The Caramel Conundrum: A Scientific Sweet Spot
The magic of Christmas Crack, at its core, relies on the Maillard reaction and caramelization – two distinct yet related chemical processes that transform simple ingredients into culinary gold. The Maillard reaction, a non-enzymatic browning reaction, occurs between reducing sugars and amino acids (proteins) at elevated temperatures. This is what gives toasted bread, seared steak, and, crucially, our caramel its complex, savory flavors. Caramelization, on the other hand, is the thermal decomposition of sugars themselves. As sugar is heated, it breaks down into hundreds of different compounds, each contributing to the characteristic nutty, buttery, and slightly bitter flavor notes we associate with caramel. The key to perfect Christmas Crack lies in controlling these reactions. Too little heat, and the caramel will be thin and watery. Too much, and it will burn, resulting in a bitter, unpleasant flavor. The ideal temperature range for caramelization is between 320°F (160°C) and 356°F (180°C). This is where a candy thermometer becomes your best friend.The Ultimate Christmas Crack Recipe
 This recipe has been meticulously refined through numerous experiments (more on that later!) to guarantee a consistently perfect batch of Christmas Crack.
Ingredients:
- 1 sleeve (approximately 40) saltine crackers
- 1 cup (2 sticks) unsalted butter
- 1 cup packed brown sugar
- 1 teaspoon vanilla extract
- 12 ounces chocolate chips (milk, semi-sweet, or dark – your preference!)
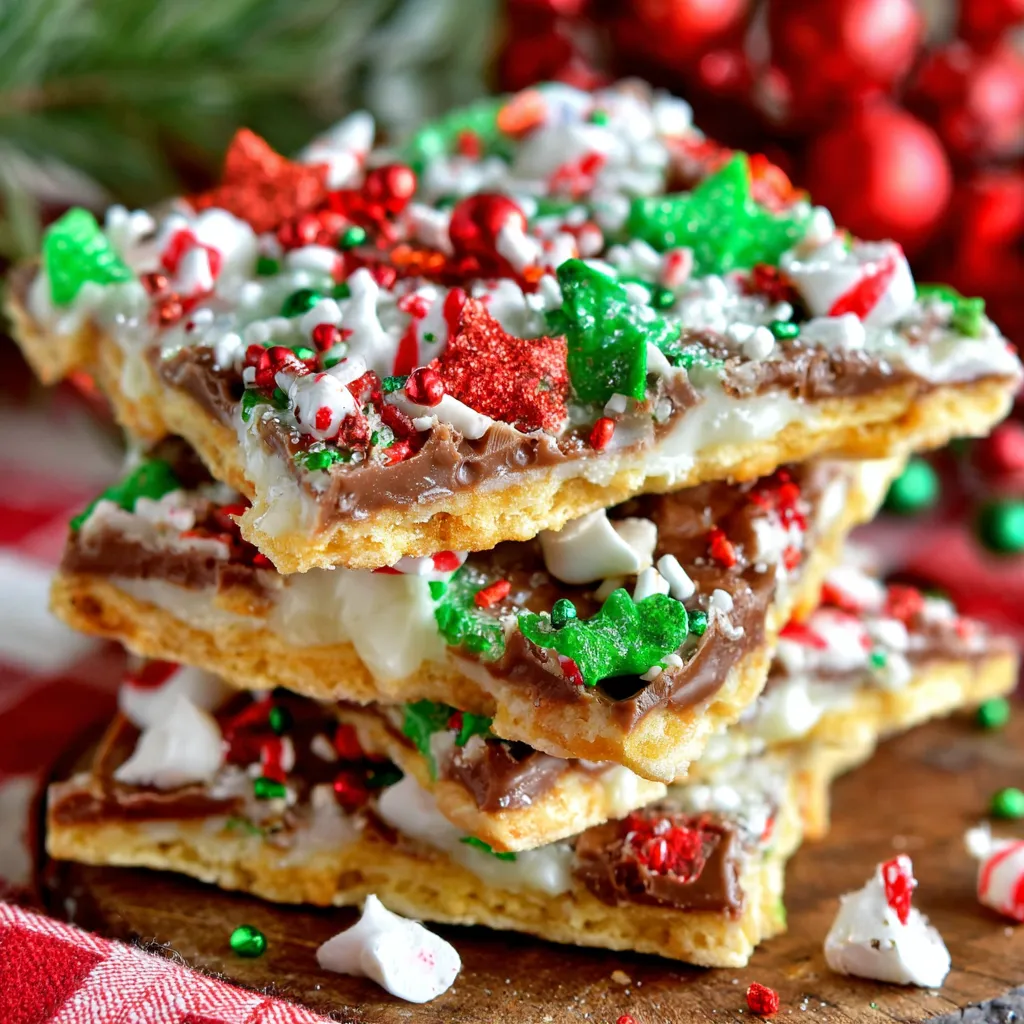
- Optional toppings: chopped nuts, sprinkles, sea salt
Equipment:
- Baking sheet with edges
- Parchment paper or silicone baking mat
- Saucepan
- Candy thermometer
- Spatula
Instructions:
- Prepare the Crackers: Preheat your oven to 350°F (175°C). Line a baking sheet with parchment paper or a silicone baking mat. Arrange the saltine crackers in a single layer on the prepared baking sheet, ensuring they are close together but not overlapping.
- Make the Caramel: In a medium saucepan, melt the butter over medium heat. Add the brown sugar and stir constantly until the sugar is dissolved and the mixture is smooth. Attach a candy thermometer to the side of the saucepan, ensuring the bulb is submerged in the caramel mixture but not touching the bottom of the pan.
- Boil the Caramel: Bring the caramel mixture to a boil, stirring constantly. Once it starts boiling, stop stirring and let it cook until the candy thermometer reaches 270°F (132°C). This should take about 5-7 minutes. Watch carefully to prevent burning!
- Pour and Bake: Remove the saucepan from the heat and stir in the vanilla extract. Immediately pour the hot caramel mixture evenly over the crackers, ensuring they are completely covered. Spread the caramel with a spatula if needed.
- Bake: Place the baking sheet in the preheated oven and bake for 5-7 minutes, or until the caramel is bubbly and evenly browned.
- Add Chocolate: Remove the baking sheet from the oven and immediately sprinkle the chocolate chips evenly over the hot caramel. Let the chocolate chips sit for 1-2 minutes to soften.
- Melt and Spread: Once the chocolate is softened, spread it evenly over the caramel using a spatula.
- Add Toppings: Sprinkle your desired toppings (nuts, sprinkles, sea salt) over the melted chocolate.
- Chill: Place the baking sheet in the refrigerator or freezer and chill for at least 30 minutes, or until the chocolate is firm.
- Break and Enjoy: Once the Christmas Crack is completely chilled and firm, break it into pieces and enjoy! Consider pairing a piece with a Spiced Christmas Margarita to add some cheer.
My Christmas Crack Chronicles: A Journey of Trials and Toffee
Like many of you, I initially thought Christmas Crack was foolproof. How could something so simple go so wrong? My first few attempts were a disaster. The caramel was either too thin, resulting in a soggy mess, or burnt to a crisp, leaving a bitter aftertaste. The chocolate was often streaky and uneven, and the crackers sometimes stuck to the pan.The Soggy Saga: Cracker Catastrophes
My initial assumption was that the baking time was the culprit. I diligently followed recipes, but the bottom layer of crackers always seemed to absorb too much moisture from the caramel, resulting in a soggy, unappetizing texture. I tried reducing the butter content, but that made the caramel too thick and difficult to spread. The solution, I discovered, was in the preheating of the oven and ensuring the crackers were arranged tightly together. The preheating allows the crackers to start crisping up before the caramel is poured over, while the tight arrangement minimizes caramel seepage. I also had a small amount of success using matzo crackers instead of saltines, which created a similar treat with a nod to Jewish holidays. Maybe next time I’ll try making some Christmas Cranberry Jam as a side!The Burnt Offering: Caramel Calamities
The burnt caramel was an even bigger challenge. I tried reducing the heat, but the caramel simply wouldn’t reach the required temperature. Then, I had an “Aha!” moment: the thickness of the saucepan mattered! A thin-bottomed pan is more prone to hot spots, which can cause the sugar to burn. Switching to a heavy-bottomed saucepan made a world of difference. And, of course, a candy thermometer is non-negotiable. Trying to eyeball the temperature is a recipe for disaster (pun intended!). This made me think that maybe making some Christmas Cranberry Sauce wouldn’t be so hard after all.The Chocolate Chaos: Achieving a Smooth Finish
The final hurdle was achieving a smooth, even layer of chocolate. Initially, I tried microwaving the chocolate chips, but they often seized up and became grainy. The key, I learned, is to let the residual heat from the caramel melt the chocolate chips. Sprinkling them evenly over the hot caramel and letting them sit for a minute or two allows them to soften gently, making them easy to spread into a smooth, glossy layer. Sometimes I like to change things up a bit and add some Christmas Puppy Chow on top!The Foolproof Christmas Crack Technique: A Recipe for Success
After countless batches and numerous tweaks, I’ve distilled the art of Christmas Crack making into a simple, foolproof technique. Follow these steps, and you’ll be rewarded with a perfect batch every time.- Use a Heavy-Bottomed Saucepan: This ensures even heat distribution and prevents the caramel from burning.
- Invest in a Candy Thermometer: This is the only way to accurately gauge the temperature of the caramel and prevent overcooking.
- Arrange Crackers Tightly: Arrange the saltine crackers in a single layer on the baking sheet, ensuring they are close together but not overlapping. This will minimize caramel seepage and prevent the crackers from becoming soggy.
- Don’t Stir the Caramel After Boiling: Once the caramel starts boiling, stop stirring. Stirring can cause sugar crystals to form, resulting in a grainy texture.
- Let the Chocolate Melt Gently: Sprinkle the chocolate chips evenly over the hot caramel and let them sit for 1-2 minutes to soften. This will prevent them from seizing up and ensure a smooth, even layer.
- Chill Completely: Allow the Christmas Crack to chill completely in the refrigerator or freezer before breaking it into pieces. This will ensure that the caramel and chocolate are firm and easy to handle.
What makes Christmas Crack so addictive?
The addictive nature of Christmas Crack comes from the combination of sweet and salty flavors, the Maillard reaction, and caramelization that transforms simple ingredients into a complex, delicious treat.
What is the ideal temperature range for caramelizing the sugar in Christmas Crack?
The ideal temperature range for caramelization is between 320°F (160°C) and 356°F (180°C). A candy thermometer is recommended to achieve this accurately.
What are some tips to avoid soggy crackers when making Christmas Crack?
To prevent soggy crackers, preheat the oven, arrange the saltine crackers tightly together on the baking sheet to minimize caramel seepage, and consider using matzo crackers as an alternative.
How can I prevent the chocolate from seizing up when adding it to the Christmas Crack?
To prevent the chocolate from seizing, sprinkle the chocolate chips evenly over the hot caramel immediately after removing the baking sheet from the oven. Let them sit for 1-2 minutes to soften before spreading them into a smooth layer.
Easy Christmas Crack Recipe
Ingredients
Equipment
Method
- Preheat your oven to 350°F (175°C).
- Line a baking sheet with parchment paper or a silicone baking mat.
- Arrange the saltine crackers in a single layer on the prepared baking sheet, ensuring they are close together but not overlapping.
- In a medium saucepan, melt the butter over medium heat.
- Add the brown sugar and stir constantly until the sugar is dissolved and the mixture is smooth.
- Attach a candy thermometer to the side of the saucepan, ensuring the bulb is submerged in the caramel mixture but not touching the bottom of the pan.
- Bring the caramel mixture to a boil, stirring constantly.
- Once it starts boiling, stop stirring and let it cook until the candy thermometer reaches 270°F (132°C). This should take about 5-7 minutes. Watch carefully to prevent burning!
- Remove the saucepan from the heat and stir in the vanilla extract.
- Immediately pour the hot caramel mixture evenly over the crackers, ensuring they are completely covered. Spread the caramel with a spatula if needed.
- Place the baking sheet in the preheated oven and bake for 5-7 minutes, or until the caramel is bubbly and evenly browned.
- Remove the baking sheet from the oven and immediately sprinkle the chocolate chips evenly over the hot caramel.
- Let the chocolate chips sit for 1-2 minutes to soften.
- Once the chocolate is softened, spread it evenly over the caramel using a spatula.
- Sprinkle your desired toppings (nuts, sprinkles, sea salt) over the melted chocolate.
- Place the baking sheet in the refrigerator or freezer and chill for at least 30 minutes, or until the chocolate is firm.
- Once the Christmas Crack is completely chilled and firm, break it into pieces and enjoy!
