Melting marshmallows into butter creates a specific kind of alchemy that transforms a simple breakfast staple into a dessert masterpiece. It is a process that requires patience and a gentle hand, ensuring the mixture remains soft and pliable rather than turning into a rock-hard brick.
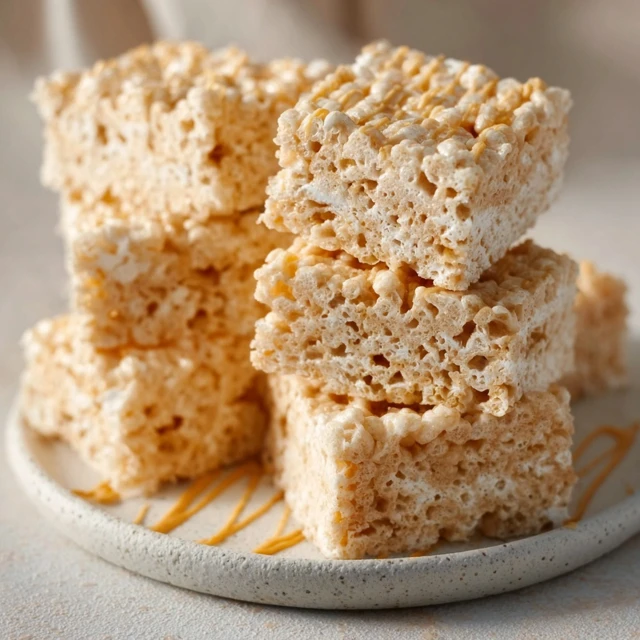
When done correctly, you are rewarded with a square that offers the perfect balance of crunch and chew, stretching delightfully as you pull it apart. These treats are not just a quick sugar fix; they are a testament to how three humble ingredients can become something truly extraordinary.
My Kitchen Secrets
- Low and Slow: Never rush the melting process; high heat makes the sugar crystallize and results in hard treats.
- Freshness Counts: Always use a fresh bag of marshmallows, as stale ones will not melt down into that silky consistency we need.
- The Gentle Press: When transferring to the pan, press down lightly with greased hands to avoid compacting the cereal.
The Essentials
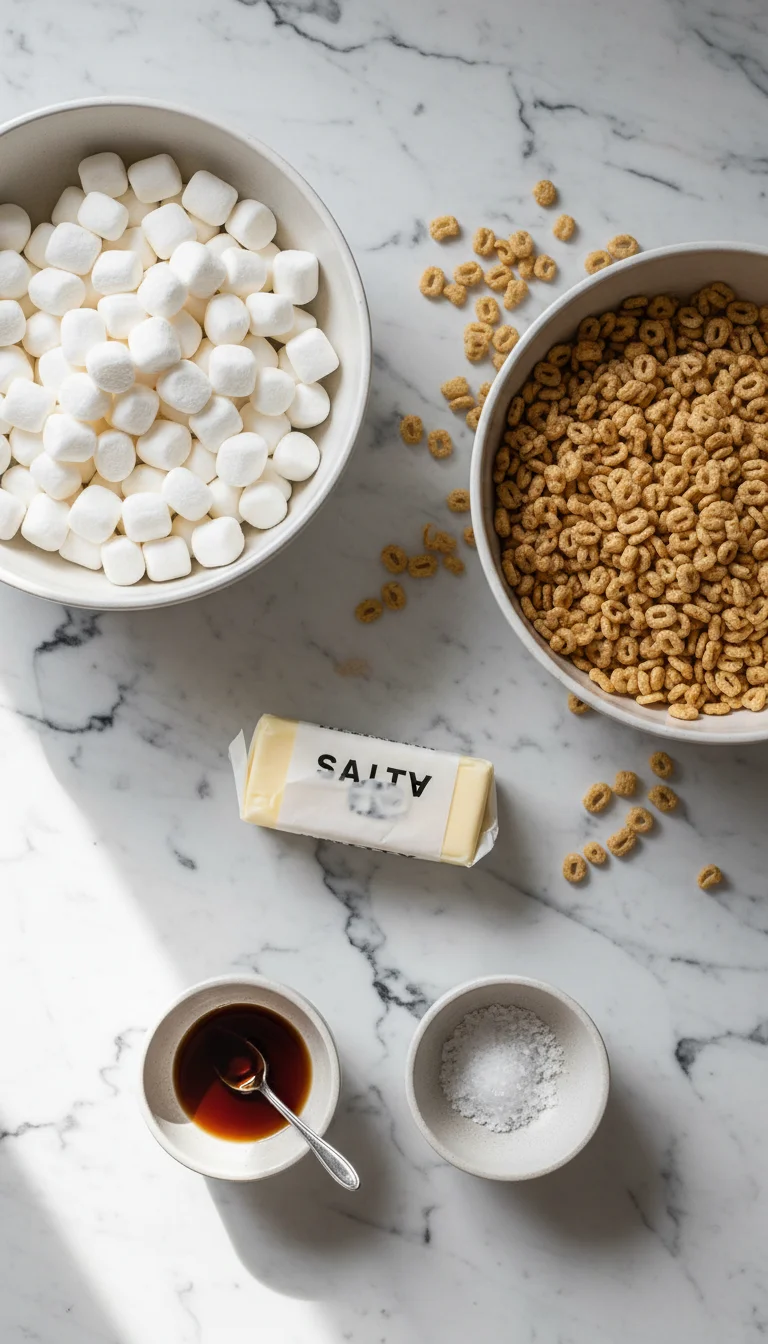
Creating the perfect texture relies heavily on the quality of the few items we use. There is nowhere for poor quality to hide in such a simple recipe, so choose your components with care.
Here is what you need to gather on your counter:
- Salted Butter: (I prefer salted butter here because it cuts through the intense sweetness of the marshmallows perfectly).
- Mini Marshmallows: (These melt much faster and more evenly than the large roasting size, ensuring a smooth base).
- Crisp Rice Cereal: (Ensure your box is fresh; stale cereal will result in a chewy, tough texture rather than a crisp snap).
- Pure Vanilla Extract: (A splash of high-quality vanilla adds a depth of flavor that makes these taste homemade rather than store-bought).
- Sea Salt: (A tiny pinch added at the end elevates the butter notes and balances the sugar).
Pantry Substitutions
Sometimes we have to work with what we have in the cupboards. Here are a few reliable swaps that won’t compromise the final result.
- Unsalted Butter: If you only have unsalted butter, simply increase the added sea salt by a quarter teaspoon to maintain that savory balance.
- Marshmallow Fluff: You can use jarred marshmallow crème in a pinch, though the texture will be slightly softer and stickier than traditional treats.
- Cereal Swaps: While rice cereal is classic, you can use this same method for other cereals. For a magical twist, try making Lucky Charms Treats using this same technique.
- Vegan Butter: High-quality plant-based butter sticks work wonderfully if you need a dairy-free option.
Make It Your Own
Once you have mastered the base recipe, the kitchen becomes your playground. I have spent years tweaking this formula to create delightful new experiences for my family.
Here are a few of my favorite ways to elevate the classic:
The Brown Butter Upgrade Browning the butter before adding the marshmallows adds a nutty, toffee-like richness that is sophisticated and deep. I use this technique often, especially when making my Brown Butter Lucky Charms Treats.
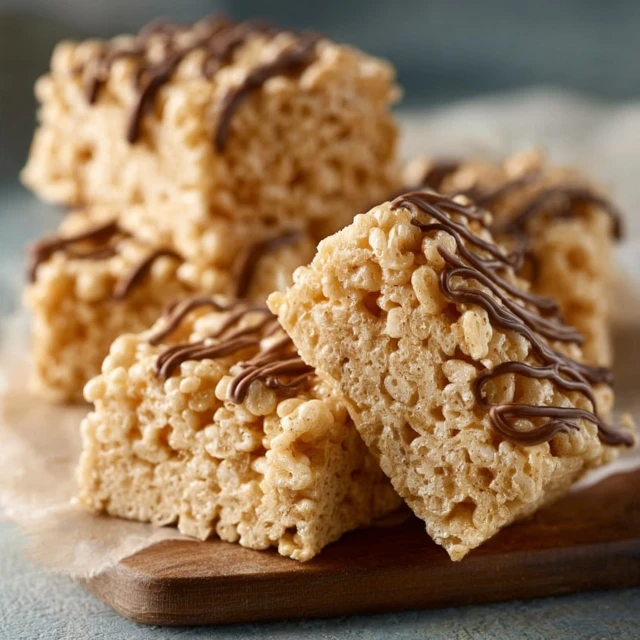
The Decadent Dessert If you want to turn this snack into a show-stopping dessert, drizzle melted chocolate and caramel over the top. For a truly indulgent experience, you must try my Caramel Turtle Rice Krispie Treats, which are loaded with pecans and gooey caramel.
The Cereal Mashup Don’t feel restricted to just one type of grain. Mixing different cereals can provide interesting textures and colors. A family favorite involves combining standard rice cereal with colorful marshmallow cereals, similar to these Lucky Charms Rice Krispie Treats.
The Time-Tested Method
The process is simple, but the technique is everything. We want to treat the marshmallows gently to preserve their soft texture.
Follow these steps closely for the best results:
1. Prepare Your Pan
Before you even turn on the stove, line a 9×9 inch square pan with parchment paper or aluminum foil. Leave a little overhang on the sides to act as handles later.Grease the lining generously with butter or non-stick spray. This preparation is vital because once the mixture is ready, you need to move quickly.
2. Melt the Butter
Place a large pot over low heat—patience is key here. Add your butter and let it melt slowly and gently.If you are feeling adventurous and want that nutty flavor I mentioned earlier, let it bubble until it turns golden brown.
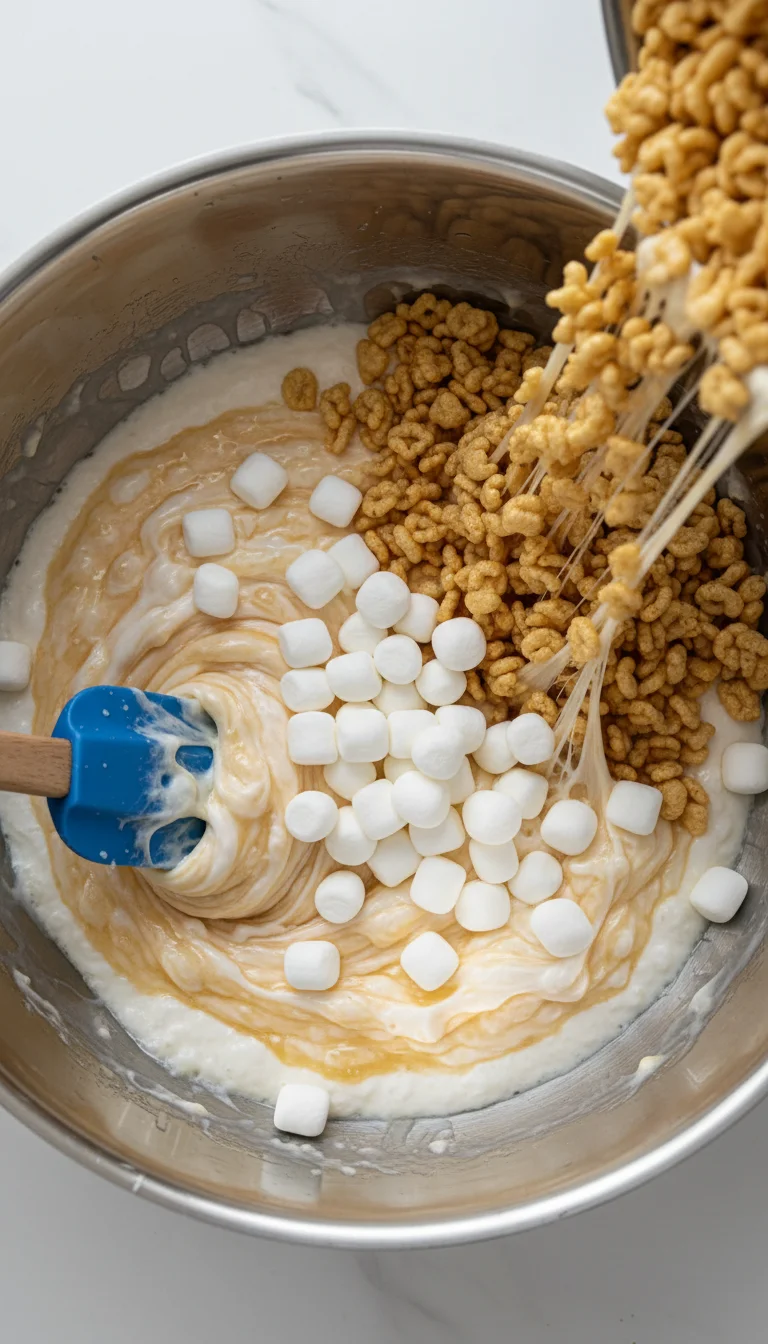
3. The Marshmallow Melt
Add the mini marshmallows to the pot, reserving about one cup for later if you like whole marshmallow pockets in your treats. Stir constantly with a rubber spatula.Continue stirring until the marshmallows are completely melted and smooth. This is also the perfect time to stir in your vanilla extract and sea salt.
4. Fold in the Cereal
Remove the pot from the heat immediately. Pour in the cereal and the reserved marshmallows.Fold the mixture gently but efficiently. You want every single piece of cereal coated in that gooey marshmallow mixture.
5. The Gentle Press
Pour the sticky mixture into your prepared pan. Now, this is the most important part: grease your hands or a spatula with a little butter.Gently press the mixture into the corners and level the top. Do not pack it down hard, or your treats will be dense; a light touch keeps them airy.
Tips for Best Results
Over the years, I have learned that a few small details prevent the most common kitchen mishaps. These notes will ensure your success every time.
- Avoid Hard Treats: The number one reason for rock-hard treats is using high heat. Always keep your burner on low to keep the sugar structure soft.
- The Marshmallow Ratio: If you love extra gooey treats, feel free to add an extra half-cup of marshmallows. It reminds me of the texture in these Lucky Charms Marshmallow Treats.
- Storage Matters: Store these in an airtight container at room temperature. Putting them in the fridge will make them hard and dry out the cereal.
- Holiday Planning: These are excellent for holiday platters because they travel well. I often serve them alongside Christmas Puppy Chow for a festive spread.
Perfect Pairings
While these treats are delicious on their own, serving them with the right accompaniment makes them even better.
A tall glass of cold milk is the classic choice, cutting through the sweetness perfectly. For the adults, a cup of strong, black coffee or an unsweetened latte provides a wonderful contrast to the sugary marshmallow.
If you are serving these at a party, place them on a platter with fresh strawberries or tart raspberries. The fresh fruit provides a bright acidity that cleanses the palate between bites.
Love this recipe? Pin it to your favorite board on Pinterest to save it for later!
Why do my Rice Krispie treats turn out hard instead of soft?
Hard treats are primarily caused by using high heat during the melting process, which crystallizes the sugar. Other causes include using stale marshmallows or pressing the mixture too firmly into the pan, which compacts the cereal.
What is the best way to store these treats to keep them fresh?
You should store the treats in an airtight container at room temperature. It is important to avoid putting them in the refrigerator, as the cold temperature will make them hard and dry out the cereal.
Can I use unsalted butter if I do not have salted butter?
Yes, you can use unsalted butter as a reliable swap. If you do so, simply increase the added sea salt by a quarter teaspoon to ensure the savory notes still balance out the sweetness of the marshmallows.
How can I customize or elevate the basic Rice Krispie treat recipe?
You can upgrade the flavor by browning the butter before adding marshmallows for a nutty taste, drizzling melted chocolate and caramel over the top, or mixing in different grains like Lucky Charms cereal.
Perfect No Bake Rice Krispie Treats
Ingredients
Equipment
Method
- Line a 9×9 inch square pan with parchment paper or aluminum foil, leaving a little overhang on the sides to act as handles later. Grease the lining generously with butter or non-stick spray.
- Place a large pot over low heat. Add the salted butter and let it melt slowly and gently. (Optional: For a nuttier flavor, let the butter bubble until golden brown).
- Add the mini marshmallows to the pot, reserving about one cup for later to create whole marshmallow pockets. Stir constantly with a rubber spatula.
- Continue stirring until the marshmallows are completely melted and smooth. Stir in the pure vanilla extract and sea salt.
- Remove the pot from the heat immediately. Pour in the crisp rice cereal and the reserved one cup of mini marshmallows.
- Fold the mixture gently but efficiently with the rubber spatula until every piece of cereal is coated in the gooey marshmallow mixture.
- Pour the sticky mixture into the prepared pan. Grease your hands or a spatula with a little butter.
- Gently press the mixture into the corners and level the top using your greased hands. Do not pack it down hard; use a light touch to keep them airy.
- Allow the treats to cool and set at room temperature before slicing into squares.
