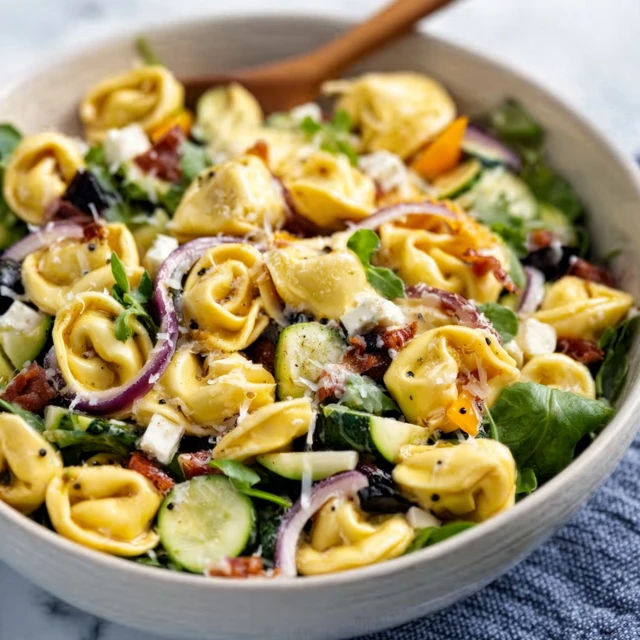
Some foods are a negotiation, a delicate balance of separate parts hoping to get along on the plate. This Cheesy Tortellini Pasta Salad is not that. It’s a joyful, unified tumble of textures and flavors, where plump, cheese-stuffed pillows of pasta are the undeniable star, supported by a cast of characters that know their role is to make the tortellini shine even brighter. It’s the dish you bring to the potluck that disappears first, the one that turns a simple Tuesday dinner into something special without any fuss.
What you get is a masterpiece of contrasts. Each bite delivers the soft, satisfying chew of tortellini, a burst of juicy tomato, the sharp crunch of red onion, and the salty, savory punch of salami. All of this is lovingly coated in a creamy, tangy dressing that clings to every nook and cranny, ensuring no ingredient is left behind. It’s hearty enough to be a meal, yet light enough to be the perfect sidekick to grilled everything, making it the most valuable player of your recipe collection.
The Cheesy Tortellini Pasta Salad Difference
- Perfectly Balanced Flavors: We use a combination of creamy mayonnaise and tangy sour cream, cut with red wine vinegar. This creates a dressing that’s rich but never heavy, complementing the cheesy pasta instead of overwhelming it.
- Textural Heaven: The key is the variety of mix-ins. Soft mozzarella pearls, crisp red onion, juicy tomatoes, and chewy salami create a delightful symphony of textures in every single spoonful.
- Make-Ahead Magic: This salad is designed to get better as it sits. The flavors meld and deepen in the fridge, making it the ultimate stress-free dish for parties, meal prep, or busy weeknights.
The Building Blocks

The magic of this salad comes from using simple, high-quality ingredients that each play a crucial role. Don’t be tempted to skimp on the good stuff; you’ll taste the difference in the final, glorious bowl.
Here’s what you’ll need to gather from your pantry and fridge:
- Cheese Tortellini: (The heart and soul of the dish. Use a fresh, refrigerated variety for the best plump, tender texture. Frozen works in a pinch, but fresh is queen.)
- Mayonnaise: (The creamy foundation of our dressing. A high-quality brand like Duke’s or Hellmann’s provides the best flavor and consistency.)
- Sour Cream or Full-Fat Greek Yogurt: (This is our secret weapon for tang. It lightens up the mayo and adds a wonderful, zesty brightness that keeps the salad from feeling too heavy.)
- Red Wine Vinegar: (The essential acid. It cuts through the richness of the cheese and mayo, making all the other flavors pop.)
- Cherry or Grape Tomatoes: (For a burst of sweetness and acidity. Halving them ensures they release their juices into the salad.)
- Red Onion: (Provides a sharp, welcome crunch and a bit of pungent flavor. If you find it too strong, you can soak the diced onion in cold water for 10 minutes to mellow it out.)
- Mini Mozzarella Pearls: (We’re doubling down on the cheese! These add a wonderful, soft, milky texture that complements the tortellini perfectly.)
- Genoa Salami or Pepperoni: (This adds a savory, salty, and slightly spicy kick that is absolutely essential. Slice it into ribbons or small chunks.)
- Canned Black Olives: (A classic pasta salad ingredient for a reason. They provide a briny, earthy flavor that rounds everything out.)
- Fresh Parsley and/or Basil: (For a final touch of fresh, herbaceous brightness. Don’t use dried here; fresh is a must!)
- Garlic Powder, Salt, and Black Pepper: (The simple seasonings that tie the entire dressing together.)
Swaps & Alternatives
Don’t have everything on hand? No problem! This recipe is wonderfully flexible. Here are a few easy substitutions that work beautifully:
- Tortellini: Feel free to use spinach and ricotta, mushroom, or even meat-filled tortellini. Any small, stuffed pasta will work. If you’re looking for a non-pasta dish with a similar cheesy vibe, these Vegetarian Stuffed Shells are a fantastic option.
- Meat: Cubed ham, crispy prosciutto, or even shredded rotisserie chicken can be used in place of the salami or pepperoni. For a vegetarian version, simply leave it out and add some chickpeas or white beans for protein.
- Veggies: This is a great “clean out the fridge” recipe. Feel free to add chopped bell peppers (any color!), cucumbers, artichoke hearts, or even some blanched broccoli florets.
- Cheese: If you can’t find mozzarella pearls, just dice a block of fresh mozzarella. Crumbled feta or cubes of provolone would also be delicious additions.
- Dressing: While the creamy dressing is iconic, a good quality Italian vinaigrette would also be lovely if you’re looking for a lighter, more acidic option.
Chef’s Twists
Ready to take this classic salad to the next level? These simple additions can add a layer of gourmet flavor that will have everyone asking for the recipe.
- Add a Sun-Dried Tomato Punch: Finely chop some oil-packed sun-dried tomatoes and add them to the salad. For an extra flavor boost, use a tablespoon of the oil from the jar in your dressing. It adds an incredible depth and sweetness.
- Bring in Some Brine: A handful of chopped pepperoncini peppers or Kalamata olives instead of black olives will add a zesty, briny kick that beautifully cuts through the creaminess of the dressing.
- Get Nutty with Pesto: Swirl a tablespoon or two of your favorite basil pesto into the dressing. It complements the cheese tortellini perfectly and adds a wonderful, nutty, and herbaceous layer of flavor.
- Sprinkle with Parmesan: Just before serving, grate a generous amount of fresh Parmesan cheese over the top. It adds a final salty, nutty note that ties everything together. While we’re on the topic of cheesy pasta, if you ever want a hot dish, this Tortellini Chicken Alfredo is a family favorite.
Step-by-Step Instructions

This process is incredibly simple and comes together in just a few easy stages. The most important part is the chilling time, so be sure to plan for at least an hour to let those flavors get to know each other.
1. Cook the Tortellini Perfectly
Bring a large pot of generously salted water to a rolling boil. Add the fresh tortellini and cook according to the package directions, usually just for a few minutes. The goal is *al dente*—tender but with a slight bite. They will continue to soften a bit as they cool and absorb the dressing. Immediately drain the tortellini and rinse them under cold water to stop the cooking process and cool them down completely. Set them aside to drain thoroughly.
2. Whisk Together the Dreamy Dressing
In a large bowl (the one you’ll serve the salad in!), combine the mayonnaise, sour cream or Greek yogurt, red wine vinegar, garlic powder, salt, and pepper. Whisk everything together until it’s completely smooth and creamy. Give it a taste and adjust the seasonings if needed. You want it to be vibrant and well-seasoned, as it will be flavoring all the other ingredients.
3. Chop and Prep Your Mix-ins
While the tortellini is cooking and cooling, get all your other ingredients ready. Halve the cherry tomatoes, finely dice the red onion, drain the mozzarella pearls and olives, and chop your salami and fresh herbs. Having everything prepped and ready to go makes the final assembly a breeze. This kind of prep work is key for so many great pasta salads, from a Chicken Bacon Ranch Pasta Salad to a zesty Mexican Street Corn Pasta Salad.
4. Combine and Chill for Flavor Fusion
Add the completely cooled and drained tortellini to the bowl with the dressing. Gently fold it in until every piece is lightly coated. Next, add the tomatoes, red onion, mozzarella pearls, salami, and black olives. Give it another gentle stir to combine everything. Finally, fold in the fresh parsley or basil. Cover the bowl tightly with plastic wrap and refrigerate for at least one hour, but preferably 2-4 hours, to allow the flavors to meld together. This chilling step is non-negotiable for the best taste!
Avoid These Pitfalls
- Overcooking the Tortellini: This is the number one mistake. Mushy, falling-apart tortellini will ruin the
Can I make this tortellini pasta salad ahead of time?
Yes, this salad is designed to be made ahead. The recipe states that the flavors meld and deepen in the fridge, making it an ideal dish to prepare in advance. For the best taste, it should be chilled for at least one hour, but preferably 2-4 hours, before serving.
What kind of tortellini is best for this recipe, and how should I cook it?
The article recommends using a fresh, refrigerated cheese tortellini for the best plump and tender texture. It’s crucial to cook it ‘al dente’ according to the package directions and then immediately rinse it under cold water to stop the cooking process and prevent it from becoming mushy.
Are there any vegetarian substitutions for the salami or pepperoni?
Yes, to make a vegetarian version of this salad, you can simply leave out the meat. The article suggests adding chickpeas or white beans for a source of protein as a substitute.
What makes the dressing in this pasta salad special?
The dressing’s unique flavor comes from a balanced combination of creamy mayonnaise and tangy sour cream or Greek yogurt, which is brightened with red wine vinegar. This creates a rich but not heavy dressing that complements the cheesy pasta without overwhelming it.

Dreamy Cheesy Tortellini Pasta Salad
Ingredients
Equipment
Method
- Cook the tortellini: Bring a large pot of salted water to a boil. Add the fresh tortellini and cook according to package directions until al dente. Drain immediately and rinse under cold water to stop the cooking process. Set aside to cool completely.
- Make the dressing: In a large serving bowl, whisk together the mayonnaise, sour cream, red wine vinegar, garlic powder, salt, and pepper until smooth and creamy. Taste and adjust seasoning if necessary.
- Combine the salad: Add the cooled and drained tortellini to the bowl with the dressing and gently fold to coat. Add the halved cherry tomatoes, diced red onion, mozzarella pearls, salami, and sliced black olives. Stir gently to combine.
- Add herbs and chill: Fold in the fresh parsley and optional basil. Cover the bowl tightly with plastic wrap and refrigerate for at least 1 hour, or up to 4 hours, to allow the flavors to meld before serving.
