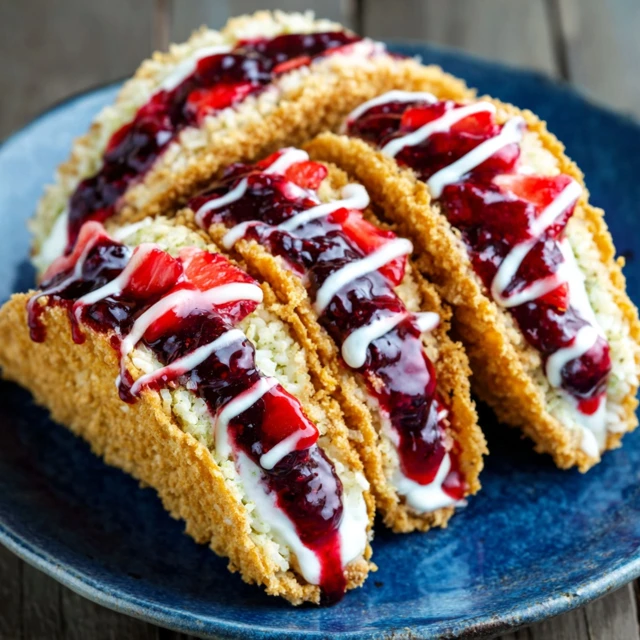
That first shatter of a warm, cinnamon-sugar shell is a sound that promises pure joy. It’s the gateway to a cool, creamy river of cheesecake filling, a delightful collision of textures that most desserts can only dream of. These aren’t just tacos; they’re an experience, a playful twist on a classic that turns a familiar shape into a vessel for pure, unadulterated dessert bliss.
What follows is a burst of fresh, tangy berries that cut through the richness, creating a perfectly balanced bite every single time. This recipe for Crispy Berrylicious Cheesecake Tacos is your new secret weapon for parties, a guaranteed showstopper that’s surprisingly simple to assemble. Get ready to watch them disappear.
Why This Crispy Berrylicious Cheesecake Tacos Works
- Texture Heaven: The contrast between the warm, crispy, cinnamon-dusted tortilla shell and the cool, velvety cream cheese filling is absolutely unforgettable. It’s a sensory delight in every bite.
- Incredibly Versatile: This is a fantastic base recipe. You can swap the berries, add different toppings, or even change the flavor of the filling. It’s one of those creative desserts that’s easy to customize.
- Perfect Party Food: These dessert tacos are easy to hold, serve, and eat, making them ideal party food ideas. They are visually stunning and always a crowd-pleaser for both kids and adults.
Gather Your Supplies
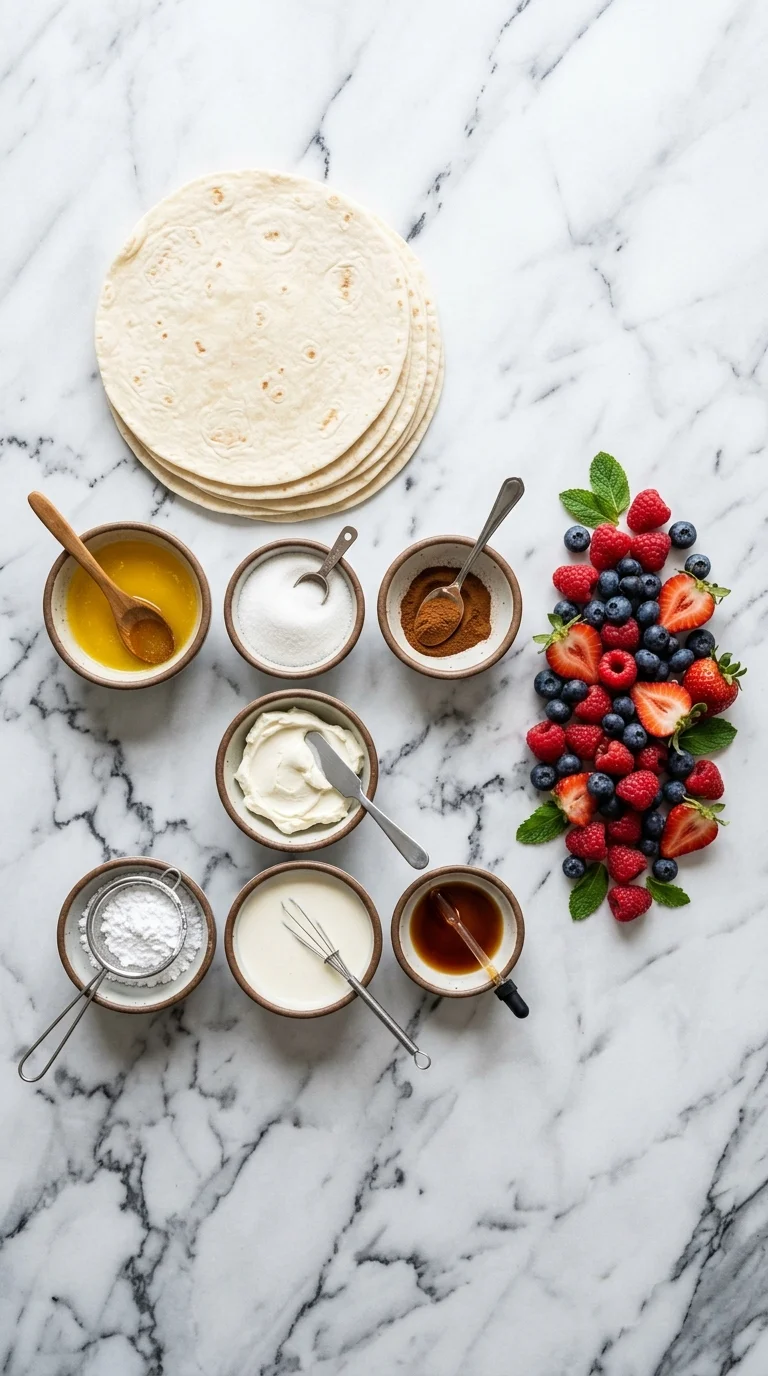
The beauty of these cheesecake tacos lies in their simplicity. We’re using straightforward, easy-to-find ingredients to create something truly magical. No need for a complicated shopping trip; you likely have most of this on hand already.
- Flour Tortillas: (Small, 6-inch “street taco” size works best for a two-bite dessert).
- Melted Butter: (This is key for getting that beautiful golden-brown crisp on the shells and helping the cinnamon sugar stick).
- Granulated Sugar & Ground Cinnamon: The classic duo that creates that irresistible, churro-like coating.
- Cream Cheese: (The star of our no bake cheesecake filling; make sure it’s fully softened to room temperature for a lump-free texture).
- Powdered Sugar: (Dissolves perfectly into the cream cheese, creating a smooth, sweet filling without any graininess).
- Heavy Cream: (Whips up to give the filling a light, airy, and mousse-like consistency).
- Vanilla Extract: A non-negotiable for adding depth and warmth to the cheesecake filling.
- Fresh Mixed Berries: (Such as strawberries, blueberries, raspberries, and blackberries for a pop of color, freshness, and tartness).
- Optional Garnish: A light dusting of powdered sugar or a drizzle of chocolate sauce.
Pantry Alternatives
Don’t have everything on the list? No problem! These fun kids food treats are very forgiving.
- Tortillas: In a pinch, you can try this with corn tortillas, but be aware they are less pliable and have a more distinct flavor. Flour is definitely recommended for that classic churro taste.
- Cream Cheese: For a tangier filling, you could substitute half of the cream cheese with mascarpone cheese.
- Heavy Cream: If you don’t have heavy cream, you can use an 8-ounce tub of thawed whipped topping (like Cool Whip) folded into the cream cheese mixture. The texture will be slightly different but still delicious.
- Berries: Feel free to use any fruit you love! Diced mango, kiwi, or peaches would be fantastic summer treats. You can also use a high-quality berry jam if fresh berries aren’t available.
Fun Variations to Try
Once you master the basic recipe, the world of dessert tacos is your oyster! These are some of our favorite ways to mix things up.
Chocolate Hazelnut Dream
Instead of fresh berries, fill the crispy shells with the cheesecake mixture and then add a generous dollop of chocolate hazelnut spread (like Nutella). Top with chopped, toasted hazelnuts for an extra crunch. It’s a decadent and rich twist.Strawberry Crunch Topping
Take inspiration from our Strawberry Crunch Cheesecake Tacos and create a crumble topping. Mix crushed vanilla wafers, melted butter, and a bit of strawberry gelatin powder. Sprinkle this over the filled tacos for an amazing texture and flavor boost. This is a great way to elevate a simple berry recipe.S’mores Tacos
This one is a guaranteed hit. After filling the tacos with the cheesecake base, add a drizzle of chocolate sauce, a sprinkle of crushed graham crackers, and a few mini marshmallows. You can even toast the marshmallows with a kitchen torch for that authentic campfire flavor.Lemon Blueberry Bliss
Add the zest of one lemon to your cream cheese filling for a bright, zesty flavor that pairs beautifully with fresh blueberries. It’s a refreshing and elegant variation perfect for a summer gathering.Step-by-Step Instructions
Let’s walk through making these incredible treats together. The process is simple and fun, perfect for getting the whole family involved in the kitchen.
Step 1: Prepare Your Taco Shells
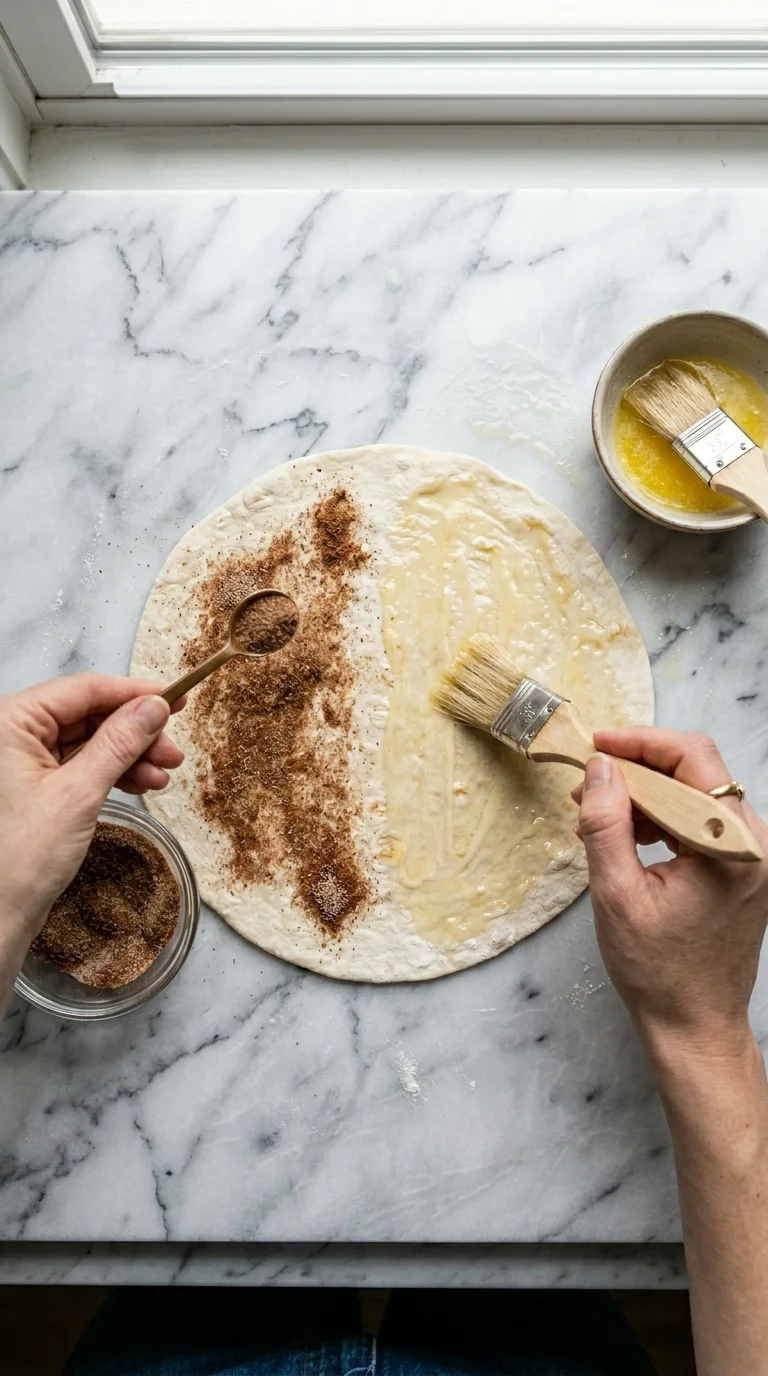
First, preheat your oven to 400°F (200°C). In a small bowl, mix together the granulated sugar and ground cinnamon until well combined. Brush both sides of each flour tortilla lightly with melted butter. Then, generously sprinkle the cinnamon-sugar mixture over both sides, pressing it in gently.Step 2: Shape and Bake the Shells
To get that perfect taco shape, drape the buttered and sugared tortillas over two rungs of your oven rack. This allows them to bake into a “U” shape. Bake for 6-8 minutes, or until they are golden brown and crispy. Keep a close eye on them, as they can go from perfect to burnt very quickly! Once done, let them cool completely on the rack before removing them. The concept of a fried, crispy shell is also used in our Fried Strawberry Cheesecake Sandwiches, proving how delicious this texture can be.Step 3: Make the No Bake Cheesecake Filling
While the shells are cooling, let’s make that luscious cream cheese filling. In a large mixing bowl, use an electric mixer to beat the softened cream cheese on medium speed until it’s completely smooth and free of lumps. This is the most important step for a silky filling.Step 4: Sweeten and Lighten the Filling
Add the powdered sugar and vanilla extract to the cream cheese, and beat on low speed until just combined, then increase to medium and beat until smooth. In a separate, chilled bowl, whip the heavy cream until stiff peaks form. Gently fold the whipped cream into the cream cheese mixture in two or three additions until it’s fully incorporated. Be careful not to overmix and deflate the air. This filling is similar to what you’d find in our popular Strawberry Cheesecake Bites.Step 5: Assemble Your Tacos
Once the shells are completely cool, transfer your cheesecake filling to a piping bag (or a zip-top bag with the corner snipped off). This makes filling the tacos much cleaner and easier. Pipe the filling evenly into each crispy taco shell. If you love cinnamon-sugar desserts, you should also check out our recipe for Churro Cheesecake!Step 6: Add the Berries and Serve
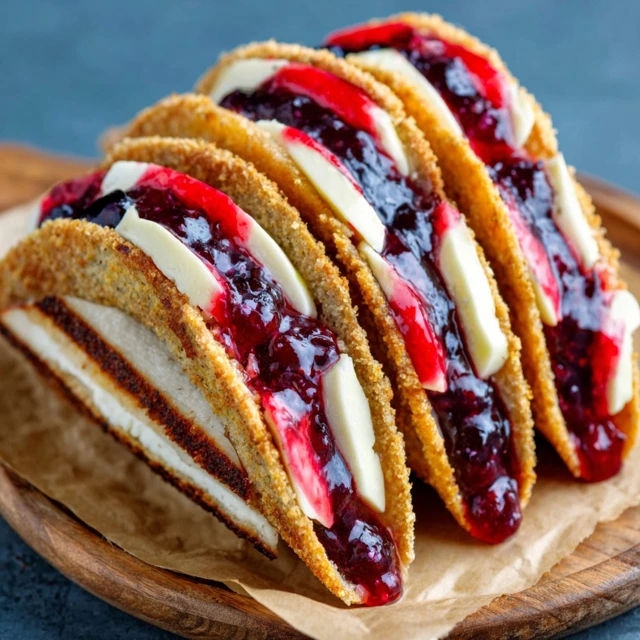
Top the cheesecake filling generously with your fresh mixed berries. You can arrange them artfully or just pile them on. For a final touch, you can add a light dusting of powdered sugar. Serve these immediately for the best texture contrast.Expert Tips for Success
- Room Temperature is Key: For the smoothest, creamiest no bake cheesecake filling, your cream cheese absolutely must be at room temperature. Cold cream cheese will result in a lumpy filling that’s impossible to fix.
- Don’t Overbake the Shells: Watch the tortillas in the oven like a hawk! They can burn in a matter of seconds. You’re looking for a light golden brown color. They will continue to crisp up as they cool.
- Assemble Just Before Serving: To maintain that incredible crispy shell, it’s best to fill the tacos right before you plan to serve them. The moisture from the filling will soften the shells over time.
Serving Suggestions
These Crispy Berrylicious Cheesecake Tacos are a complete dessert all on their own, but a few simple additions can make them even more special. They are a fantastic end to any meal, whether it’s a casual weeknight dinner of Sweet Potato Black Bean Tacos or a celebratory feast.
A drizzle of warm chocolate or caramel sauce over the top adds another layer of decadence. You can also serve them with a small scoop of vanilla bean ice cream on the side for a delightful hot-and-cold contrast.
For a party, set up a “taco bar” with the empty shells, the bowl of cheesecake filling, and several small bowls of different toppings—berries, chocolate chips, sprinkles, chopped nuts, and sauces. This lets guests build their own creative desserts and is always a huge hit. It’s a fun and interactive way to enjoy these summer treats. If you’re a fan of strawberry desserts, you might also love the classic flavors in a Southern Strawberry Layer Cake.
These dessert tacos are also perfect for brunch. The combination of creamy filling and fresh fruit feels right at home on a brunch menu, offering a sweet and satisfying option that’s a little different from the usual.
Did you change any ingredients? Let me know in the comments how you made this recipe your own
How do I prevent the cheesecake taco shells from getting soggy?
To maintain the best texture and ensure the shells remain crispy, it is recommended to assemble the tacos just before you plan to serve them. The moisture from the cheesecake filling will soften the shells over time.
Can I use other fruits or toppings besides mixed berries?
Yes, this recipe is incredibly versatile. You can use any fruit you love, such as diced mango, kiwi, or peaches. For other variations, you can try a ‘Chocolate Hazelnut Dream’ with Nutella, ‘S’mores Tacos’ with chocolate and marshmallows, or a ‘Lemon Blueberry Bliss’ by adding lemon zest to the filling.
What is the most important tip for making a smooth, lump-free cheesecake filling?
The key to a perfectly smooth and creamy cheesecake filling is to ensure your cream cheese is fully softened to room temperature before you begin. Using cold cream cheese will result in a lumpy texture that is difficult to fix.
Crispy Berrylicious Cheesecake Tacos
Ingredients
Equipment
Method
- Preheat your oven to 400°F (200°C). In a small bowl, mix together the granulated sugar and ground cinnamon. Brush both sides of each flour tortilla with melted butter, then sprinkle generously with the cinnamon-sugar mixture, pressing gently to adhere.
- To create the taco shape, carefully drape the prepared tortillas over two rungs of your oven rack. Bake for 6-8 minutes, or until golden brown and crispy. Let them cool completely on the rack before handling.
- While the shells cool, prepare the filling. In a large mixing bowl, use an electric mixer to beat the softened cream cheese on medium speed until completely smooth and free of lumps.
- Add the powdered sugar and vanilla extract to the cream cheese, and beat on low speed until combined, then increase to medium until smooth. In a separate chilled bowl, whip the cold heavy cream until stiff peaks form.
- Gently fold the whipped cream into the cream cheese mixture in two or three additions until fully incorporated, being careful not to overmix and deflate the filling.
- Transfer the cheesecake filling to a piping bag (or a zip-top bag with the corner cut off). Pipe the filling evenly into each cooled, crispy taco shell.
- Top the filling generously with fresh mixed berries. Garnish with an optional dusting of powdered sugar or a drizzle of chocolate sauce. Serve immediately for the best texture.
