The Alchemy of Softness: Understanding the Science Behind the Cookie
The secret to a truly soft sugar cookie lies in understanding the interplay of ingredients. Gluten development is the enemy of tenderness. Gluten, formed when flour proteins are hydrated and agitated, creates a chewy, elastic texture. To combat this, we need strategies to minimize gluten formation. Fat is our friend. A high fat content, like that from butter or shortening, shortens gluten strands, hindering their development and creating a more delicate texture. Sugar also plays a role. It not only sweetens but also attracts and holds moisture, keeping the cookies soft. Using powdered sugar (confectioners’ sugar) instead of or in addition to granulated sugar can further enhance softness because of its cornstarch content, which interferes with gluten development. The type of leavening agent also matters. Baking powder, a double-acting leavening agent, provides a more consistent rise and a slightly lighter texture compared to baking soda. Finally, overbaking is a common pitfall. Cookies continue to bake slightly after being removed from the oven, so it’s crucial to pull them out when they are still slightly soft in the center.The Ultimate Soft Cut-Out Sugar Cookie Recipe
 This recipe has been meticulously crafted and tested to deliver consistently soft, delicious cut-out sugar cookies.
Yields
Approximately 24-36 cookies, depending on sizePrep time
30 minutesChill time
2 hours minimumBake time
8-12 minutesIngredients
- 1 cup (2 sticks) unsalted butter, softened
- 1 ½ cups powdered sugar
- ½ cup granulated sugar
- 2 large eggs
- 1 teaspoon vanilla extract
- ½ teaspoon almond extract (optional, but recommended)
- 3 cups all-purpose flour
- 1 teaspoon baking powder
- ½ teaspoon salt
Instructions
- Cream the butter and sugars: In a large bowl, cream together the softened butter, powdered sugar, and granulated sugar until light and fluffy. This usually takes 3-5 minutes with an electric mixer.
- Incorporate the wet ingredients: Beat in the eggs one at a time, then stir in the vanilla extract and almond extract (if using).
- Combine the dry ingredients: In a separate bowl, whisk together the flour, baking powder, and salt.
- Gradually add dry ingredients to wet ingredients: Gradually add the dry ingredients to the wet ingredients, mixing on low speed until just combined. Be careful not to overmix. The dough will be soft.
- Chill the dough: Divide the dough in half, flatten each half into a disc, wrap tightly in plastic wrap, and chill in the refrigerator for at least 2 hours, or preferably overnight. This chilling step is crucial for preventing the cookies from spreading too much during baking.
- Preheat and prepare: Preheat your oven to 350°F (175°C). Line baking sheets with parchment paper or silicone baking mats.
- Roll out and cut the dough: On a lightly floured surface, roll out one disc of dough to about ¼-inch thickness. Use cookie cutters to cut out desired shapes.
- Bake the cookies: Place the cut-out cookies onto the prepared baking sheets, leaving about 1 inch between each cookie. Bake for 8-12 minutes, or until the edges are just beginning to turn golden brown. The centers should still be slightly soft.
- Cool the cookies: Let the cookies cool on the baking sheets for a few minutes before transferring them to a wire rack to cool completely.
- Decorate: Once completely cool, decorate with your favorite frosting and sprinkles.
My Quest for the Perfect Soft Sugar Cookie: A Culinary Investigation
My journey to perfect soft cut-out sugar cookies was paved with plenty of crispy, disappointing results. My first few attempts were a disaster, resulting in cookies that were either too hard, too spread out, or both! Then, I had an “Aha!” moment – it wasn’t just about the recipe, it was about the *technique*.The Butter Battle: Softened vs. Cold
Like many of you, I initially thought that softened butter meant “slightly melted.” Big mistake! The cookies spread like crazy. Using truly *softened* butter, meaning butter that holds its shape but is easily pliable, made a huge difference. I also experimented with using slightly colder butter, closer to room temperature. The results were slightly less soft, but the shape held better during baking. Ultimately, I found the best balance with properly softened butter.Sugar Shock: Granulated vs. Powdered
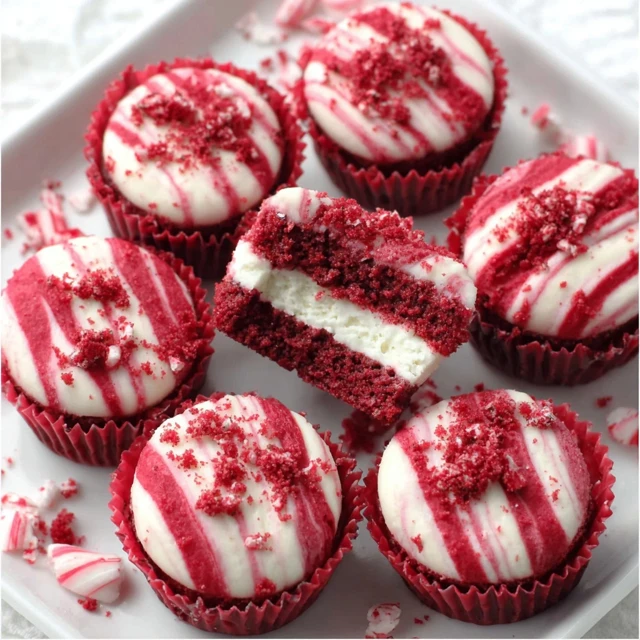
I experimented with different ratios of granulated and powdered sugar. Using all granulated sugar resulted in a slightly chewier cookie, while using all powdered sugar made the cookie almost too delicate. The combination of both, as outlined in the recipe, provided the perfect texture – soft, but still with a bit of structure. This also reminded me of the delights in Sugar Cookie Cheesecake, which similarly relies on the balance of sugars for the perfect texture.The Gluten Gauntlet: Mixing Techniques
I quickly learned that overmixing was a cardinal sin. The more I mixed, the more gluten developed, and the tougher the cookies became. Gently incorporating the dry ingredients into the wet ingredients until just combined was key. I even tried sifting the flour to prevent clumps and reduce the need for excessive mixing, which helped significantly. This made me think of the delicate process of making Sugar Cookie Bars, where a similar gentle approach is crucial.Chilling Challenges: Time is of the Essence
Initially, I underestimated the importance of chilling the dough. I thought a quick 30-minute chill would suffice. Wrong! The cookies spread like pancakes. I discovered that a minimum of 2 hours, and preferably overnight, was essential for firming up the butter and allowing the flour to fully hydrate. This prevented excessive spreading and resulted in a much more tender cookie.The Baking Blind Spot: Recognizing “Done-ness”
Baking time was another area where I struggled. I tended to overbake the cookies, resulting in dry, crumbly edges. I learned to pull them out of the oven when the edges were just beginning to turn golden brown and the centers still looked slightly soft. They continued to bake on the baking sheet, resulting in perfectly soft cookies.The Foolproof Method: A Step-by-Step Guide to Soft Sugar Cookie Success
This method, distilled from countless experiments, guarantees perfectly soft cut-out sugar cookies every time.- Cream Properly Softened Butter and Sugars: Ensure your butter is truly softened, not melted. Cream it with the powdered and granulated sugar until light and fluffy. This is the foundation of a tender cookie.
- Don’t Overmix: Gently incorporate the dry ingredients into the wet ingredients until just combined. Overmixing develops gluten and leads to tough cookies.
- Chill, Chill, Chill: Chill the dough for at least 2 hours, or preferably overnight. This prevents spreading and allows the dough to become easier to handle.
- Roll to the Right Thickness: Roll the dough to about ¼-inch thickness. Too thin, and the cookies will be brittle; too thick, and they won’t bake evenly.
- Bake Until *Almost* Done: Bake until the edges are just beginning to turn golden brown and the centers are still slightly soft. They will continue to bake as they cool.
- Cool Completely Before Decorating: Allow the cookies to cool completely before decorating. This prevents the frosting from melting and ensures a clean finish.
Why are some sugar cookies dry and crumbly while others stay soft?
The secret to soft sugar cookies is minimizing gluten development and maintaining moisture. Using a high fat content, like butter or shortening, using powdered sugar, and avoiding overbaking are key to a soft texture.
How long should I chill the sugar cookie dough?
The recipe recommends chilling the dough for a minimum of 2 hours, but preferably overnight. This prevents the cookies from spreading too much during baking.
What does it mean to cream the butter and sugar until “light and fluffy”?
Creaming the butter and sugars until light and fluffy means mixing them together, typically with an electric mixer, for about 3-5 minutes until the mixture becomes noticeably lighter in color and has a fluffy texture. This incorporates air, contributing to a tender cookie.
How do I know when the sugar cookies are done baking?
Bake the cookies until the edges are just beginning to turn golden brown and the centers are still slightly soft. They will continue to bake on the baking sheet as they cool. Avoid overbaking to prevent dry, crumbly cookies.

Best Soft Cut Out Sugar Cookies
Ingredients
Equipment
Method
- Cream the butter and sugars: In a large bowl, cream together the softened butter, powdered sugar, and granulated sugar until light and fluffy (3-5 minutes with an electric mixer).
- Incorporate the wet ingredients: Beat in the eggs one at a time, then stir in the vanilla extract and almond extract (if using).
- Combine the dry ingredients: In a separate bowl, whisk together the flour, baking powder, and salt.
- Gradually add dry ingredients to wet ingredients: Gradually add the dry ingredients to the wet ingredients, mixing on low speed until just combined. Be careful not to overmix. The dough will be soft.
- Chill the dough: Divide the dough in half, flatten each half into a disc, wrap tightly in plastic wrap, and chill in the refrigerator for at least 2 hours, or preferably overnight.
- Preheat and prepare: Preheat your oven to 350°F (175°C). Line baking sheets with parchment paper or silicone baking mats.
- Roll out and cut the dough: On a lightly floured surface, roll out one disc of dough to about ¼-inch thickness. Use cookie cutters to cut out desired shapes.
- Bake the cookies: Place the cut-out cookies onto the prepared baking sheets, leaving about 1 inch between each cookie. Bake for 8-12 minutes, or until the edges are just beginning to turn golden brown. The centers should still be slightly soft.
- Cool the cookies: Let the cookies cool on the baking sheets for a few minutes before transferring them to a wire rack to cool completely.
- Decorate: Once completely cool, decorate with your favorite frosting and sprinkles.