The Thanksgiving Piecaken. Just hearing the name conjures images of culinary audacity, doesn’t it? It’s a dessert so extravagant, so wonderfully over-the-top, that it’s practically a Thanksgiving tradition in itself. I know it might seem intimidating at first, but trust me, if I can do it, you can too! And the look on your family’s faces when you present this magnificent creation? Priceless!
What Exactly IS a Piecaken?

For the uninitiated, a Piecaken is exactly what it sounds like: a cake baked with pies inside. Typically, it involves layering different types of pies (apple, pumpkin, pecan are popular choices) inside a cake batter and baking the whole shebang together. The result? A multi-flavored, texturally diverse dessert that’s guaranteed to be the star of your Thanksgiving feast. It’s like a turducken, but for dessert! And honestly, who wouldn’t want that?
Why You Should Embrace the Piecaken
- It’s a Conversation Starter: Forget awkward small talk. The Piecaken is a guaranteed conversation starter. Everyone will want to know how you made it, what pies are inside, and, of course, how it tastes!
- It Satisfies Every Craving: Can’t decide between apple pie, pumpkin pie, and pecan pie? With a Piecaken, you don’t have to! You get a little bit of everything.
- It’s Surprisingly Manageable: Yes, it looks impressive, but the process is broken down into manageable steps. You can even prepare parts of it in advance!
- It’s Fun! Baking should be enjoyable, and the Piecaken is definitely a fun project to tackle. Get the whole family involved!
Choosing Your Pies: The Foundation of Flavor
The heart of any good Piecaken lies in the pies you choose. This is where you can really get creative and tailor the dessert to your family’s preferences. Here are some popular options:
- Apple Pie: A classic for a reason. The sweet, slightly tart apples provide a wonderful contrast to the richer flavors of the other pies and cake. If you’re feeling adventurous, try adding a layer of Homemade Apple Crisp topping for extra texture!
- Pumpkin Pie: A Thanksgiving staple. The creamy, spiced pumpkin filling adds warmth and depth to the Piecaken.
- Pecan Pie: Rich, nutty, and decadent. Pecan pie adds a delightful sweetness and a satisfying crunch. For those who love pecan pie, have you ever tried a Pecan Pie Cookie? They’re dangerously addictive!
- Sweet Potato Pie: A Southern favorite. Sweet potato pie offers a similar texture to pumpkin pie but with a slightly different flavor profile.
- Cherry Pie: The tartness of cherry pie provides a beautiful balance to the richness of the other elements.
Important Considerations:
- Pie Size: Make sure your pies are smaller in diameter than your cake pans. You need room for the cake batter to surround the pies. I typically use 8-inch pies for a 9 or 10-inch cake pan.
- Pie Crust: Pre-made pie crusts are perfectly fine for this recipe! Don’t feel pressured to make your own unless you really want to. You can even use a gluten-free crust to accommodate dietary needs.
- Baking Your Pies in Advance: I highly recommend baking your pies a day or two ahead of time. This will save you time and stress on Thanksgiving Day. Plus, it gives the pies a chance to cool completely, which is essential for assembling the Piecaken.
Cake Batter: The Glue That Holds It All Together
Now that you’ve chosen your pies, it’s time to think about the cake batter. You want a batter that’s sturdy enough to support the weight of the pies but also moist and flavorful. Here are a few options:
- Yellow Cake: A classic choice that pairs well with almost any pie flavor.
- Spice Cake: Adds a warm, cozy flavor that complements the Thanksgiving theme perfectly.
- Chocolate Cake: For the chocolate lovers in your life! A rich chocolate cake provides a delicious contrast to the fruit and spice fillings of the pies.
- Carrot Cake: Adds a lovely texture and subtle sweetness.
My Go-To Cake Batter Recipe:
This recipe is simple, reliable, and always produces a moist and delicious cake. Feel free to double or triple it depending on the size of your cake pans.
Simple Vanilla Cake Batter
- 1 1/2 cups all-purpose flour
- 1 1/2 teaspoons baking powder
- 1/4 teaspoon salt
- 1/2 cup (1 stick) unsalted butter, softened
- 3/4 cup granulated sugar
- 2 large eggs
- 3/4 teaspoon vanilla extract
- 1/2 cup milk
Instructions:
- Preheat oven to 350°F (175°C). Grease and flour your cake pans.
- In a medium bowl, whisk together the flour, baking powder, and salt.
- In a large bowl, cream together the butter and sugar until light and fluffy.
- Beat in the eggs one at a time, then stir in the vanilla extract.
- Gradually add the dry ingredients to the wet ingredients, alternating with the milk, beginning and ending with the dry ingredients. Mix until just combined. Do not overmix.
Assembling Your Masterpiece: Layer by Layer
This is where the magic happens! Assembly is key to a successful Piecaken. Here’s how I do it:
- Prepare Your Pans: Grease and flour your cake pans thoroughly. You can also line the bottoms with parchment paper for easy removal.
- First Layer of Cake Batter: Spread a layer of cake batter (about 1/2 inch thick) in the bottom of one of your cake pans. This will act as the base for your first pie.
- First Pie: Carefully place your first pie (e.g., apple pie) on top of the cake batter. Gently press it down so it’s secure.
- More Cake Batter: Pour more cake batter around the sides and on top of the pie, filling in any gaps. You want the pie to be completely surrounded by cake batter.
- Second Pie: Carefully place your second pie (e.g., pumpkin pie) on top of the cake batter. Again, gently press it down.
- Even More Cake Batter: Repeat the process of pouring cake batter around and on top of the pie, making sure it’s fully encased.
- Third Pie (Optional): If you’re feeling ambitious, you can add a third pie! Just repeat the layering process.
- Final Layer of Cake Batter: Finish with a final layer of cake batter, smoothing it out evenly.
- Repeat for Second Cake Pan: If you are making a two-layer piecaken, repeat the entire process in your second cake pan.
Pro Tip: Don’t overfill your cake pans! You want to leave about an inch of space at the top to allow for the cake to rise without overflowing.
Baking Your Piecaken: Patience is a Virtue
Baking the Piecaken requires patience. It’s a large, dense dessert, so it will take longer to bake than a regular cake. Here’s what you need to know:
- Oven Temperature: Preheat your oven to 325°F (160°C). A lower temperature will help the cake bake evenly and prevent the edges from burning.
- Baking Time: Baking time will vary depending on the size of your cake pans and the density of your cake batter. Start checking for doneness after about 1 hour. A toothpick inserted into the center of the cake (away from the pies!) should come out clean or with a few moist crumbs.
- Preventing Burning: If the top of the cake starts to brown too quickly, cover it loosely with aluminum foil.
Troubleshooting:
- Cake is sinking in the middle: This could be due to underbaking or using too much liquid in your cake batter. Make sure to bake the cake until a toothpick comes out clean.
- Pies are leaking: This is normal! The pies will release some juices as they bake. Just be prepared for a slightly messy oven.
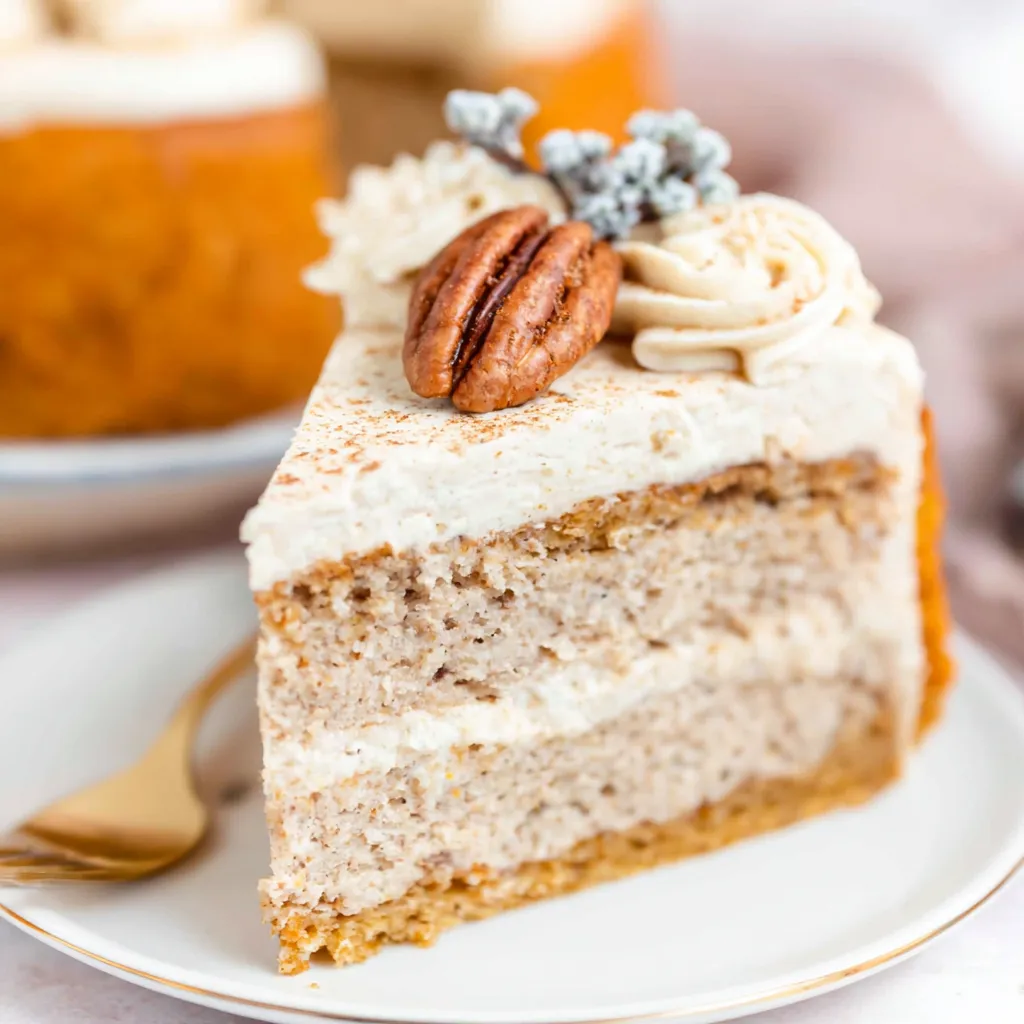
Cooling and Frosting: The Finishing Touches
Once the Piecaken is baked, it’s crucial to let it cool completely before frosting. This will prevent the frosting from melting and sliding off.
- Cool in Pans: Let the Piecaken cool in the cake pans for about 15-20 minutes.
- Invert onto Wire Rack: Carefully invert the cakes onto a wire rack to cool completely.
- Frosting: Once the cakes are completely cool, you can frost them with your favorite frosting. Cream cheese frosting, vanilla buttercream, or even a simple glaze all work well.
Frosting Ideas:
- Cream Cheese Frosting: A classic pairing with spice cake and pumpkin pie.
- Vanilla Buttercream: Simple and versatile, it complements all the pie flavors.
- Salted Caramel Frosting: Adds a touch of sophistication and a delicious salty-sweet flavor. If you love salted caramel, you absolutely MUST try the Salted Caramel Apple Pie Cheesecake!
Serving and Storing Your Piecaken
The moment of truth! Serving the Piecaken is a spectacle in itself. Slice it carefully to reveal the layers of pie and cake. Serve it with a dollop of whipped cream or a scoop of vanilla ice cream.
Storage: Store leftover Piecaken in the refrigerator for up to 3 days. Cover it tightly to prevent it from drying out.
Variations and Adaptations: Make It Your Own
The beauty of the Piecaken is that it’s completely customizable! Here are a few ideas to get you started:
- Mini Piecakens: Use smaller cake pans and mini pies to create individual Piecakens. These are perfect for portion control (or not!).
- Different Pie Combinations: Experiment with different pie combinations to find your favorite flavor profile.
- Add Layers of Filling: Add layers of fruit filling, such as apple pie filling or cherry pie filling, between the pies and cake layers.
- Cheesecake Layer: You can even try adding a cheesecake layer in the middle. Similar to Apple Pie Cheesecake Bites, but on a grand scale.
The Ultimate Thanksgiving Piecaken Recipe
Okay, let’s get down to the nitty-gritty. Here’s a comprehensive recipe for creating a truly unforgettable Thanksgiving Piecaken Dessert.
Ingredients:
For the Pies:
- 1 (8-inch) Apple Pie, baked and cooled
- 1 (8-inch) Pumpkin Pie, baked and cooled
- 1 (8-inch) Pecan Pie, baked and cooled
- (You can use store-bought or homemade)
For the Cake:
- 2 boxes (15.25 oz each) Yellow Cake Mix (plus ingredients called for on the box, typically eggs, oil, and water)
- Or double the Simple Vanilla Cake Batter recipe above
For the Frosting:
- 2 (8 oz) packages Cream Cheese, softened
- 1 cup (2 sticks) Unsalted Butter, softened
- 6-8 cups Powdered Sugar
- 2 teaspoons Vanilla Extract
- Optional: Caramel sauce, chopped pecans, or other decorations
Equipment:
- Two 9-inch cake pans
- Mixing bowls
- Electric mixer
- Measuring cups and spoons
- Spatula
- Wire rack
Instructions:
- Prepare the Pies: Ensure all pies are baked, cooled completely, and ready for assembly.
- Prepare the Cake Batter: Prepare the yellow cake batter according to the package directions (or use the Simple Vanilla Cake recipe, doubled).
- Assemble the First Layer: Grease and flour one of the 9-inch cake pans. Pour a layer of cake batter (about 1-inch thick) into the pan.
- Add the First Pie: Carefully place the apple pie on top of the cake batter. Gently press it down.
- Cover with Cake Batter: Pour more cake batter around and on top of the apple pie, filling the gaps and covering the pie completely.
- Add the Second Pie: Place the pumpkin pie on top of the cake batter.
- Cover with Cake Batter: Pour more cake batter around and on top of the pumpkin pie, ensuring it is fully encased.
- Add the Third Pie: Place the pecan pie on top of the cake batter.
- Cover with Remaining Cake Batter: Use the remaining cake batter to cover the pecan pie, leveling the top.
- Bake: Preheat oven to 325°F (160°C). Bake for approximately 1 hour 30 minutes to 2 hours, or until a toothpick inserted into the center of the cake comes out clean (avoid piercing the pies).
- Cool: Let the cake cool in the pan for 20 minutes before inverting it onto a wire rack to cool completely.
- Prepare the Frosting: In a large bowl, beat the cream cheese and butter together until smooth and creamy. Gradually add the powdered sugar, beating until light and fluffy. Stir in the vanilla extract.
- Frost the Piecaken: Once the cake is completely cool, frost the top and sides with the cream cheese frosting.
- Decorate: Drizzle with caramel sauce, sprinkle with chopped pecans, or decorate as desired.
- Chill: Refrigerate for at least 1 hour before serving.
- Serve: Slice and serve cold. Enjoy the ultimate Thanksgiving dessert!
Final Thoughts: Go Forth and Piecaken!
So there you have it! Everything you need to create your own show-stopping Thanksgiving Piecaken. It might seem like a lot of work, but trust me, the end result is well worth the effort. This Thanksgiving, ditch the ordinary and embrace the extraordinary. Your family (and your taste buds
What exactly is a Piecaken?
A Piecaken is a cake baked with pies inside. It typically involves layering different types of pies (like apple, pumpkin, and pecan) inside a cake batter and baking it all together.
What are some popular pie choices for a Piecaken?
Popular pie choices include apple pie, pumpkin pie, pecan pie, sweet potato pie, and cherry pie. It’s best to use pies that are smaller in diameter than your cake pans.
What kind of cake batter is best to use for a Piecaken?
You want a cake batter that’s sturdy enough to support the weight of the pies but also moist and flavorful. Good options include yellow cake, spice cake, chocolate cake, or carrot cake. The article provides a simple vanilla cake batter recipe.
How do I store leftover Piecaken?
Store leftover Piecaken in the refrigerator for up to 3 days. Cover it tightly to prevent it from drying out.
Thanksgiving Piecaken Ultimate Dessert
Ingredients
Equipment
Method
- Prepare the Pies: Ensure all pies are baked, cooled completely, and ready for assembly.
- Prepare the Cake Batter: Prepare the yellow cake batter according to the package directions (or use the Simple Vanilla Cake recipe, doubled).
- Assemble the First Layer: Grease and flour one of the 9-inch cake pans. Pour a layer of cake batter (about 1-inch thick) into the pan.
- Add the First Pie: Carefully place the apple pie on top of the cake batter. Gently press it down.
- Cover with Cake Batter: Pour more cake batter around and on top of the apple pie, filling the gaps and covering the pie completely.
- Add the Second Pie: Place the pumpkin pie on top of the cake batter.
- Cover with Cake Batter: Pour more cake batter around and on top of the pumpkin pie, ensuring it is fully encased.
- Add the Third Pie: Place the pecan pie on top of the cake batter.
- Cover with Remaining Cake Batter: Use the remaining cake batter to cover the pecan pie, leveling the top.
- Bake: Preheat oven to 325°F (160°C). Bake for approximately 1 hour 30 minutes to 2 hours, or until a toothpick inserted into the center of the cake comes out clean (avoid piercing the pies).
- Cool: Let the cake cool in the pan for 20 minutes before inverting it onto a wire rack to cool completely.
- Prepare the Frosting: In a large bowl, beat the cream cheese and butter together until smooth and creamy. Gradually add the powdered sugar, beating until light and fluffy. Stir in the vanilla extract.
- Frost the Piecaken: Once the cake is completely cool, frost the top and sides with the cream cheese frosting.
- Decorate: Drizzle with caramel sauce, sprinkle with chopped pecans, or decorate as desired.
- Chill: Refrigerate for at least 1 hour before serving.
- Serve: Slice and serve cold. Enjoy the ultimate Thanksgiving dessert!
