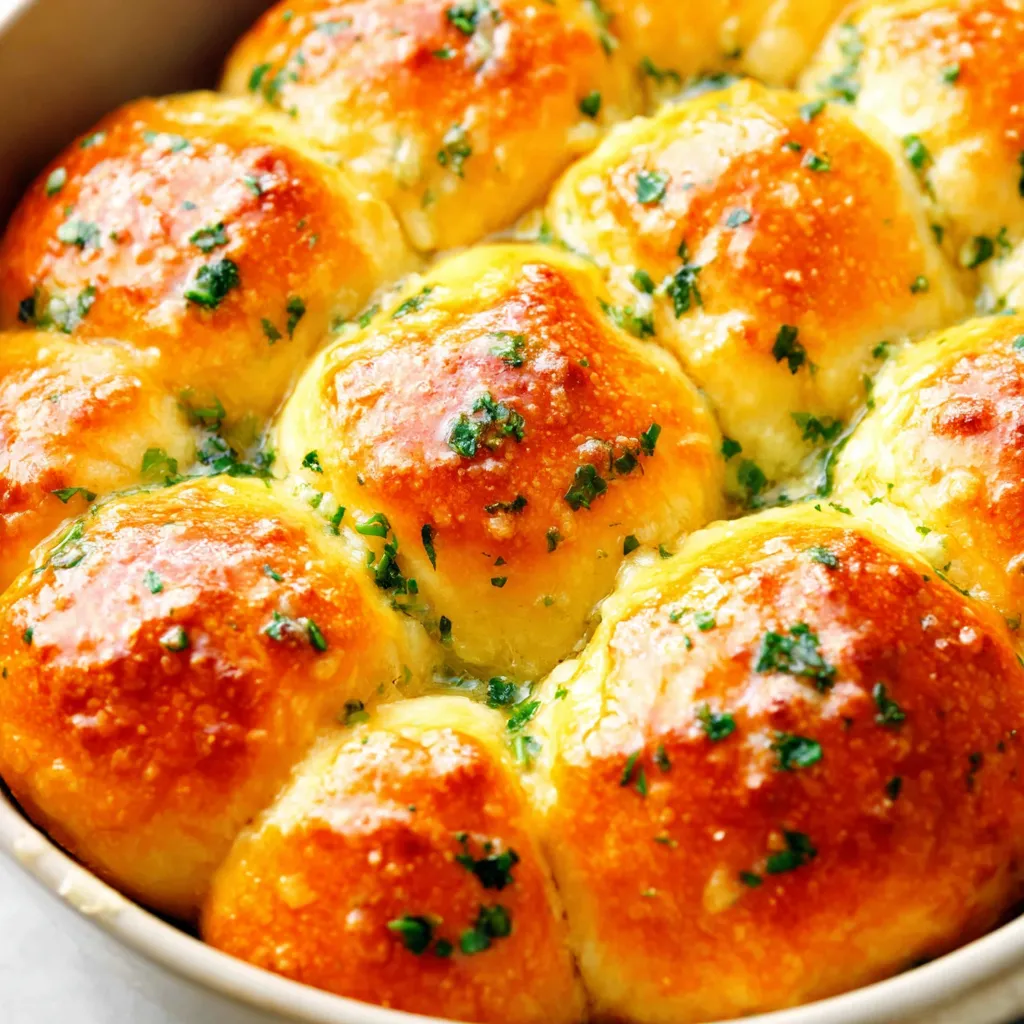
Imagine the aroma of warm, freshly baked bread filling your kitchen, each bite bursting with garlicky, buttery goodness. These Garlic Butter Rolls are soft, fluffy, and ridiculously easy to make, even for beginner bakers. Trust me, you’re about to become a roll-making pro, and everyone will be begging you for the recipe!
What You’ll Need: The Ingredients

For the Dough:
- 1 cup warm milk (about 105-115°F)
- 2 1/4 teaspoons active dry yeast (1 packet)
- 1/4 cup granulated sugar
- 1 teaspoon salt
- 1/4 cup unsalted butter, melted
- 1 large egg, lightly beaten
- 3 – 3 1/2 cups all-purpose flour, plus more for dusting
For the Garlic Butter Topping:
- 1/2 cup unsalted butter, melted
- 4-6 cloves garlic, minced (or more, if you’re a garlic lover like me!)
- 1/4 cup chopped fresh parsley (optional, but adds a lovely freshness)
- 1/4 teaspoon garlic powder (optional, to enhance the garlic flavor)
- Pinch of salt
Let’s Get Baking: Step-by-Step Instructions
Making the Dough:
- Activate the Yeast: In a large bowl, combine the warm milk, yeast, and sugar. Let it sit for 5-10 minutes, or until foamy. This means the yeast is alive and kicking! If it doesn’t foam, your yeast might be old, and you’ll need to get a fresh packet.
- Combine Wet Ingredients: Add the melted butter and beaten egg to the yeast mixture. Mix well.
- Add Dry Ingredients: Gradually add the flour and salt, mixing until a soft dough forms. Start with 3 cups of flour and add more, a tablespoon at a time, until the dough is no longer sticky. Be careful not to add too much flour, or your rolls will be dry!
- Knead the Dough: Turn the dough out onto a lightly floured surface and knead for 5-7 minutes, or until smooth and elastic. You can also use a stand mixer with a dough hook for this step.
- First Rise: Place the dough in a lightly greased bowl, turning to coat. Cover with plastic wrap or a clean kitchen towel and let rise in a warm place for 1-1.5 hours, or until doubled in size. This is crucial for light and airy rolls!
Shaping and Baking the Rolls:
- Punch Down the Dough: Gently punch down the dough to release the air.
- Shape the Rolls: Turn the dough out onto a lightly floured surface and divide it into 12 equal pieces. Roll each piece into a ball and place them in a greased 9×13 inch baking dish. You can also use a cast iron skillet for a rustic presentation.
- Second Rise: Cover the rolls with plastic wrap or a clean kitchen towel and let rise in a warm place for 30-45 minutes, or until puffed up.
- Prepare the Garlic Butter Topping: While the rolls are rising, melt the butter in a small saucepan. Add the minced garlic, parsley (if using), garlic powder (if using), and a pinch of salt. Stir well and set aside.
- Bake the Rolls: Preheat oven to 375°F (190°C). Brush the rolls generously with the garlic butter topping.
- Bake: Bake for 15-20 minutes, or until golden brown. Keep an eye on them – every oven is different!
- More Garlic Butter: As soon as the rolls come out of the oven, brush them with the remaining garlic butter topping. This is the key to ultimate flavor!
- Serve: Let the rolls cool slightly before serving. Enjoy!
Troubleshooting: Common Roll-Making Mishaps (and How to Fix Them!)
My dough isn’t rising!
This is a common problem, and usually, it’s down to the yeast. Make sure your milk isn’t too hot – it should be warm, not scalding, as high heat can kill the yeast. Also, check the expiration date on your yeast packet. If it’s old, it might not be active anymore. A cold room can also hinder rising, so find a warm spot, like near a sunny window or in a slightly warmed oven (turned OFF!).
My rolls are too dry!
Over-baking is the main culprit here. Start checking the rolls a few minutes before the recommended baking time. Also, adding too much flour can make the dough dry. Measure your flour carefully, and only add more if the dough is still very sticky after kneading. Brushing with plenty of garlic butter both before and after baking will also help keep them moist.
My rolls are too dense!
This usually means the dough wasn’t kneaded enough, or it didn’t rise properly. Make sure to knead the dough for the full 5-7 minutes, or until it’s smooth and elastic. Give the dough enough time to rise in a warm place. If you’re short on time, you can do a slow rise in the refrigerator overnight – just be sure to bring the dough back to room temperature before shaping the rolls.
Variations: Spice Up Your Rolls!
Cheesy Garlic Rolls:
Sprinkle shredded Parmesan or mozzarella cheese over the rolls before baking for a cheesy twist. You can even add some cheddar for an extra flavor boost!
Herb-Infused Rolls:
Add other fresh herbs to the garlic butter topping, such as rosemary, thyme, or oregano. This will add a lovely aromatic flavor to the rolls.
Spicy Garlic Rolls:
Add a pinch of red pepper flakes to the garlic butter topping for a little kick. You can also add a dash of hot sauce for extra heat.
Sweet Garlic Rolls:
Believe it or not, a touch of sweetness can complement the savory garlic flavor. Add a tablespoon of honey or maple syrup to the garlic butter topping for a subtle sweetness.
Serving Suggestions: What to Serve with Your Garlic Butter Rolls
These Garlic Butter Rolls are the perfect accompaniment to just about any meal! They’re delicious with pasta dishes, soups, salads, and grilled meats. Here are a few ideas:
- Serve them alongside a hearty bowl of Cheddar Garlic Herb Potato Soup for a comforting and satisfying meal.
- Pair them with Cheesy Garlic Chicken Wraps for a quick and easy weeknight dinner.
- Use them to soak up the delicious sauce from Creamy Garlic Parmesan Chicken Pasta.
- They’re also fantastic with Creamy Garlic Parmesan Crockpot Chicken & Potatoes, offering a perfect carb complement.
- Don’t forget they are amazing with Garlic Parmesan Crockpot Chicken!
- Or, try them with Garlic Butter Bowtie Beef Pasta for a double dose of garlic butter goodness!
Storage Instructions: Keeping Your Rolls Fresh
Leftover Garlic Butter Rolls can be stored in an airtight container at room temperature for up to 2 days. For longer storage, you can freeze them for up to 2 months. To reheat, wrap the rolls in foil and bake at 350°F (175°C) for 10-15 minutes, or until warmed through.
Get Ready to Bake!
So, there you have it – everything you need to make the most irresistible Garlic Butter Rolls! Don’t be intimidated by the yeast or the kneading – with a little practice, you’ll be a roll-making master in no time. And remember, even if they don’t turn out perfectly the first time, they’ll still taste amazing! Happy baking, my friend!
What should I do if my dough isn’t rising?
Make sure your milk isn’t too hot, check the expiration date on your yeast, and ensure the dough is in a warm place. Old yeast or milk that’s too hot can prevent rising.
How can I prevent my garlic butter rolls from becoming too dry?
Avoid over-baking by checking the rolls a few minutes before the recommended baking time. Also, be careful not to add too much flour. Brushing with plenty of garlic butter before and after baking will also help.
What are some variations I can make to the garlic butter rolls?
You can try adding shredded Parmesan or mozzarella cheese for cheesy garlic rolls, incorporating fresh herbs like rosemary or thyme for herb-infused rolls, adding red pepper flakes for spicy garlic rolls, or a touch of honey or maple syrup for sweet garlic rolls.
How should I store leftover garlic butter rolls?
Leftover rolls can be stored in an airtight container at room temperature for up to 2 days or frozen for up to 2 months. To reheat, wrap them in foil and bake at 350°F (175°C) for 10-15 minutes.
Irresistible Easy Garlic Butter Rolls
Ingredients
Equipment
Method
- Activate the Yeast: In a large bowl, combine the warm milk, yeast, and sugar. Let it sit for 5-10 minutes, or until foamy.
- Combine Wet Ingredients: Add the melted butter and beaten egg to the yeast mixture. Mix well.
- Add Dry Ingredients: Gradually add the flour and salt, mixing until a soft dough forms. Start with 3 cups of flour and add more, a tablespoon at a time, until the dough is no longer sticky.
- Knead the Dough: Turn the dough out onto a lightly floured surface and knead for 5-7 minutes, or until smooth and elastic. You can also use a stand mixer with a dough hook.
- First Rise: Place the dough in a lightly greased bowl, turning to coat. Cover with plastic wrap or a clean kitchen towel and let rise in a warm place for 1-1.5 hours, or until doubled in size.
- Punch Down the Dough: Gently punch down the dough to release the air.
- Shape the Rolls: Turn the dough out onto a lightly floured surface and divide it into 12 equal pieces. Roll each piece into a ball and place them in a greased 9×13 inch baking dish.
- Second Rise: Cover the rolls with plastic wrap or a clean kitchen towel and let rise in a warm place for 30-45 minutes, or until puffed up.
- Prepare the Garlic Butter Topping: While the rolls are rising, melt the butter in a small saucepan. Add the minced garlic, parsley (if using), garlic powder (if using), and a pinch of salt. Stir well.
- Bake the Rolls: Preheat oven to 375°F (190°C). Brush the rolls generously with the garlic butter topping.
- Bake: Bake for 15-20 minutes, or until golden brown.
- More Garlic Butter: As soon as the rolls come out of the oven, brush them with the remaining garlic butter topping.
- Serve: Let the rolls cool slightly before serving. Enjoy!
Notes
Variations: Spice up your rolls with shredded Parmesan or mozzarella cheese, rosemary, thyme, oregano, red pepper flakes, or a tablespoon of honey or maple syrup.
