I can almost smell it now! I remember being a brand new college student, completely broke, and desperately trying to impress my roommates with a “fancy” meal. I stumbled upon a rudimentary version of this recipe, and with a few tweaks (okay, maybe a lot of tweaks!), it became a staple. It was affordable, relatively quick, and always a crowd-pleaser. And guess what? It still is! Today, I’m sharing all my secrets for the most amazing Easy Cheesy Garlic Chicken Wraps you’ll ever make!
Easy Cheesy Garlic Chicken Wraps: Your New Weeknight Hero
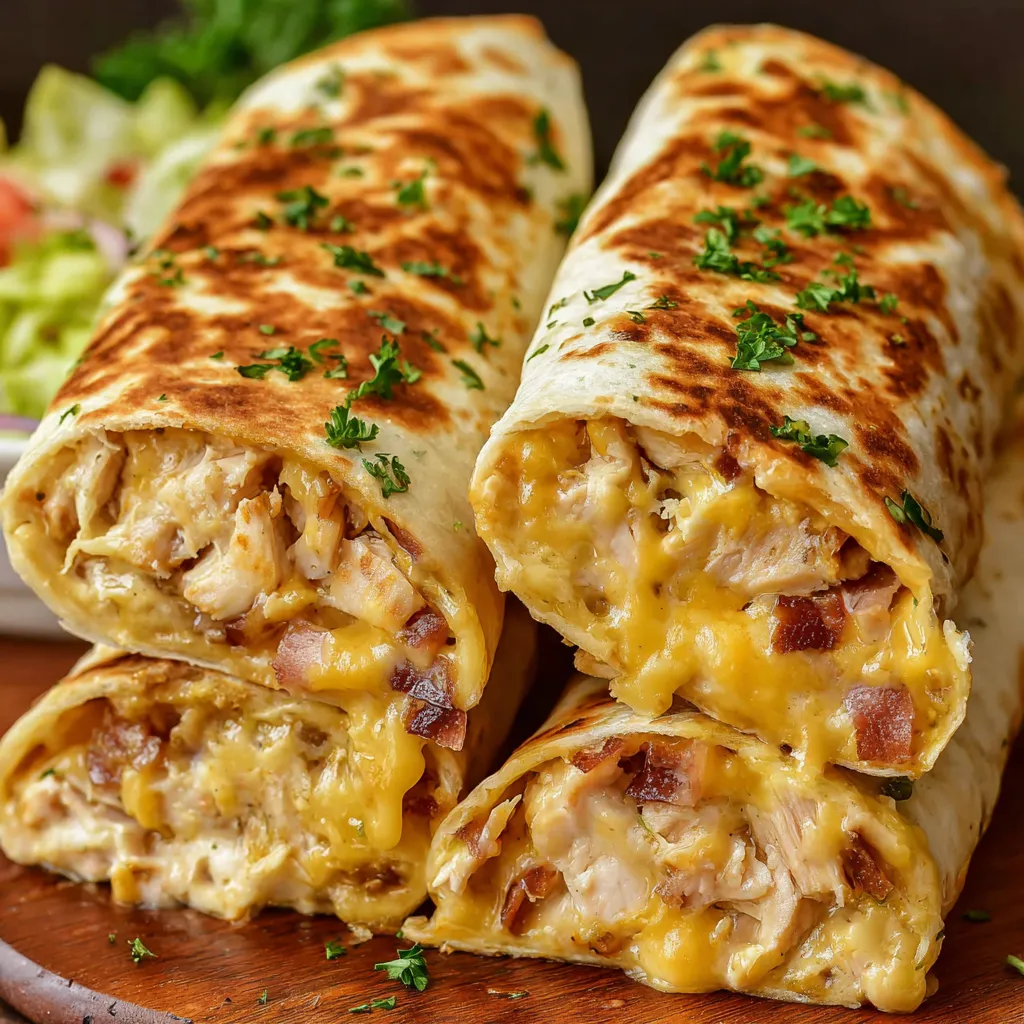
Okay, friend, let’s be real. We’re all busy. We all crave something delicious and satisfying. And we all want to avoid spending hours in the kitchen after a long day. That’s precisely why these Easy Cheesy Garlic Chicken Wraps are about to become your new best friend. They are quick, easy, customizable, and packed with flavor. Trust me, even the pickiest eaters will be begging for seconds!
Why You’ll Absolutely Love These Wraps
- Lightning-Fast Prep: From fridge to table in under 30 minutes? Yes, please!
- Simple Ingredients: You probably already have most of these ingredients in your pantry and fridge.
- Kid-Friendly: Even the little ones will devour these cheesy, garlicky delights.
- Customizable: Add your favorite veggies, sauces, or spices to make them your own.
- Seriously Delicious: The combination of tender chicken, melted cheese, and garlicky goodness is simply irresistible.
What You’ll Need: The Ingredient Rundown
Let’s get started! Here’s what you’ll need to create these magical wraps. Don’t worry if you need to make substitutions; I’ll give you some helpful tips along the way.
The Core Ingredients
- Chicken Breasts: About 1.5 pounds. I prefer boneless, skinless chicken breasts for convenience, but you can also use chicken thighs. Just make sure to cook them thoroughly.
- Garlic: 4-6 cloves, minced. Fresh garlic is a MUST for that authentic garlicky flavor. Don’t skimp!
- Cheese: 2 cups shredded cheese. I love using a blend of cheddar and mozzarella for that perfect melt and flavor. But feel free to experiment with your favorites! Pepper jack would add a nice kick.
- Tortillas: Large burrito-size tortillas. Flour tortillas are the classic choice, but you can also use whole wheat or gluten-free tortillas.
- Olive Oil: For cooking the chicken and garlic.
- Spices: Salt, pepper, garlic powder, onion powder, paprika. These are the basics, but feel free to add other spices to your liking.
Optional, But Highly Recommended Add-Ins
- Veggies: Sliced bell peppers (any color!), onions, spinach, mushrooms, tomatoes – whatever your heart desires!
- Sauces: Ranch dressing, sriracha, BBQ sauce, or your favorite hot sauce for dipping or drizzling.
- Herbs: Fresh parsley, cilantro, or basil for garnish.
Step-by-Step: Making Your Cheesy Garlic Chicken Wraps
Alright, friend, let’s get cooking! I’m going to walk you through each step, so you can feel confident and create delicious wraps every single time.
Step 1: Prep the Chicken
- Pound the Chicken: Place the chicken breasts between two sheets of plastic wrap and use a meat mallet (or a rolling pin!) to pound them to an even thickness (about 1/2 inch). This helps them cook evenly and quickly.
- Season the Chicken: In a small bowl, combine salt, pepper, garlic powder, onion powder, and paprika. Generously season both sides of the chicken breasts with this mixture.
Pro Tip: Don’t be afraid to get creative with your seasoning! A little chili powder or cumin can add a lovely depth of flavor.
Step 2: Cook the Chicken
- Heat the Oil: Heat about 1 tablespoon of olive oil in a large skillet over medium-high heat.
- Cook the Chicken: Add the seasoned chicken breasts to the skillet and cook for about 5-7 minutes per side, or until they are cooked through and no longer pink inside. The internal temperature should reach 165°F (74°C).
- Let it Rest: Remove the chicken from the skillet and let it rest for a few minutes before slicing or shredding it. This helps retain the juices.
Don’t Overcook the Chicken!: Overcooked chicken will be dry and tough. Use a meat thermometer to ensure it’s cooked to the perfect temperature.
Step 3: Sauté the Garlic (and Veggies!)
- Sauté the Garlic: Add another tablespoon of olive oil to the same skillet over medium heat. Add the minced garlic and sauté for about 1-2 minutes, or until fragrant. Be careful not to burn the garlic, as it will become bitter.
- Add Veggies (Optional): If you’re adding veggies, add them to the skillet with the garlic and sauté until they are tender-crisp. Bell peppers and onions usually take about 5-7 minutes.
Garlic Tip: Keep a close eye on the garlic. Burnt garlic ruins the whole dish. If you think the garlic is browning too quickly, reduce the heat.
Step 4: Assemble the Wraps
- Warm the Tortillas: Warm the tortillas in a dry skillet or microwave for a few seconds to make them more pliable. This will prevent them from tearing when you fold them.
- Layer the Ingredients: On each tortilla, layer some of the shredded cheese, sliced or shredded chicken, sautéed garlic (and veggies, if using).
- Fold the Wraps: Fold in the sides of the tortilla, then fold up the bottom and roll it tightly to form a wrap.
If you enjoy the taste of CROCKPOT GARLIC PARMESAN CHICKEN, you can add a small amount of Parmesan cheese in this step.
Step 5: Toast the Wraps (Optional, But Highly Recommended!)
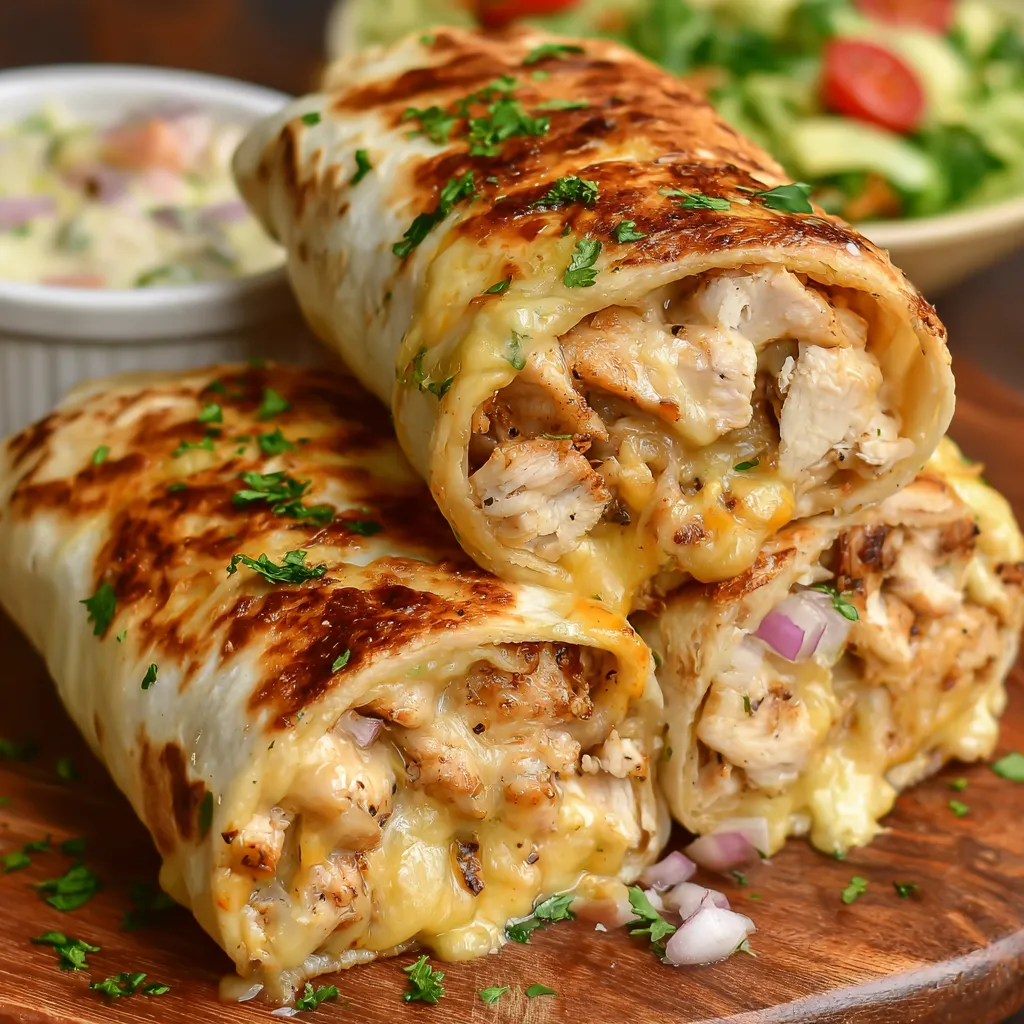
- Toast in Skillet: Heat a clean skillet over medium heat. Place the wraps in the skillet and cook for about 2-3 minutes per side, or until they are golden brown and crispy. You can also brush the wraps with a little olive oil before toasting for extra crispness.
- Toast in Oven: Alternatively, you can bake the wraps in a preheated oven at 350°F (175°C) for about 10-15 minutes, or until they are heated through and the cheese is melted.
Cheese Melt!: Make sure the cheese is melted and gooey for the best flavor! You can even pop the wraps under the broiler for a minute or two for extra melty goodness (but watch them closely so they don’t burn!).
Step 6: Serve and Enjoy!
Slice the wraps in half and serve immediately. Offer your favorite dipping sauces and garnishes for a complete and satisfying meal.
Variations and Customization: Make it Your Own!
The beauty of these Easy Cheesy Garlic Chicken Wraps is that they are incredibly versatile. Feel free to experiment and make them your own!
Spice it Up!
- Add some heat: Drizzle sriracha, chipotle sauce, or your favorite hot sauce inside the wraps or serve it on the side.
- Jalapeños: Add sliced jalapeños to the wraps for a spicy kick.
Veggie Power
- Black Beans and Corn: Add a can of drained and rinsed black beans and some corn kernels to the wraps for a Southwestern twist.
- Avocado: Add sliced avocado for a creamy and healthy addition.
- Spinach or Kale: Add a handful of fresh spinach or kale to the wraps for extra nutrients.
Cheese, Please!
- Different Cheeses: Experiment with different cheeses like pepper jack, provolone, or Monterey Jack.
- Cream Cheese: Spread a thin layer of cream cheese on the tortillas before adding the other ingredients for extra creaminess.
Sauce it Up!
If you’re looking for inspiration, consider adding some sauce like you would for HONEY GARLIC CHICKEN PERFECTION inside of the wraps.
- BBQ Sauce: Add a drizzle of BBQ sauce for a smoky and sweet flavor.
- Ranch Dressing: Ranch dressing is a classic pairing with chicken wraps.
- Pesto: Spread a thin layer of pesto on the tortillas for a fresh and flavorful twist.
- Spicy Mayo: Mix mayonnaise with sriracha or chili garlic sauce for a creamy and spicy sauce.
Looking for more ways to add garlic and parmesan? Try GARLIC PARMESAN CHICKEN PASTA next!
Leftover Chicken? No Problem!
If you love garlic and chicken, you may have come across ULTIMATE CREAMY GARLIC CHICKEN. If you make this, save the leftovers to use in your wraps!
- Use Leftover Chicken: This recipe is perfect for using up leftover cooked chicken. Simply shred or slice the chicken and add it to the wraps.
- Rotisserie Chicken: Rotisserie chicken is a convenient and flavorful option for these wraps.
If you love garlic and chicken, then you’ll enjoy GARLIC PARMESAN CHICKEN PERFECTION. If you’re looking for a cheesy garlic wrap already, try GARLIC CHICKEN CHEESE WRAPS!
Tips and Tricks for Wrap Success
Here are a few extra tips and tricks to ensure your Easy Cheesy Garlic Chicken Wraps are a total hit!
- Don’t Overfill the Wraps: Overfilling the wraps will make them difficult to fold and eat.
- Warm the Tortillas: Warming the tortillas is crucial for preventing them from tearing.
- Use a Good Quality Cheese: Good quality cheese will melt better and have a richer flavor.
- Toast the Wraps for Extra Flavor: Toasting the wraps adds a delicious crispy texture and enhances the flavors.
- Make Ahead: You can assemble the wraps ahead of time and store them in the refrigerator until you’re ready to cook them.
- Freezing: You can freeze these wraps for a quick and easy meal. Wrap them individually in plastic wrap and then place them in a freezer bag. Thaw them in the refrigerator overnight and then reheat them in the oven or microwave.
Conclusion: Your Cheesy Garlic Chicken Wrap Adventure Awaits!
There you have it, friend! A super simple, ridiculously delicious recipe for Easy Cheesy Garlic Chicken Wraps that will become a new staple in your kitchen. Don’t be afraid to get creative, experiment with flavors, and make them your own. I promise you’ll love the process, and even more, you’ll love the results. Happy cooking, and enjoy every single bite!
How long does it take to make the Easy Cheesy Garlic Chicken Wraps?
The prep time is lightning-fast! You can have these wraps from fridge to table in under 30 minutes.
Can I customize the Easy Cheesy Garlic Chicken Wraps?
Yes, the recipe is highly customizable! You can add your favorite veggies, sauces, or spices to make them your own. The article suggests additions like bell peppers, onions, spinach, mushrooms, tomatoes, ranch dressing, sriracha, or BBQ sauce.
What kind of cheese is recommended for the wraps?
The recipe suggests using a blend of cheddar and mozzarella for the perfect melt and flavor. However, you can experiment with your favorites, such as pepper jack for a kick.
Is it necessary to toast the wraps after assembling them?
Toasting the wraps is optional but highly recommended! It adds a delicious crispy texture and enhances the flavors. You can toast them in a skillet or bake them in the oven.
Easy Cheesy Garlic Chicken Wraps
Ingredients
Equipment
Method
- Pound the chicken breasts to an even thickness of about 1/2 inch between two sheets of plastic wrap.
- In a small bowl, combine salt, pepper, garlic powder, onion powder, and paprika. Season both sides of the chicken breasts with this mixture.
- Heat 1 tablespoon of olive oil in a large skillet over medium-high heat.
- Add the seasoned chicken breasts to the skillet and cook for about 5-7 minutes per side, or until they are cooked through and no longer pink inside. The internal temperature should reach 165°F (74°C).
- Remove the chicken from the skillet and let it rest for a few minutes before slicing or shredding it.
- Add another tablespoon of olive oil to the same skillet over medium heat. Add the minced garlic and sauté for about 1-2 minutes, or until fragrant, being careful not to burn it.
- If using veggies, add them to the skillet with the garlic and sauté until they are tender-crisp. Bell peppers and onions usually take about 5-7 minutes.
- Warm the tortillas in a dry skillet or microwave for a few seconds to make them more pliable.
- On each tortilla, layer some of the shredded cheese, sliced or shredded chicken, sautéed garlic (and veggies, if using).
- Fold in the sides of the tortilla, then fold up the bottom and roll it tightly to form a wrap.
- Heat a clean skillet over medium heat. Place the wraps in the skillet and cook for about 2-3 minutes per side, or until they are golden brown and crispy. You can also brush the wraps with a little olive oil before toasting for extra crispness. Alternatively, bake in a preheated oven at 350°F (175°C) for 10-15 minutes, or until heated through and the cheese is melted.
- Slice the wraps in half and serve immediately. Offer your favorite dipping sauces and garnishes for a complete and satisfying meal.
