I can still smell the cinnamon and baked apples wafting through my grandmother’s kitchen. It was always a signal that fall had officially arrived, and that meant family gatherings, cozy sweaters, and, of course, her legendary apple crisp. I remember standing on a stool, “helping” (mostly making a mess) as she carefully layered the apples and sprinkled the crumble topping with practiced ease. Today, I’m sharing all my secrets for the most amazing Easy Cozy Apple Crisp Recipe you’ll ever make!
The Ultimate Easy Cozy Apple Crisp Recipe: Your New Fall Favorite

Okay, friend, let’s talk about apple crisp. Not just any apple crisp, but the apple crisp. The one that makes your kitchen smell heavenly, the one that warms you from the inside out, and the one that’s so easy, you’ll be making it all season long. We’re talking about the kind of dessert that’s perfect for a weeknight treat or a show-stopping centerpiece for your Thanksgiving table. Get ready to become an apple crisp pro!
Why This Recipe Works (And Why You’ll Love It)
This isn’t just a recipe; it’s a foolproof guide to apple crisp perfection. Here’s why it’s so amazing:
- Simple Ingredients: We’re using pantry staples here. No fancy, hard-to-find ingredients.
- Quick Prep: From start to oven, you’ll be done in about 20 minutes. That’s it!
- Adaptable: You can easily customize this recipe to your liking with different apples, spices, or toppings.
- Utterly Delicious: The combination of sweet, tart apples and a buttery, crunchy topping is simply irresistible.
Ingredients You’ll Need
Let’s gather our ingredients. Don’t worry if you don’t have everything on hand; I’ll give you some substitution ideas along the way.
For the Apple Filling:
- 6-8 Medium Apples: I prefer a mix of tart and sweet apples, like Granny Smith, Honeycrisp, and Gala. But honestly, use whatever you have!
- 1/4 Cup Granulated Sugar: For sweetness.
- 2 Tablespoons All-Purpose Flour: This helps to thicken the apple juices.
- 1 Teaspoon Ground Cinnamon: The star spice!
- 1/4 Teaspoon Ground Nutmeg: Adds warmth and depth.
- 1 Tablespoon Lemon Juice: Brightens the flavors and prevents browning.
- 2 Tablespoons Butter: Adds richness and flavor.
For the Crisp Topping:
- 1 Cup All-Purpose Flour: The base of our crumble.
- 1 Cup Rolled Oats: Adds texture and a nutty flavor.
- 1 Cup Packed Brown Sugar: For sweetness and a caramel-like flavor.
- 1/2 Teaspoon Ground Cinnamon: More cinnamon, because why not?
- 1/2 Cup (1 Stick) Cold Unsalted Butter: Cut into cubes. This is key for a crumbly topping!
- 1/4 Cup Chopped Pecans or Walnuts (Optional): For extra crunch and flavor.
Step-by-Step Instructions: Making Your Apple Crisp
Alright, let’s get baking! Follow these steps, and you’ll have a warm, delicious apple crisp in no time.
Step 1: Prepare the Apples
First, preheat your oven to 375°F (190°C). While it’s heating up, let’s tackle the apples. Peel, core, and slice the apples into about 1/4-inch thick pieces. I like to slice them relatively uniformly so they cook evenly.
Place the sliced apples in a large bowl. Add the granulated sugar, flour, cinnamon, nutmeg, and lemon juice. Toss everything together until the apples are evenly coated. Dot the apples with the butter.
Step 2: Make the Crisp Topping
In a separate bowl, combine the flour, oats, brown sugar, and cinnamon. Add the cold, cubed butter. This is where your hands come in! Use your fingers or a pastry blender to cut the butter into the dry ingredients until the mixture resembles coarse crumbs. Don’t overmix! You want to see small pieces of butter throughout.
If you’re using nuts, stir them into the topping.
Step 3: Assemble and Bake
Pour the apple mixture into a 9-inch square baking dish or pie plate. Sprinkle the crisp topping evenly over the apples. Make sure to cover every inch!
Bake for 30-40 minutes, or until the topping is golden brown and the apples are tender and bubbly. You might want to place a baking sheet underneath the dish to catch any drips.
Step 4: Cool and Serve
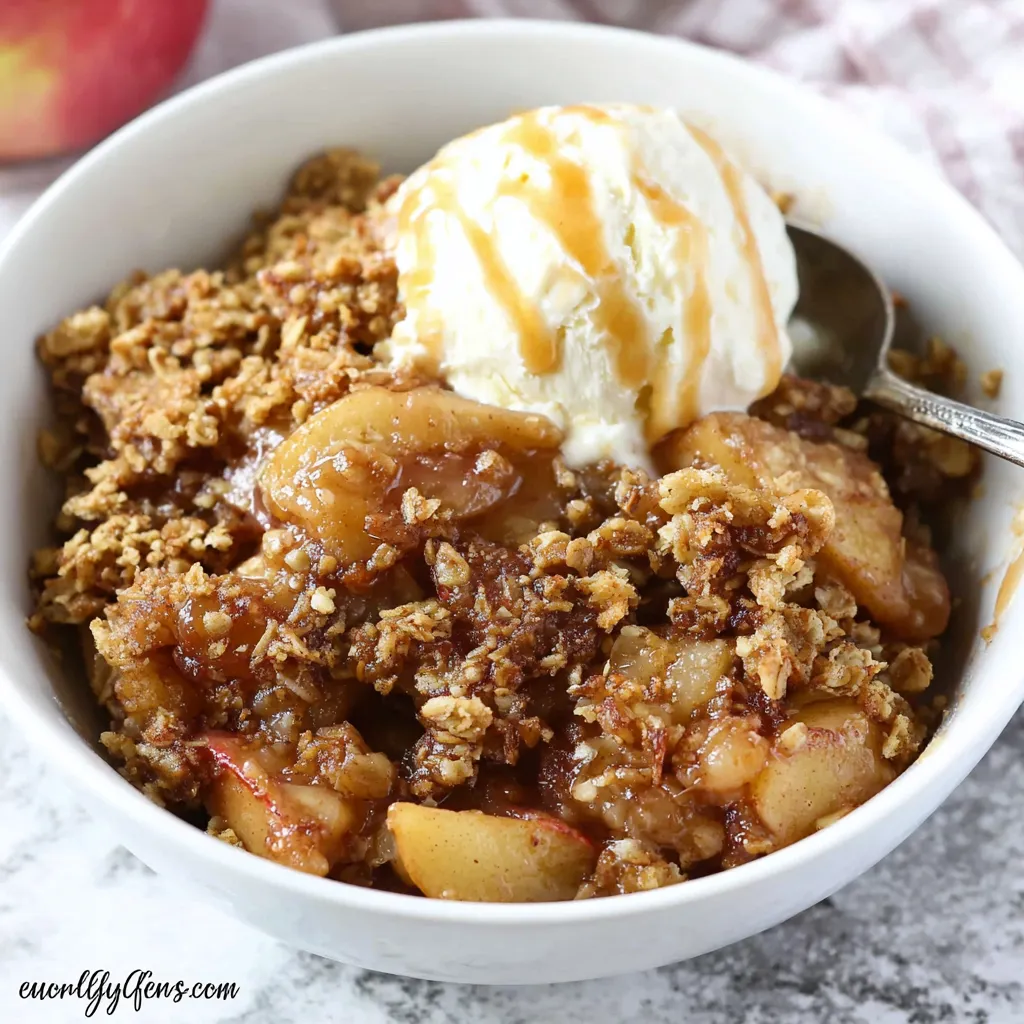
Let the apple crisp cool for at least 15 minutes before serving. This allows the filling to thicken slightly and prevents you from burning your tongue (trust me, I’ve been there!).
Serve warm, and if you’re feeling extra indulgent, top it with a scoop of vanilla ice cream or a dollop of whipped cream. Seriously, it’s heavenly!
Tips and Tricks for Apple Crisp Success
Okay, let’s talk about some insider tips to make your apple crisp even more amazing.
Apple Selection
As I mentioned earlier, a mix of apples is ideal. Granny Smith apples provide a nice tartness that balances the sweetness of the other apples. Honeycrisp apples add a juicy sweetness, and Gala apples offer a subtle flavor and tender texture. Feel free to experiment with other varieties like Fuji, Braeburn, or Pink Lady.
Spice It Up
Don’t be afraid to get creative with your spices! A pinch of ground ginger or cloves can add a warm, spicy kick. You can also use apple pie spice instead of cinnamon and nutmeg.
Oatmeal Options
I prefer rolled oats for the topping, but you can also use quick-cooking oats. Just be aware that they might create a slightly less crunchy topping.
Nutty Variations
Pecans and walnuts are my go-to nuts for apple crisp, but you can also use almonds, hazelnuts, or even macadamia nuts. Toasting the nuts before adding them to the topping will enhance their flavor.
Gluten-Free Apple Crisp
Want to make this recipe gluten-free? Simply substitute the all-purpose flour in both the filling and the topping with a gluten-free all-purpose flour blend. Make sure the blend contains xanthan gum for the best results.
Vegan Apple Crisp
To make this recipe vegan, use a vegan butter substitute in the topping and filling. You can also replace the butter in the filling with coconut oil.
Make-Ahead Tips
You can assemble the apple crisp ahead of time and store it in the refrigerator for up to 24 hours before baking. Just add a few minutes to the baking time.
You can also make the crisp topping ahead of time and store it in the refrigerator or freezer until ready to use.
Serving Suggestions and Creative Twists
This apple crisp is delicious on its own, but here are some fun ways to dress it up:
- Ice Cream: Vanilla, caramel, or cinnamon ice cream are all fantastic choices.
- Whipped Cream: A dollop of freshly whipped cream adds a touch of elegance.
- Caramel Sauce: Drizzle with caramel sauce for an extra decadent treat.
- Cinnamon Sugar: Sprinkle with cinnamon sugar for a simple yet satisfying topping.
- Chopped Nuts: Add a sprinkle of chopped nuts for extra crunch.
Looking for some creative twists on this classic recipe?
- Apple Cranberry Crisp: Add 1 cup of fresh or frozen cranberries to the apple filling for a festive twist.
- Apple Pear Crisp: Substitute half of the apples with pears for a unique flavor combination.
- Apple Ginger Crisp: Add 1 tablespoon of grated fresh ginger to the apple filling for a spicy kick.
- Salted Caramel Apple Crisp: Use salted caramel sauce instead of regular caramel sauce for a sweet and salty treat.
If you are in the mood for more fall flavors, give these recipes a try. You will definitely want to try these PUMPKIN MUFFINS . These are a simple and delicious treat for a cozy fall day. Another recipe you will love is these PUMPKIN COOKIES . If you are looking for a combination of flavors, then make sure to check out this APPLE PUMPKIN MUFFIN . And for a unique twist, these BROWN BUTTER PUMPKIN COOKIES are incredible. Are you a chocolate lover? Then these PUMPKIN CHOCOLATE DREAM will satisfy your craving. Lastly, if you love baking bread, then be sure to try this PUMPKIN BREAD .
Troubleshooting: Common Apple Crisp Problems and Solutions
Even with the easiest recipes, things can sometimes go awry. Here are some common problems and how to fix them:
- Topping is Too Dry: If the topping seems too dry and crumbly, add a tablespoon or two of melted butter or milk until it comes together.
- Topping is Too Wet: If the topping is too wet and sticky, add a tablespoon or two of flour or oats.
- Apples are Too Tart: If your apples are too tart, add a little more sugar to the filling.
- Apples are Too Soft: If your apples are too soft, use a firmer variety or reduce the baking time.
- Crisp is Burning: If the topping starts to brown too quickly, tent the dish with aluminum foil for the last 10-15 minutes of baking.
Final Thoughts: Enjoy Your Homemade Apple Crisp!
And there you have it! Your very own Easy Cozy Apple Crisp Recipe, ready to impress your family and friends (or just yourself!). Remember, baking is all about having fun and experimenting, so don’t be afraid to put your own spin on this recipe. Whether you’re enjoying it warm from the oven with a scoop of ice cream or saving it for a cozy afternoon treat, I hope this apple crisp brings you as much joy as it brings me.
What kind of apples are best to use for this apple crisp recipe?
A mix of tart and sweet apples is ideal. Granny Smith apples provide tartness, Honeycrisp add a juicy sweetness, and Gala apples offer a subtle flavor and tender texture. You can experiment with other varieties like Fuji, Braeburn, or Pink Lady.
Can I make this apple crisp gluten-free?
Yes! Simply substitute the all-purpose flour in both the filling and the topping with a gluten-free all-purpose flour blend. Make sure the blend contains xanthan gum for the best results.
How can I prevent the apple crisp topping from burning?
If the topping starts to brown too quickly, tent the dish with aluminum foil for the last 10-15 minutes of baking.
Can I prepare the apple crisp ahead of time?
Yes, you can assemble the apple crisp ahead of time and store it in the refrigerator for up to 24 hours before baking. Just add a few minutes to the baking time. You can also make the crisp topping ahead of time and store it in the refrigerator or freezer until ready to use.
EASIEST COZY APPLE CRISP
Ingredients
Equipment
Method
- Preheat your oven to 375°F (190°C).
- Peel, core, and slice the apples into about 1/4-inch thick pieces.
- Place the sliced apples in a large bowl.
- Add the granulated sugar, flour, cinnamon, nutmeg, and lemon juice to the bowl with the apples.
- Toss everything together until the apples are evenly coated.
- Dot the apples with the butter.
- In a separate bowl, combine the flour, oats, brown sugar, and cinnamon.
- Add the cold, cubed butter to the dry ingredients.
- Use your fingers or a pastry blender to cut the butter into the dry ingredients until the mixture resembles coarse crumbs. Don’t overmix!
- If using nuts, stir them into the topping.
- Pour the apple mixture into a 9-inch square baking dish or pie plate.
- Sprinkle the crisp topping evenly over the apples. Make sure to cover every inch!
- Bake for 30-40 minutes, or until the topping is golden brown and the apples are tender and bubbly. Place a baking sheet underneath the dish to catch any drips.
- Let the apple crisp cool for at least 15 minutes before serving.
