Unlocking the Molten Core: The Science Behind the Magic
The secret to a perfect lava cake boils down to a few key scientific principles: heat transfer, protein coagulation, and sugar caramelization. Unlike a regular cake where the goal is even baking throughout, the lava cake aims for a stark contrast: a fully cooked outer layer and a liquid center. This is achieved through a relatively short baking time at a high temperature. The heat quickly sets the proteins in the outer layer of the batter, creating a stable structure. However, the center doesn’t have enough time to fully cook. The sugar and fat content in the center remain molten, resulting in the signature lava flow. The higher fat content compared to something like a Sticky Toffee Pudding helps with keeping that center fluid. The role of eggs is also crucial; they contribute to the structure and richness, but too many will lead to a fully set cake. Achieving the perfect balance is essential.The Ultimate Chocolate Lava Cake Recipe
 This recipe has been tweaked and perfected through countless trials (and delicious errors!). It consistently delivers that molten center we all crave.
Ingredients:
- 4 ounces (115g) bittersweet chocolate, finely chopped (60-70% cacao)
- 4 ounces (115g) unsalted butter, cut into cubes
- 2 large eggs
- 2 large egg yolks
- 1/4 cup (50g) granulated sugar
- Pinch of salt
- 2 tablespoons (15g) all-purpose flour
- Powdered sugar, for dusting (optional)
Equipment:
- 4 (6-ounce) ramekins, greased and lightly floured (or cocoa powder)
- Double boiler or heatproof bowl and saucepan
- Mixing bowls
- Whisk
Instructions:
- Melt the Chocolate and Butter: In a double boiler or heatproof bowl set over a simmering pot of water (making sure the bowl doesn’t touch the water), melt the chocolate and butter together, stirring occasionally until smooth. Remove from heat and let cool slightly.
- Whisk Eggs and Sugar: In a separate bowl, whisk together the eggs, egg yolks, sugar, and salt until pale and slightly thickened. This usually takes about 2-3 minutes.
- Combine Wet and Dry Ingredients: Gently fold the melted chocolate mixture into the egg mixture until just combined. Do not overmix.
- Add Flour: Sift the flour over the chocolate mixture and gently fold until just incorporated. Be careful not to overmix; a few streaks of flour are okay. Overmixing will develop the gluten in the flour and result in a tougher cake.
- Fill Ramekins: Divide the batter evenly among the prepared ramekins.
- Bake: Bake in a preheated oven at 425°F (220°C) for 12-15 minutes. The edges should be set, but the center should still appear soft. The baking time will vary slightly depending on your oven, so keep a close eye on them. Don’t be afraid to check by gently wiggling a ramekin; the center should wobble. Consider that baking times could be affected if you just made Chocolate Covered Cherry Brownie Bombs right before this and the oven hasn’t fully recovered.
- Cool Slightly and Invert: Let the cakes cool in the ramekins for 1-2 minutes before inverting them onto serving plates. If they stick, gently run a thin knife around the edges to loosen them.
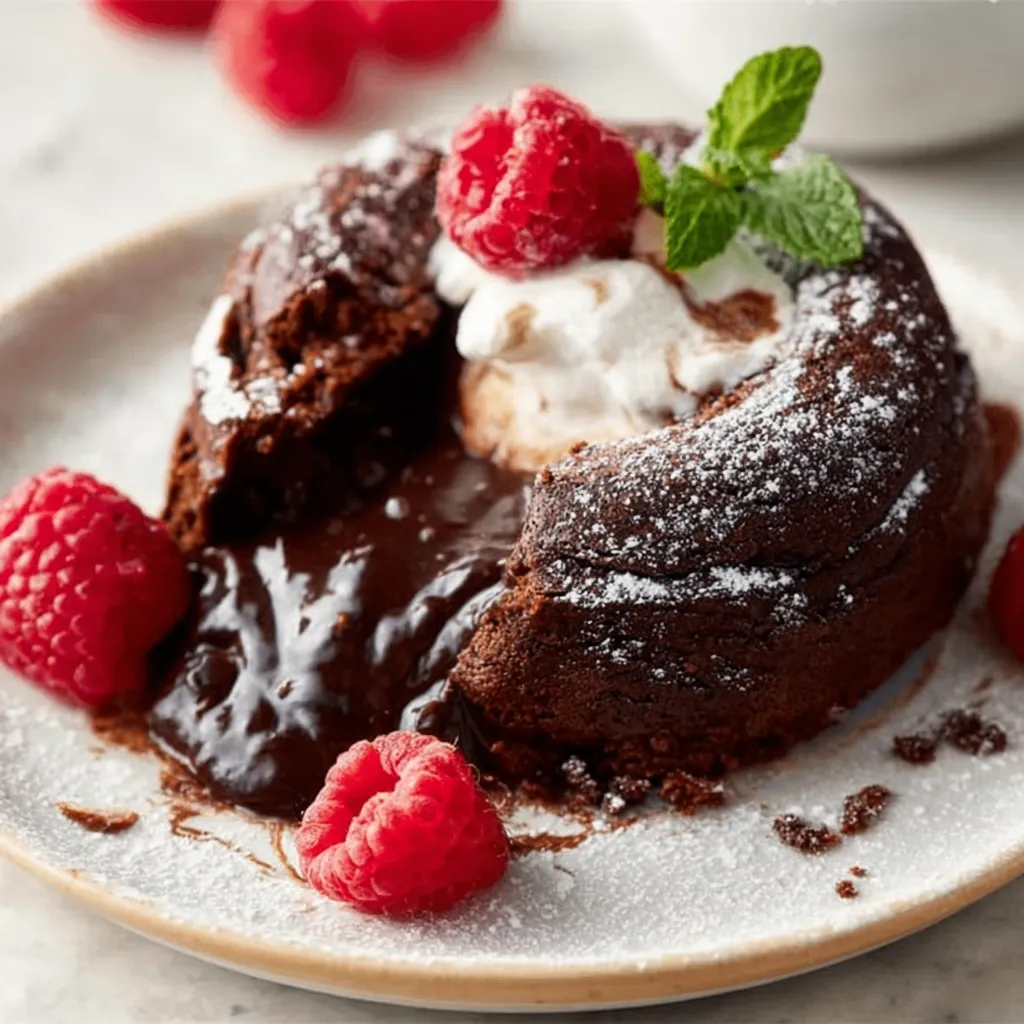
- Serve: Dust with powdered sugar, if desired, and serve immediately. A scoop of vanilla ice cream or a few fresh raspberries makes a delightful accompaniment. The richness is similar in some ways to Chocolate Raspberry Truffles.
My Quest for the Perfect Lava: A Culinary Investigation
My first few attempts were a disaster. I vividly remember the first batch – rock-solid all the way through. Then, I had an “Aha!” moment when I realized I was over-baking them. Like many of you, I initially thought the longer they baked, the more “done” they would be. I was wrong!The Initial Fails: Over-Baking and Under-Baking
My initial attempts resulted in either completely cooked cakes (disappointing!) or a soupy mess that wouldn’t hold its shape. I was following recipes blindly, not understanding the underlying principles. The first few times, I stubbornly stuck to the recommended baking time, even when I could clearly see the cakes were overdone. The under-baked versions were even more frustrating; they collapsed as soon as they were inverted.The Eureka Moment: Temperature and Timing
The turning point came when I started experimenting with oven temperature and baking time in tandem. I realized that a high oven temperature (425°F/220°C) was crucial for quickly setting the edges while leaving the center molten. But even more important was the timing. I started checking the cakes after 10 minutes, and then every minute after that, until I saw the edges were set but the center still looked soft. This required a lot of babysitting the oven, unlike when I make Red Velvet Blossoms Cookies.The Chocolate Conundrum: Choosing the Right Chocolate
Another crucial element was the type of chocolate. I initially used milk chocolate, which resulted in a cake that was too sweet and lacked the intense chocolate flavor I was looking for. Switching to bittersweet chocolate (around 60-70% cacao) made a world of difference. It provided the perfect balance of sweetness and bitterness, creating a richer and more complex flavor profile. Now, I tend to shy away from using milk chocolate unless I’m making something like Chocolate Peanut Butter Valentine’s Hearts.The Ramekin Riddle: Size Matters
I also experimented with different ramekin sizes. Smaller ramekins required less baking time, while larger ones needed a bit more. I found that 6-ounce ramekins were the sweet spot, providing the perfect portion size and baking time.The Foolproof Lava Cake Method: A Summary
After countless experiments, I’ve distilled the perfect lava cake technique into these simple steps:- Melt Chocolate and Butter Properly: Use a double boiler or a heatproof bowl over simmering water to ensure the chocolate and butter melt smoothly and evenly without burning.
- Whisk Eggs and Sugar Thoroughly: Whisk the eggs, egg yolks, and sugar until pale and slightly thickened. This incorporates air into the batter, creating a lighter texture.
- Don’t Overmix: Gently fold the wet and dry ingredients together until just combined. Overmixing develops gluten and results in a tougher cake.
- Prepare Ramekins Well: Grease and flour (or cocoa powder) the ramekins thoroughly to prevent the cakes from sticking.
- Bake at High Heat: Bake at 425°F (220°C) for 12-15 minutes. Watch the cakes closely and adjust the baking time as needed.
- Cool Briefly Before Inverting: Let the cakes cool in the ramekins for 1-2 minutes before inverting them. This allows them to set slightly, making them easier to release.
- Serve Immediately: Lava cakes are best served warm, right after they’re made.
What is the key to achieving the perfect molten center in a chocolate lava cake?
The key is a short baking time at a high temperature (425°F/220°C). This allows the edges to set while the center remains molten due to its high sugar and fat content.
What kind of chocolate is recommended for a chocolate lava cake and why?
Bittersweet chocolate (60-70% cacao) is recommended because it provides the perfect balance of sweetness and bitterness, creating a richer and more complex chocolate flavor compared to milk chocolate.
Why is it important not to overmix the batter when making chocolate lava cake?
Overmixing develops the gluten in the flour, which results in a tougher cake instead of the desired soft and delicate texture.
What size ramekins are recommended for making chocolate lava cakes, and how does the size affect baking time?
6-ounce ramekins are recommended. Smaller ramekins require less baking time, while larger ramekins need more.
Irresistible Chocolate Lava Cake
Indulge in a decadent chocolate lava cake with a perfectly molten center. This recipe provides a foolproof method for achieving the ideal balance of a set exterior and a flowing, intensely chocolatey interior, creating an unforgettable dessert experience.
Ingredients
Equipment
Method
- Melt the Chocolate and Butter: In a double boiler or heatproof bowl set over a simmering pot of water (making sure the bowl doesn’t touch the water), melt the chocolate and butter together, stirring occasionally until smooth. Remove from heat and let cool slightly.
- Whisk Eggs and Sugar: In a separate bowl, whisk together the eggs, egg yolks, sugar, and salt until pale and slightly thickened. This usually takes about 2-3 minutes.
- Combine Wet and Dry Ingredients: Gently fold the melted chocolate mixture into the egg mixture until just combined. Do not overmix.
- Add Flour: Sift the flour over the chocolate mixture and gently fold until just incorporated. Be careful not to overmix; a few streaks of flour are okay. Overmixing will develop the gluten in the flour and result in a tougher cake.
- Fill Ramekins: Divide the batter evenly among the prepared ramekins.
- Bake: Bake in a preheated oven at 425°F (220°C) for 12-15 minutes. The edges should be set, but the center should still appear soft. The baking time will vary slightly depending on your oven, so keep a close eye on them. Don’t be afraid to check by gently wiggling a ramekin; the center should wobble.
- Cool Slightly and Invert: Let the cakes cool in the ramekins for 1-2 minutes before inverting them onto serving plates. If they stick, gently run a thin knife around the edges to loosen them.
- Serve: Dust with powdered sugar, if desired, and serve immediately.
Notes
For best results, use high-quality bittersweet chocolate. Adjust baking time based on your oven and ramekin size. Serve immediately for the optimal molten lava experience. A scoop of vanilla ice cream or fresh raspberries makes a delightful accompaniment. Ramekins can be greased with butter or cooking spray, and dusted with flour or cocoa powder to prevent sticking. Do not overmix the batter, as this will result in a tougher cake. Watch the cakes closely during baking to ensure the edges are set but the center remains molten.
