I’ll always remember being huddled around the kitchen island with my mom and sisters, the scent of peppermint filling the air as we carefully layered crushed candy canes onto a creamy white filling; it wasn’t Christmas until we made our annual Christmas Peppermint Pie. The cool, refreshing flavor against the richness of the chocolate crust was just pure holiday magic. And trust me, friend, you’re about to experience that same magic in your own kitchen – this recipe is seriously foolproof and utterly delicious!
The Ultimate Christmas Peppermint Pie: A Friend’s Guide

Hey there, baking buddy! I’m so excited you’re here, ready to tackle this incredibly festive and surprisingly simple Christmas Peppermint Pie. I know, pies can sometimes seem intimidating, but honestly, this one is a total breeze. We’re talking minimal effort, maximum impact, and a whole lot of “oohs” and “aahs” when you serve it up.
I’ve made this pie countless times, and I’ve learned a few tricks along the way to ensure your pie is picture-perfect and absolutely scrumptious. So, grab your apron, crank up the Christmas tunes, and let’s get baking!
Why This Christmas Peppermint Pie is a Must-Make
Okay, before we dive into the nitty-gritty, let’s talk about why this pie deserves a spot on your holiday dessert table. Besides the obvious deliciousness, here’s what makes it a winner:
- Festive Flavors: Peppermint and chocolate are the ultimate Christmas power couple. The cool, refreshing peppermint perfectly complements the rich, decadent chocolate, creating a flavor explosion in every bite.
- Easy to Make: Seriously, this pie is SO easy. No finicky pastry crusts, no complicated techniques. We’re keeping it simple and stress-free.
- Make-Ahead Friendly: This pie is actually *better* when made ahead of time! It needs a few hours to chill and set, so it’s perfect for prepping the day before your holiday gathering.
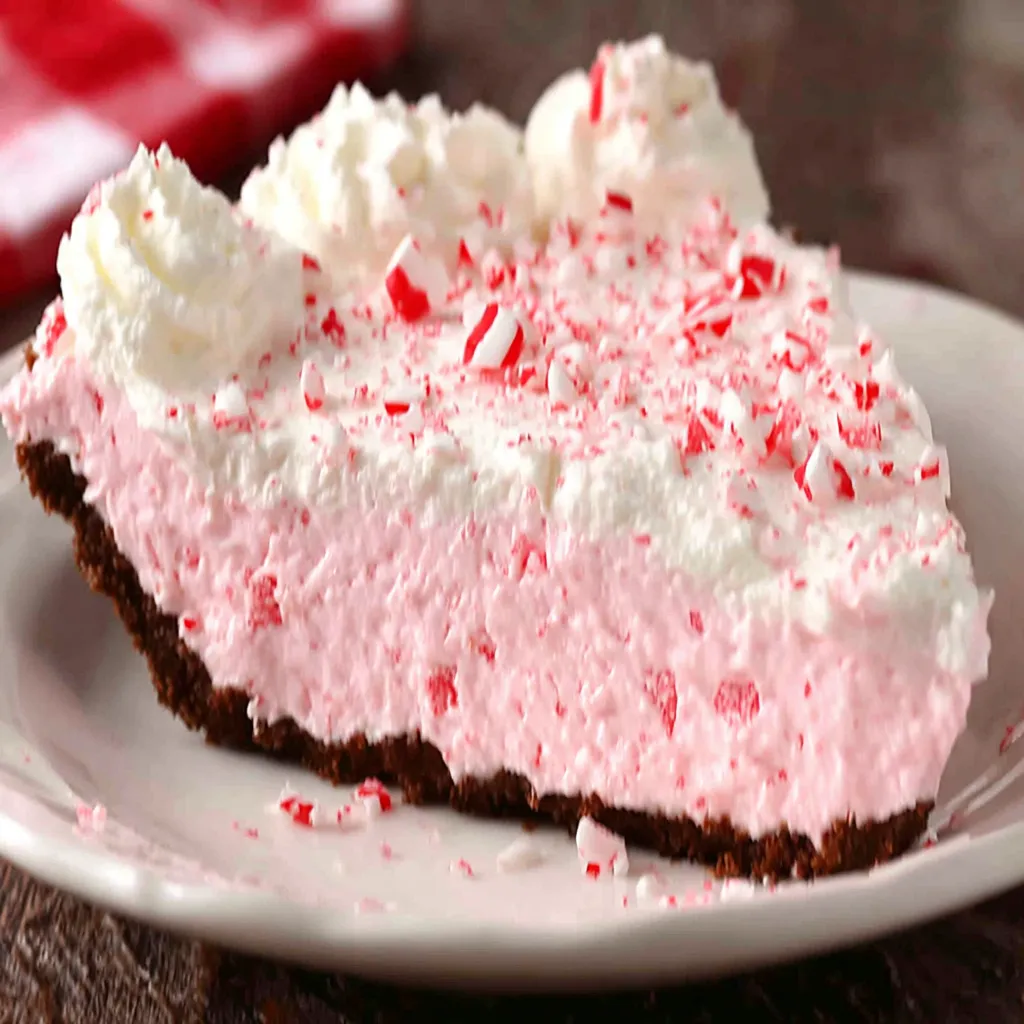
- Impressive Presentation: With its vibrant red and white candy cane topping, this pie is a showstopper. It looks like you spent hours slaving away in the kitchen, even though it only took minutes!
- Crowd-Pleaser: Trust me, everyone will love this pie. It’s the perfect balance of sweet, refreshing, and indulgent, making it a hit with both kids and adults.
What You’ll Need: The Ingredients Breakdown
Let’s gather our ingredients! Don’t worry, the list is short and sweet:
For the Chocolate Crust:
- Chocolate Cookie Crumbs: You can use store-bought chocolate cookie crumbs (like Oreo crumbs with the filling removed) or make your own by crushing chocolate cookies in a food processor.
- Melted Butter: Unsalted butter is best, as it allows you to control the amount of salt in the crust.
- Sugar: Just a touch of granulated sugar to add a little sweetness.
For the Peppermint Filling:
- Cream Cheese: Make sure it’s softened to room temperature for a smooth and creamy filling.
- Powdered Sugar: Also known as confectioners’ sugar, this will give the filling its sweetness and structure.
- Heavy Cream: This is what makes the filling rich and decadent. Make sure it’s cold for easy whipping.
- Peppermint Extract: A little goes a long way! Start with a small amount and add more to taste.
- Crushed Candy Canes: For that iconic peppermint flavor and festive look.
Step-by-Step: Making Your Christmas Peppermint Pie
Alright, let’s get down to business! Here’s how to make this incredible pie, step-by-step:
Step 1: Prepare the Chocolate Crust
- In a medium bowl, combine the chocolate cookie crumbs, melted butter, and sugar. Mix well until evenly moistened.
- Press the mixture into the bottom and up the sides of a 9-inch pie plate. I like to use the bottom of a measuring cup to help press it firmly and evenly.
- Bake the crust in a preheated oven at 350°F (175°C) for 8-10 minutes. This will help it set and prevent it from becoming soggy.
- Let the crust cool completely before adding the filling. This is crucial! A warm crust will melt the filling.
Step 2: Make the Peppermint Filling
- In a large bowl, beat the softened cream cheese with an electric mixer until smooth and creamy.
- Gradually add the powdered sugar, beating until well combined.
- In a separate bowl, whip the cold heavy cream until stiff peaks form. This is important for the filling to set properly.
- Gently fold the whipped cream into the cream cheese mixture. Be careful not to overmix, as this can deflate the whipped cream.
- Stir in the peppermint extract. Start with 1/2 teaspoon and add more to taste. Remember, peppermint extract is strong!
- Fold in about half of the crushed candy canes.
Step 3: Assemble and Chill the Pie
- Pour the peppermint filling into the cooled chocolate crust.
- Sprinkle the remaining crushed candy canes over the top of the pie.
- Cover the pie with plastic wrap and refrigerate for at least 4 hours, or preferably overnight. This will allow the filling to set completely.
Step 4: Serve and Enjoy!
- Remove the pie from the refrigerator about 15-20 minutes before serving to soften it slightly.
- Slice and serve! Garnish with extra crushed candy canes or a dollop of whipped cream, if desired.
Troubleshooting and Tips for Pie Perfection
Okay, let’s be real. Baking isn’t always sunshine and rainbows. Here are a few common issues you might encounter and how to fix them:
- Soggy Crust: Make sure to bake the crust before adding the filling. This will help it crisp up and prevent it from becoming soggy. You can also brush the cooled crust with melted chocolate to create a moisture barrier.
- Lumpy Filling: Make sure your cream cheese is softened to room temperature before mixing. If you still end up with lumps, try beating the cream cheese on high speed for a few minutes until smooth.
- Runny Filling: Make sure you whip the heavy cream to stiff peaks. This is essential for the filling to set properly. Also, don’t overmix the filling after adding the whipped cream.
- Not Enough Peppermint Flavor: Start with a small amount of peppermint extract and add more to taste. Remember, you can always add more, but you can’t take it away!
- Candy Canes Melting: If you’re worried about the candy canes melting, you can wait to add them until just before serving.
Variations and Adaptations: Make it Your Own!
One of the best things about this recipe is that it’s super adaptable! Here are a few ideas to get your creative juices flowing:
- Different Crust: Try using a graham cracker crust, an Oreo crust (with the filling!), or even a gluten-free crust.
- Chocolate Chips: Add some mini chocolate chips to the filling for extra chocolatey goodness.
- Peppermint Bark: Top the pie with chunks of peppermint bark instead of crushed candy canes.
- Liqueur: Add a tablespoon or two of peppermint schnapps to the filling for an extra kick.
- Vegan Option: Use vegan cream cheese, vegan butter, and a vegan cookie crust to make this pie vegan-friendly.
Serving Suggestions and Pairings
This Christmas Peppermint Pie is delicious on its own, but here are a few ideas to take it to the next level:
- Whipped Cream: A dollop of freshly whipped cream is always a welcome addition.
- Chocolate Sauce: Drizzle with chocolate sauce for an extra decadent treat.
- Coffee or Hot Chocolate: The perfect warm beverage to complement the cool, refreshing pie.
- Ice Cream: Serve with a scoop of vanilla or chocolate ice cream for an extra indulgent dessert.
While you’re in the Christmas baking spirit, why not try some other festive treats? My Grinch Oreo Truffles are always a hit, and they’re so fun to make with kids. Or, if you’re feeling ambitious, bake up a batch of Candy Cane Cookies. Need a double dose? Check out these Perfect Candy Cane Cookies. They are delicious and festive. For a savory and sweet combo, try the Christmas Cheesecake Cranberry Jam. Another incredibly addictive treat is Christmas Crack. If you love cheesecake, you might also enjoy my Sugar Cookie Cheesecake.
Frequently Asked Questions (FAQ)
Got questions? I’ve got answers! Here are some of the most common questions I get about this Christmas Peppermint Pie:
Q: Can I use a store-bought crust?
A: Absolutely! A store-bought chocolate cookie crust or graham cracker crust will work just fine. Just make sure to bake it according to the package directions.
Q: How long does this pie last in the refrigerator?
A: This pie will keep in the refrigerator for up to 3-4 days.
Q: Can I freeze this pie?
A: Yes, you can freeze this pie! Wrap it tightly in plastic wrap and then foil, and it will keep in the freezer for up to 2-3 months. Thaw it in the refrigerator overnight before serving.
Q: Can I use peppermint oil instead of peppermint extract?
A: Peppermint oil is much more potent than peppermint extract, so use it sparingly. Start with just a drop or two and add more to taste.
Q: My candy canes are sticking together. How can I crush them easily?
A: Place the candy canes in a resealable bag and crush them with a rolling pin or meat mallet. You can also pulse them in a food processor.
Share Your Christmas Peppermint Pie Creations!
I can’t wait to see your Christmas Peppermint Pie masterpieces! Be sure to snap a photo and share it with me on social media using #ChristmasPeppermintPie and tagging my handle. I love seeing your creations and hearing how much you enjoyed the recipe!
Final Thoughts: Enjoy the Baking Journey!
Remember, baking is all about having fun and creating something delicious to share with loved ones. Don’t be afraid to experiment, get creative, and make this Christmas Peppermint Pie your own. Most importantly, enjoy the process and savor every bite of your homemade holiday treat!
Can I prepare the Christmas Peppermint Pie in advance?
Yes, this pie is actually better when made ahead of time! It needs a few hours to chill and set, so it’s perfect for prepping the day before your holiday gathering.
What can I do to prevent a soggy crust?
Make sure to bake the crust before adding the filling. This will help it crisp up and prevent it from becoming soggy. You can also brush the cooled crust with melted chocolate to create a moisture barrier.
How long will the Christmas Peppermint Pie last in the fridge?
This pie will keep in the refrigerator for up to 3-4 days.
Is it possible to freeze the Christmas Peppermint Pie?
Yes, you can freeze this pie! Wrap it tightly in plastic wrap and then foil, and it will keep in the freezer for up to 2-3 months. Thaw it in the refrigerator overnight before serving.
Easy Christmas Peppermint Pie
Ingredients
Equipment
Method
- Preheat oven to 350°F (175°C).
- In a medium bowl, combine chocolate cookie crumbs, melted butter, and sugar. Mix well until evenly moistened.
- Press the mixture into the bottom and up the sides of a 9-inch pie plate.
- Bake the crust for 8-10 minutes. Let the crust cool completely before adding the filling.
- In a large bowl, beat the softened cream cheese with an electric mixer until smooth and creamy.
- Gradually add the powdered sugar, beating until well combined.
- In a separate bowl, whip the cold heavy cream until stiff peaks form.
- Gently fold the whipped cream into the cream cheese mixture. Be careful not to overmix.
- Stir in the peppermint extract.
- Fold in about half of the crushed candy canes.
- Pour the peppermint filling into the cooled chocolate crust.
- Sprinkle the remaining crushed candy canes over the top of the pie.
- Cover the pie with plastic wrap and refrigerate for at least 4 hours, or preferably overnight, to allow the filling to set completely.
- Remove the pie from the refrigerator about 15-20 minutes before serving to soften it slightly.
- Slice and serve. Garnish with extra crushed candy canes or a dollop of whipped cream, if desired.
