Ingredients
For the Snowballs:
- 1 (14 ounce) can sweetened condensed milk
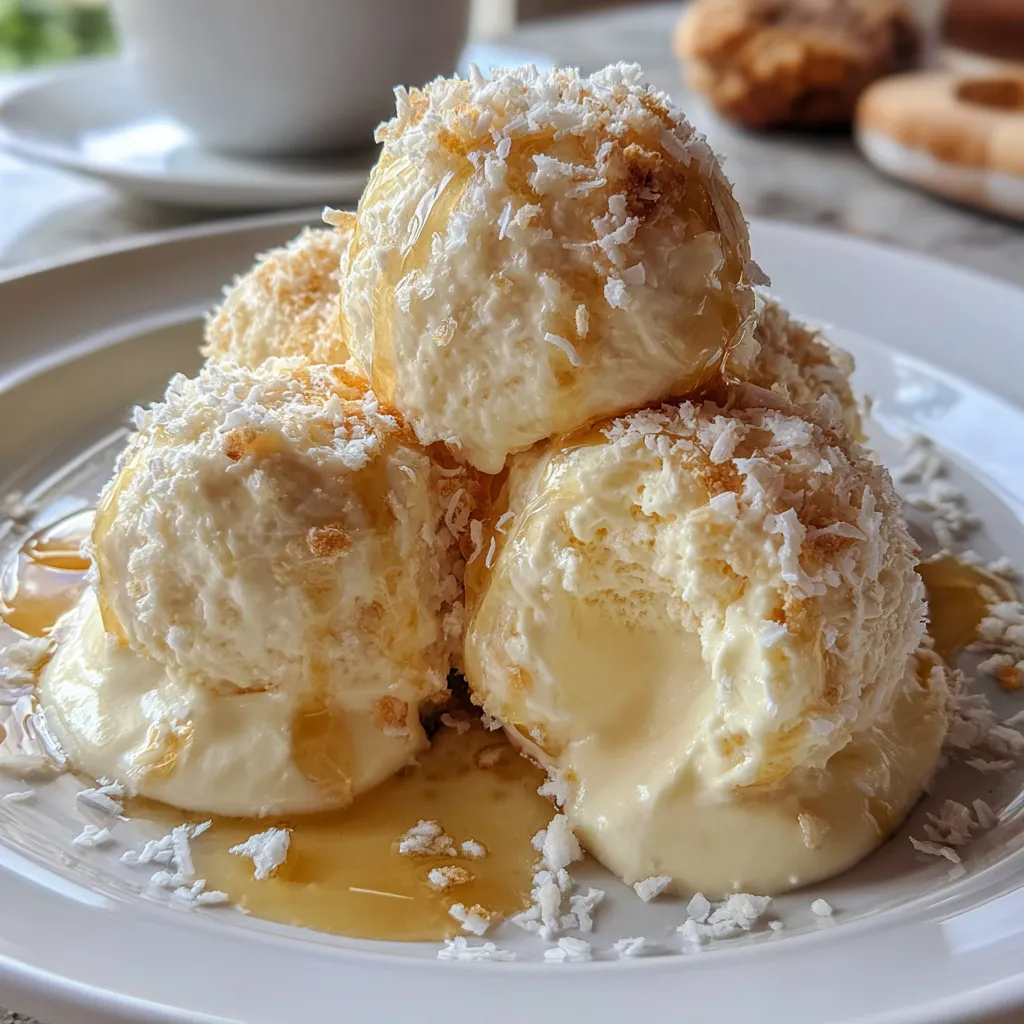
- 1 (7 ounce) package sweetened shredded coconut, plus more for rolling
- 1 teaspoon vanilla extract
- Pinch of salt
Optional Garnishes:
- Maraschino cherries, halved
- Pecans or walnuts, chopped
- Sprinkles (for a colorful twist!)
Let’s Talk Sweetened Condensed Milk (The Star of the Show!)

Okay, friend, let’s get real about sweetened condensed milk. It’s the magic ingredient that holds these snowballs together, giving them that rich, sweet flavor and perfectly chewy texture. Make sure you grab SWEETENED condensed milk, not evaporated milk – they are NOT the same! Evaporated milk won’t give you the sweetness or the binding power we need. Trust me, I’ve made that mistake before (we all have our kitchen fails!).
Gather Your Tools (Keep it Simple!)
You won’t need any fancy equipment for this recipe, which is just one reason I adore it. Here’s what you’ll want to have on hand:
- Large mixing bowl
- Measuring cups and spoons
- Baking sheet
- Parchment paper or silicone mat (optional, but helps prevent sticking)
- Small bowl for extra coconut (for rolling)
Step-by-Step Instructions
Alright, let’s get rolling (literally!). Here’s how to make these Sweetened Condensed Milk Snowballs:
Step 1: Mix It Up
- In a large mixing bowl, combine the sweetened condensed milk, shredded coconut, vanilla extract, and salt.
- Stir everything together until well combined. It should be a sticky, shaggy mixture.
Step 2: Chill Out (Important!)
- Cover the bowl with plastic wrap and refrigerate for at least 30 minutes. This is crucial! Chilling the mixture helps it firm up, making it much easier to roll into balls. If you skip this step, you’ll end up with a sticky mess (again, speaking from experience!).
Step 3: Roll ‘Em Up
- Place the extra shredded coconut in a small bowl.
- Take a spoonful of the chilled coconut mixture (about 1-2 tablespoons) and roll it between your palms to form a ball. Don’t worry if they’re not perfectly round – snowballs aren’t!
- Immediately roll the snowball in the extra shredded coconut, making sure it’s fully coated.
- Place the coated snowball on a baking sheet lined with parchment paper or a silicone mat.
- Repeat with the remaining mixture.
Step 4: Add Some Sparkle (Optional!)
- If you’re using garnishes, gently press a halved maraschino cherry or a few chopped pecans into the top of each snowball. Sprinkles would also be a fun addition!
Step 5: Chill Again (For Best Results!)
- Refrigerate the snowballs for another 15-20 minutes before serving. This helps them set up even more and prevents them from getting too soft at room temperature.
Tips and Tricks for Snowball Success
- Don’t overmix: Overmixing can make the coconut mixture tough. Just mix until everything is combined.
- Adjust sweetness to taste: If you prefer a less sweet snowball, you can reduce the amount of sweetened condensed milk slightly.
- Get creative with flavors: Add a few drops of almond extract or peppermint extract for a different flavor profile. You could also mix in some chopped dried cranberries or chocolate chips.
- Make them ahead: These snowballs can be made a day or two in advance. Just store them in an airtight container in the refrigerator.
- Freezing: Yes, you can freeze them! Place the snowballs in a single layer on a baking sheet and freeze until solid. Then transfer them to a freezer bag or container. They’ll keep for up to 2 months. Let them thaw in the refrigerator before serving.
Variations: Let’s Get Creative!
The beauty of this recipe is its simplicity and how easy it is to customize! Here are a few ideas to get your creative juices flowing:
- Chocolate Snowballs: Add a tablespoon or two of cocoa powder to the coconut mixture.
- Peppermint Snowballs: Add 1/4 teaspoon of peppermint extract and crushed candy canes to the coconut mixture.
- Lemon Snowballs: Add the zest of one lemon and a teaspoon of lemon extract to the coconut mixture.
- Nutella Snowballs: Swirl a teaspoon of Nutella into each snowball before rolling it in coconut.
Serving Suggestions
These Sweetened Condensed Milk Snowballs are perfect for:
- Holiday parties
- Cookie exchanges
- Gifting to friends and neighbors
- A sweet treat after dinner
- Anytime you need a quick and easy dessert!
Storing Your Snowballs
Store your Sweetened Condensed Milk Snowballs in an airtight container in the refrigerator for up to a week. They’re best served cold or at room temperature (but not too warm!).
More Holiday Treats You’ll Love
If you’re looking for more easy and delicious holiday treats, be sure to check out these recipes:
- Try these easy Cinnamon Roll Cookies.
- Also, who can resist 3-ingredient Fudge?
- Or, maybe this Sugar Cookie Cheesecake is more your style.
- Don’t forget Christmas Puppy Chow!
- You’ll also love Christmas Cracker Candy.
- And these Christmas Cranberry Roll-ups are always a crowd pleaser.
Troubleshooting: Common Problems and Solutions
- Snowballs are too sticky: This usually means the coconut mixture wasn’t chilled long enough. Pop it back in the refrigerator for another 30 minutes.
- Snowballs are too dry: Add a tablespoon of sweetened condensed milk at a time until the mixture comes together.
- Coconut isn’t sticking: Gently press the coconut onto the snowballs to help it adhere. You can also lightly dampen your hands before rolling the snowballs.
Final Thoughts
These Sweetened Condensed Milk Snowballs are truly one of the easiest and most satisfying holiday treats you can make. They’re perfect for involving kids in the kitchen, and they always bring a smile to everyone’s face. So, gather your ingredients, put on some festive music, and get ready to create some sweet memories!
Can I substitute evaporated milk for sweetened condensed milk in this recipe?
No, you cannot substitute evaporated milk for sweetened condensed milk. Sweetened condensed milk is essential for the recipe because it provides the sweetness and binding power needed for the snowballs to hold their shape and have the correct texture.
How long can I store the Sweetened Condensed Milk Snowballs?
You can store the snowballs in an airtight container in the refrigerator for up to a week. They are best served cold or at room temperature.
The recipe says to chill the mixture. Why is this step so important?
Chilling the coconut mixture is crucial because it helps the mixture firm up, making it much easier to roll into balls. Skipping this step will result in a sticky mess.
Can I freeze the Sweetened Condensed Milk Snowballs?
Yes, you can freeze them. Place the snowballs in a single layer on a baking sheet and freeze until solid. Then transfer them to a freezer bag or container. They’ll keep for up to 2 months. Let them thaw in the refrigerator before serving.
Sweetened Condensed Milk Snowballs
Ingredients
Equipment
Method
- In a large mixing bowl, combine the sweetened condensed milk, shredded coconut, vanilla extract, and salt.
- Stir everything together until well combined. It should be a sticky mixture.
- Cover the bowl with plastic wrap and refrigerate for at least 30 minutes.
- Place the extra shredded coconut in a small bowl.
- Take a spoonful of the chilled coconut mixture (about 1-2 tablespoons) and roll it between your palms to form a ball.
- Immediately roll the snowball in the extra shredded coconut, making sure it’s fully coated.
- Place the coated snowball on a baking sheet lined with parchment paper or a silicone mat.
- Repeat with the remaining mixture.
- If using garnishes, gently press a halved maraschino cherry or a few chopped pecans into the top of each snowball. Sprinkles can also be added.
- Refrigerate the snowballs for another 15-20 minutes before serving.
