I’ll never forget the Thanksgiving when I decided to ditch the traditional pumpkin pie and try something completely different. My aunt, bless her heart, raised an eyebrow, but one bite of that rich, decadent dessert had everyone begging for the recipe. Today, I’m sharing all my secrets for the most amazing Brown Butter Pumpkin Chocolate Dream you’ll ever make!
Unlocking the Magic of Brown Butter Pumpkin Chocolate Dream
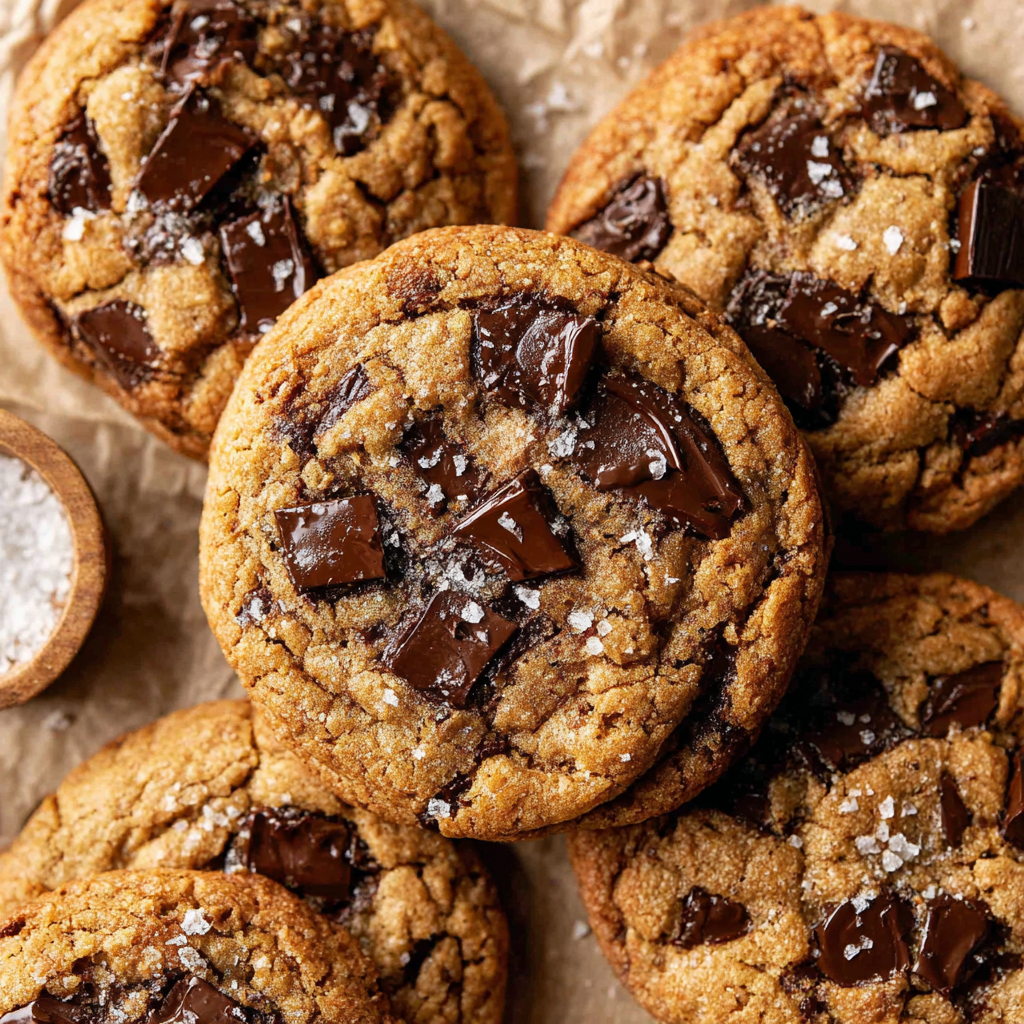
Oh, my friend, prepare to be amazed! This isn’t just another pumpkin recipe; it’s a symphony of flavors and textures that will dance across your taste buds. We’re talking nutty, caramelized brown butter, the warm spice of pumpkin, and the satisfying intensity of dark chocolate. Trust me, this recipe is a showstopper, perfect for holidays, gatherings, or even just a cozy night in.
The beauty of this Brown Butter Pumpkin Chocolate Dream lies in its simplicity, even though it tastes incredibly complex. Don’t be intimidated by the “brown butter” part; I’m going to walk you through it step-by-step, so you’ll be browning butter like a pro in no time!
What Makes This Recipe Special?
- Brown Butter Depth: Browning the butter elevates the flavor profile to a whole new level, adding a nutty, toasty dimension that complements the pumpkin beautifully.
- Perfect Pumpkin Balance: We use just the right amount of pumpkin puree to create a moist and tender texture without overpowering the other flavors.
- Rich Chocolate Indulgence: High-quality dark chocolate chunks provide a delightful contrast to the sweetness of the pumpkin and the richness of the brown butter.
- Versatility: This recipe is incredibly versatile! You can adapt it to your liking by adding different spices, nuts, or even a swirl of cream cheese frosting.
Let’s Get Baking: Step-by-Step Instructions
Alright, apron on, music up, and let’s dive into this delicious adventure! I’m going to break down each step to ensure your Brown Butter Pumpkin Chocolate Dream is an absolute success. Remember, baking is a science, but it’s also an art, so don’t be afraid to experiment and have fun!
Ingredients You’ll Need:
- 1 cup (2 sticks) unsalted butter
- 1 ½ cups granulated sugar
- ½ cup packed light brown sugar
- 2 large eggs
- 1 teaspoon vanilla extract
- 1 cup pumpkin puree (not pumpkin pie filling)
- 2 ¼ cups all-purpose flour
- 1 teaspoon baking soda
- 1 teaspoon ground cinnamon
- ½ teaspoon ground nutmeg
- ¼ teaspoon ground cloves
- ½ teaspoon salt
- 1 ½ cups dark chocolate chunks or chocolate chips
Instructions:
- Brown the Butter: Place the butter in a light-colored saucepan over medium heat. Watch closely as it melts. It will bubble and foam.
- Keep Watching: Continue cooking until the foam subsides and the butter turns a golden-brown color. Swirl the pan occasionally to ensure even browning.
- Smell the Magic: You’ll notice a nutty aroma. This is when you know the butter is perfectly browned. Remove from heat immediately and pour into a heatproof bowl to stop the cooking process. Let it cool slightly, about 10-15 minutes.
- Cream the Sugars: In a large bowl (or the bowl of a stand mixer), combine the granulated sugar, brown sugar, and cooled brown butter.
- Beat Until Fluffy: Beat the mixture on medium speed until light and fluffy, about 3-5 minutes. This step is crucial for creating a tender crumb.
- Add the Eggs: Beat in the eggs one at a time, mixing well after each addition.
- Incorporate Vanilla and Pumpkin: Stir in the vanilla extract and pumpkin puree until well combined. The mixture will look slightly curdled at this point, but don’t worry, it will come together!
- Combine Dry Ingredients: In a separate bowl, whisk together the flour, baking soda, cinnamon, nutmeg, cloves, and salt.
- Gradually Add Dry Ingredients: Gradually add the dry ingredients to the wet ingredients, mixing on low speed until just combined. Be careful not to overmix.
- Fold in Chocolate: Gently fold in the dark chocolate chunks or chocolate chips.
- Chill the Dough: Cover the bowl with plastic wrap and chill the dough in the refrigerator for at least 30 minutes. This helps to prevent the cookies from spreading too much during baking. I often chill it for an hour, or even overnight!
- Preheat Oven: Preheat your oven to 375°F (190°C). Line baking sheets with parchment paper.
- Scoop and Bake: Scoop rounded tablespoons of dough onto the prepared baking sheets, leaving about 2 inches between each cookie.
- Bake to Perfection: Bake for 10-12 minutes, or until the edges are golden brown and the centers are set.
- Cool and Enjoy: Let the cookies cool on the baking sheets for a few minutes before transferring them to a wire rack to cool completely.
- Optional Glaze: Drizzle with a simple glaze made of powdered sugar and milk for an extra touch of sweetness.
Success Tips for Your Brown Butter Pumpkin Chocolate Dream
Now, for the golden nuggets of wisdom that will guarantee baking success! These tips are based on years of baking experience, and they’ll help you avoid common pitfalls and achieve cookie perfection.
- The Secret to Brown Butter: Don’t walk away from the stove! Browning butter requires constant attention. Watch for the color change and listen for the nutty aroma. If you burn the butter, you’ll have to start over.
- Chill Time is Crucial: Don’t skip the chilling step! Chilling the dough allows the flavors to meld together and prevents the cookies from spreading too thin.
- Don’t Overbake: Overbaked cookies are dry and crumbly. Pull them from the oven when the edges are golden brown and the centers still look slightly soft. They will continue to bake as they cool.
- High-Quality Chocolate Matters: Use good-quality dark chocolate chunks for the best flavor. The higher the cocoa percentage, the richer the chocolate will be.
- Make-Ahead & Freezing Instructions: You can make the dough ahead of time and store it in the refrigerator for up to 3 days. You can also freeze the dough for up to 2 months. Just thaw it in the refrigerator overnight before baking. Baked cookies can also be frozen for up to 2 months.
Variations & Additions to Spice Things Up
Okay, so you’ve mastered the basic recipe? Fantastic! Now it’s time to get creative and explore some delicious variations. Here are a few ideas to get your culinary juices flowing:
- Nutty Delight: Add ½ cup of chopped pecans or walnuts to the dough for a crunchy texture and nutty flavor.
- Spiced Up: Add ¼ teaspoon of ground ginger or allspice to the dry ingredients for a more intense spice flavor.
- Cream Cheese Swirl: Beat together 4 ounces of softened cream cheese with ¼ cup of powdered sugar and a splash of vanilla extract. Swirl dollops of the cream cheese mixture into the cookie dough before baking.
- Espresso Kick: Add 1 tablespoon of instant espresso powder to the dry ingredients for a subtle coffee flavor that complements the chocolate beautifully.
- Maple Magic: Drizzle the baked cookies with a maple glaze made from powdered sugar, maple syrup, and a touch of milk.
Troubleshooting Common Baking Issues
Even the most experienced bakers encounter bumps in the road. Here are some common problems you might encounter when making this recipe and how to fix them:
- Cookies are too flat: This is usually caused by not chilling the dough long enough or by using too much butter. Make sure to chill the dough for at least 30 minutes and measure the butter accurately.
- Cookies are too dry: This can be caused by overbaking or by using too much flour. Don’t overbake the cookies, and measure the flour correctly by spooning it into the measuring cup and leveling it off with a knife.
- Cookies are too cakey: This can be caused by using too much baking soda or by overmixing the dough. Use the correct amount of baking soda and mix the dough until just combined.
- Butter Separated: If your butter separates after browning you may have had the heat on too high. Don’t worry it can be saved, simply place the butter in the fridge to slightly solidify. Then when you cream it with the sugar it will cream as if it were regular butter.
Speaking of delightful dessert combinations, have you ever tried Fried Strawberry Cheesecake Sandwiches? It is a different type of indulgence but equally satisfying! The crispy, creamy, fruity goodness is a total winner, especially during warmer months.
Understanding the Science Behind the Deliciousness
Let’s nerd out for a second and explore the science behind why this recipe works so well! Understanding the role of each ingredient will make you a better baker and allow you to adapt recipes to your own preferences.
- Butter: Butter provides richness, flavor, and tenderness to the cookies. Browning the butter enhances its nutty flavor and adds depth to the overall flavor profile.
- Sugar: Sugar adds sweetness, moisture, and helps to create a tender crumb. Brown sugar also adds a molasses flavor that complements the pumpkin.
- Eggs: Eggs bind the ingredients together, add moisture, and contribute to the structure of the cookies.
- Flour: Flour provides structure and holds the cookies together.
- Baking Soda: Baking soda is a leavening agent that helps the cookies to rise and become light and airy.
- Spices: Cinnamon, nutmeg, and cloves add warmth and complexity to the flavor of the cookies.
- Chocolate: Dark chocolate adds a rich, bittersweet flavor that balances the sweetness of the pumpkin and sugar.
- Pumpkin Puree: Pumpkin puree adds moisture and a subtle pumpkin flavor. It also contributes to the soft and chewy texture of the cookies.
I often think back to times where I have made these cookies, and I am just so happy that I learned to make them. They’re such a crowd-pleaser!
Serving Suggestions and Presentation Ideas
Okay, you’ve baked these amazing Brown Butter Pumpkin Chocolate Dream cookies! Now, let’s talk about how to serve them and make them look as good as they taste. Presentation is key, especially when you’re sharing these treats with friends and family.
- Classic Cookie Plate: Arrange the cookies on a pretty platter and serve them with a glass of cold milk or a cup of hot coffee.
- Gift Giving: Package the cookies in a decorative box or tin for a thoughtful homemade gift. Tie a ribbon around the box and add a handwritten tag for a personal touch.
- Dessert Board Extravaganza: Create a dessert board with a variety of treats, including these cookies, fresh fruit, nuts, and chocolate-covered pretzels.
- Ice Cream Sandwich: Sandwich a scoop of vanilla ice cream between two cookies for an indulgent treat.
- Warm and Cozy: Serve the cookies warm with a scoop of whipped cream or a dollop of Greek yogurt for a comforting dessert.
Final Thoughts: Embrace the Baking Joy!
There you have it! My ultimate guide to creating the most amazing Brown Butter Pumpkin Chocolate Dream. I truly hope this recipe becomes a staple in your kitchen, bringing joy and deliciousness to your life. Remember, baking is a journey, not a destination. Don’t be afraid to experiment, make mistakes, and have fun along the way. The most important ingredient is always love!
What makes browning the butter so important in this recipe?
Browning the butter elevates the flavor profile by adding a nutty, toasty dimension that complements the pumpkin beautifully.
Can I make the dough ahead of time?
Yes, you can make the dough ahead of time and store it in the refrigerator for up to 3 days or freeze it for up to 2 months. Thaw frozen dough in the refrigerator overnight before baking.
What are some variations I can try to spice up the recipe?
You can add ½ cup of chopped pecans or walnuts, ¼ teaspoon of ground ginger or allspice, swirl in a cream cheese mixture, add 1 tablespoon of instant espresso powder, or drizzle with a maple glaze.
Why is chilling the dough so important?
Chilling the dough allows the flavors to meld together and prevents the cookies from spreading too thin during baking.
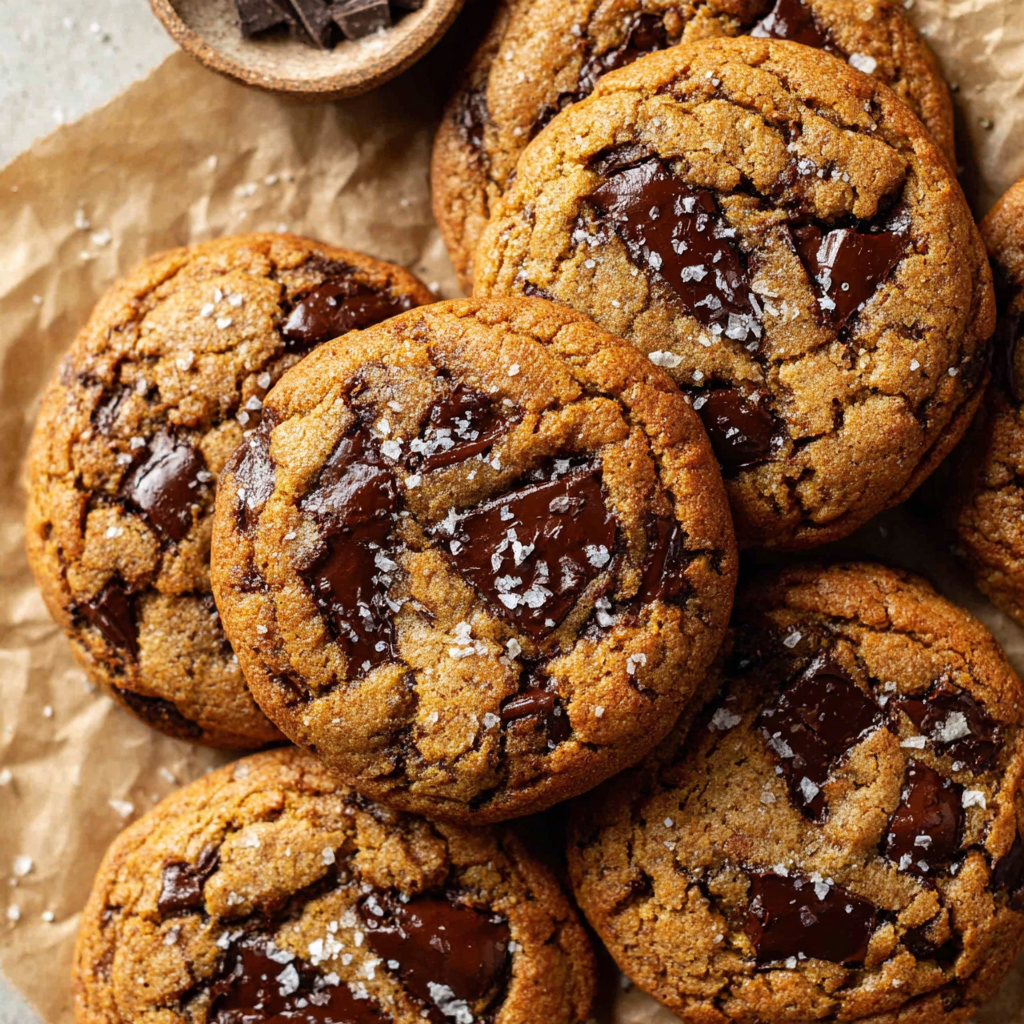
Brown Butter Pumpkin Chocolate Dream Cookies
Ingredients
Equipment
Method
- Brown the Butter: Place the butter in a light-colored saucepan over medium heat. Watch closely as it melts and bubbles.
- Continue Cooking: Continue cooking until the foam subsides and the butter turns a golden-brown color. Swirl the pan occasionally to ensure even browning.
- Remove from Heat: When you notice a nutty aroma and the butter is golden-brown, remove from heat immediately and pour into a heatproof bowl to stop the cooking process. Let it cool slightly, about 10-15 minutes.
- Cream the Sugars: In a large bowl (or the bowl of a stand mixer), combine the granulated sugar, brown sugar, and cooled brown butter.
- Beat Until Fluffy: Beat the mixture on medium speed until light and fluffy, about 3-5 minutes.
- Add the Eggs: Beat in the eggs one at a time, mixing well after each addition.
- Incorporate Vanilla and Pumpkin: Stir in the vanilla extract and pumpkin puree until well combined.
- Combine Dry Ingredients: In a separate bowl, whisk together the flour, baking soda, cinnamon, nutmeg, cloves, and salt.
- Gradually Add Dry Ingredients: Gradually add the dry ingredients to the wet ingredients, mixing on low speed until just combined. Be careful not to overmix.
- Fold in Chocolate: Gently fold in the dark chocolate chunks or chocolate chips.
- Chill the Dough: Cover the bowl with plastic wrap and chill the dough in the refrigerator for at least 30 minutes (or up to overnight).
- Preheat Oven: Preheat your oven to 375°F (190°C). Line baking sheets with parchment paper.
- Scoop and Bake: Scoop rounded tablespoons of dough onto the prepared baking sheets, leaving about 2 inches between each cookie.
- Bake to Perfection: Bake for 10-12 minutes, or until the edges are golden brown and the centers are set.
- Cool and Enjoy: Let the cookies cool on the baking sheets for a few minutes before transferring them to a wire rack to cool completely.
- Optional Glaze: If desired, whisk together powdered sugar and a small amount of milk until a smooth glaze forms. Drizzle over cooled cookies.
