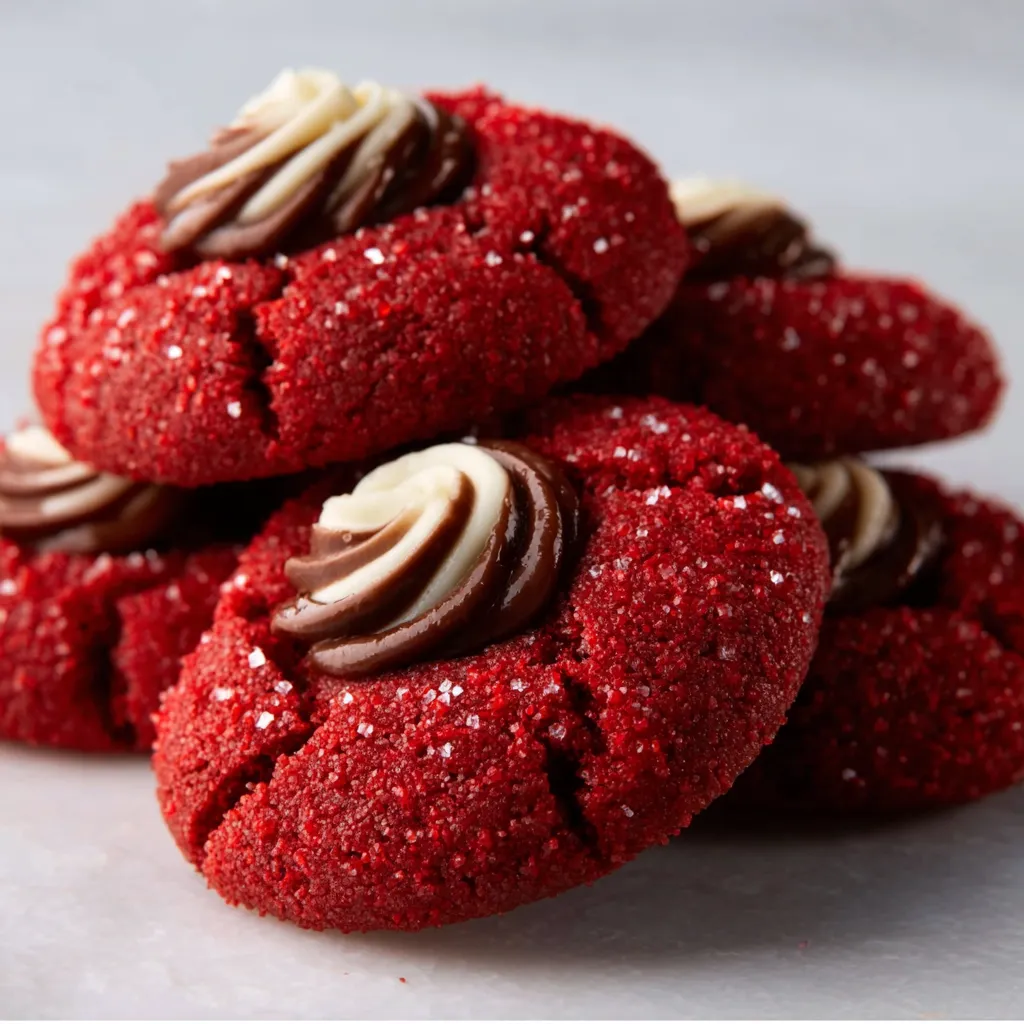
The striking red hue, the soft, chewy texture, and the sweet kiss of chocolate nestled on top – are you ready to bake a cookie that’s as visually stunning as it is delicious? These Red Velvet Blossoms Cookies are guaranteed to be the star of any dessert table, and I promise, with my tips and tricks, you’ll nail them every time.
Ingredients
For the Red Velvet Cookies:
- 1 ½ cups all-purpose flour
- ¼ cup unsweetened cocoa powder
- ½ teaspoon baking soda
- ¼ teaspoon salt
- ½ cup (1 stick) unsalted butter, softened
- ¾ cup granulated sugar
- ¼ cup packed light brown sugar
- 1 large egg
- 1 teaspoon vanilla extract
- 1 teaspoon red food coloring (gel is recommended)
- 1 teaspoon white vinegar
- ½ cup buttermilk
For the Blossoms:
- About 36 Hershey’s Kisses (or other chocolate kisses), unwrapped
- Optional: Granulated sugar, for rolling
Essential Equipment

- Mixing Bowls (various sizes)
- Electric Mixer (stand or hand mixer)
- Measuring Cups and Spoons
- Cookie Sheets
- Parchment Paper or Silicone Baking Mats
- Wire Rack
Step-by-Step Instructions
Get Started (Prep Work!)
- Preheat your oven to 350°F (175°C).
- Line your cookie sheets with parchment paper or silicone baking mats. This prevents sticking and makes cleanup a breeze!
- Unwrap all your Hershey’s Kisses. Trust me; you don’t want to be doing this with sticky cookie dough on your hands later.
Mixing the Dry Ingredients
- In a medium bowl, whisk together the flour, cocoa powder, baking soda, and salt. This ensures everything is evenly distributed.
Creaming the Butter and Sugar
- In a large bowl, cream together the softened butter, granulated sugar, and brown sugar until light and fluffy. This usually takes about 3-5 minutes with an electric mixer. Don’t rush this step – it’s crucial for a tender cookie.
Adding the Wet Ingredients
- Beat in the egg and vanilla extract until well combined.
- In a small bowl, combine the red food coloring, white vinegar, and buttermilk. This mixture helps activate the red color and adds a slight tang that complements the red velvet flavor.
- Gradually add the wet ingredients to the dry ingredients, alternating with the buttermilk mixture, beginning and ending with the dry ingredients. Mix until just combined. Be careful not to overmix, or your cookies will be tough.
Forming the Cookies
- If desired, pour some granulated sugar into a small bowl.
- Use a cookie scoop or spoon to form rounded balls of dough (about 1 inch in diameter).
- If using granulated sugar, roll each ball in the sugar to coat. This adds a little extra sparkle and sweetness.
- Place the dough balls onto the prepared cookie sheets, leaving about 2 inches between each cookie.
Baking the Cookies
- Bake for 8-10 minutes, or until the edges are set and the centers are slightly soft. Be careful not to overbake, or the cookies will be dry.
- Remove the cookie sheets from the oven and immediately press a Hershey’s Kiss into the center of each cookie. The cookies will crack slightly around the kiss, which is perfectly normal and adds to their charm!
- Let the cookies cool on the cookie sheets for a few minutes before transferring them to a wire rack to cool completely.

Troubleshooting and Tips for Success
Why are my cookies flat?
Flat cookies are usually caused by butter that is too warm or overmixing the dough. Make sure your butter is softened but still cool to the touch, and mix the dough until just combined. Also, chilling the dough for 30 minutes before baking can help prevent spreading.
Why are my cookies dry?
Dry cookies are often the result of overbaking. Keep a close eye on the cookies while they’re in the oven and remove them as soon as the edges are set and the centers are still slightly soft.
My kisses are melting!
If your kisses are melting, it could be due to the oven being too hot or the cookies being too warm when you press them in. Make sure your oven temperature is accurate, and let the cookies cool slightly before adding the kisses. You can also try chilling the kisses in the freezer for a few minutes before using them.
Getting that Perfect Red Velvet Color
Gel food coloring will give you the most vibrant red color without adding too much liquid to the dough. If you’re using liquid food coloring, you may need to add a little extra flour to compensate for the added moisture.
Variations and Fun Twists
Different Kisses
While Hershey’s Kisses are classic, feel free to experiment with other flavors! Try using caramel-filled kisses, dark chocolate kisses, or even Hugs (the striped milk chocolate and white chocolate kisses) for a fun twist.
Add Some Sprinkles!
Before baking, sprinkle the cookies with red, white, and green sprinkles for a festive touch. This is a great way to add some extra color and texture.
Nuts for Red Velvet?
Fold in some chopped pecans or walnuts into the cookie dough for added flavor and crunch. About ½ cup of chopped nuts should be plenty.
The Science Behind Red Velvet
Ever wondered what *actually* makes red velvet red? It’s all about a chemical reaction! The combination of cocoa powder, vinegar, and buttermilk creates a slightly acidic environment that helps to bring out the red pigments naturally present in cocoa. The red food coloring simply enhances this effect, resulting in that signature red velvet hue we all know and love. It’s the same idea behind recipes like Chocolate Crinkle Cookies.
Perfect Pairings
Red Velvet Blossoms Cookies are fantastic on their own, but they also pair well with a variety of beverages. A glass of cold milk is a classic choice, but they’re also delicious with a cup of hot coffee or tea. For a more indulgent treat, try pairing them with a scoop of vanilla ice cream.
Serving Suggestions
These cookies are perfect for holiday parties, bake sales, or just a sweet treat on a cozy night in. Arrange them on a festive platter, package them in cellophane bags as gifts, or simply enjoy them straight from the cookie jar!
Storing Your Red Velvet Masterpieces
To keep your Red Velvet Blossoms Cookies fresh, store them in an airtight container at room temperature. They’ll stay delicious for up to 3-4 days. You can also freeze them for longer storage. Just make sure they’re completely cool before freezing, and they’ll keep for up to 2-3 months.
Holiday Cookie Extravaganza
Red Velvet Blossoms Cookies are a standout addition to any holiday cookie platter! If you’re looking for more festive baking ideas, why not try these other amazing recipes? Consider adding Christmas Kitchen Sink Cookies for a delightful mix of sweet and salty flavors, or perhaps some adorable Christmas Pinwheel Cookies for a swirl of holiday cheer. For a classic touch, you can never go wrong with Chocolate Thumbprint Cookies or another version of Chocolate Thumbprint Cookies. And of course, no holiday cookie collection is complete without a perfect Sugar Cookie Recipe, perhaps even the Soft Cut Out Sugar Cookies.
Conclusion
So there you have it – my guide to baking the most perfect Red Velvet Blossoms Cookies! With a little patience and these helpful tips, you’ll be wowing your friends and family with these irresistible treats in no time. Happy baking!
What makes Red Velvet Blossoms Cookies red?
The red color comes from a combination of cocoa powder, vinegar, and buttermilk reacting together, enhancing the natural red pigments in cocoa. Red food coloring is also added to intensify the color.
Why did my Red Velvet Blossoms Cookies spread too thin and become flat?
Flat cookies are usually caused by using butter that is too warm or overmixing the dough. The recipe suggests using softened but cool butter and mixing until just combined. Chilling the dough for 30 minutes can also help.
How should I store these cookies to keep them fresh?
To keep your Red Velvet Blossoms Cookies fresh, store them in an airtight container at room temperature for up to 3-4 days. You can also freeze them for 2-3 months after they are completely cool.
What can I use instead of Hershey’s Kisses?
While Hershey’s Kisses are classic, you can experiment with other flavors like caramel-filled kisses, dark chocolate kisses, or even Hugs (striped milk chocolate and white chocolate kisses).
Perfect Red Velvet Blossoms Cookies
Ingredients
Equipment
Method
- Preheat your oven to 350°F (175°C).
- Line your cookie sheets with parchment paper or silicone baking mats.
- Unwrap all your Hershey’s Kisses.
- In a medium bowl, whisk together the flour, cocoa powder, baking soda, and salt.
- In a large bowl, cream together the softened butter, granulated sugar, and brown sugar until light and fluffy (3-5 minutes).
- Beat in the egg and vanilla extract until well combined.
- In a small bowl, combine the red food coloring, white vinegar, and buttermilk.
- Gradually add the dry ingredients to the wet ingredients, alternating with the buttermilk mixture, beginning and ending with the dry ingredients. Mix until just combined; do not overmix.
- If desired, pour some granulated sugar into a small bowl.
- Use a cookie scoop or spoon to form rounded balls of dough (about 1 inch in diameter).
- If using granulated sugar, roll each ball in the sugar to coat.
- Place the dough balls onto the prepared cookie sheets, leaving about 2 inches between each cookie.
- Bake for 8-10 minutes, or until the edges are set and the centers are slightly soft. Be careful not to overbake.
- Remove the cookie sheets from the oven and immediately press a Hershey’s Kiss into the center of each cookie.
- Let the cookies cool on the cookie sheets for a few minutes before transferring them to a wire rack to cool completely.