The Alchemist’s Secret: Unveiling the Science of Hotteok
At its core, Hotteok dough is a fascinating example of gluten development meets fermentation. Unlike, say, sourdough where a tangy flavor profile is the goal, in Hotteok, fermentation is primarily about creating a light, airy, and slightly chewy texture. The key players are:- Flour: Gluten development is crucial. Bread flour, with its higher protein content, provides the necessary structure. All-purpose flour can work in a pinch, but the resulting Hotteok might lack the desired chewiness.
- Yeast: This is the engine of our fermentation process. Yeast consumes sugars, producing carbon dioxide, which creates air pockets in the dough, making it light and fluffy. The type of yeast (instant, active dry) and its activation method influence the final outcome.
- Sugar: Not only does sugar contribute to sweetness, but it also feeds the yeast, accelerating fermentation. The type of sugar (white, brown) can subtly alter the flavor.
- Warm Water/Milk: Provides the ideal environment for yeast activity and hydrates the flour, initiating gluten development. The temperature is critical; too hot, and you’ll kill the yeast; too cold, and it will be sluggish.
- Oil: Adds richness and moisture to the dough, contributing to a softer texture. It also helps to prevent the dough from sticking to your hands and the cooking surface.
The Recipe: Korean Cheese Hotteok (Makes 6-8 Hotteok)
 Here’s the recipe that emerged from my countless experiments, the one that consistently delivers chewy, cheesy perfection.
Dough Ingredients:
- 200g (1 2/3 cups) Bread Flour
- 5g (1 tsp) Instant Yeast
- 15g (1 tbsp) Sugar
- 1/4 tsp Salt
- 160ml (2/3 cup) Warm Water (around 105-115°F)
- 1 tbsp Vegetable Oil
Filling Ingredients:
- 200g Mozzarella Cheese, shredded
- 2 tbsp Cream Cheese, softened
- 1 tbsp Parmesan Cheese, grated
- 1 tbsp Sugar (Optional, for added sweetness)
- Pinch of Salt
- Pinch of Black Pepper
Cooking Ingredients:
- 2-3 tbsp Vegetable Oil, for frying
Instructions:
1. Activate the Yeast (Optional but Recommended): In a small bowl, combine warm water, sugar, and instant yeast. Let it sit for 5-10 minutes until foamy. This ensures the yeast is active. If using active dry yeast, this step is crucial. 2. Combine Dry Ingredients: In a large bowl, whisk together bread flour, salt. 3. Mix Wet and Dry: Pour the yeast mixture (or warm water if not activating yeast separately) and vegetable oil into the dry ingredients. 4. Knead the Dough: Knead the dough for 5-7 minutes until it becomes smooth and elastic. The dough will be slightly sticky, but avoid adding too much flour. 5. First Rise: Place the dough in a lightly oiled bowl, turning to coat. Cover with plastic wrap or a clean kitchen towel. Let it rise in a warm place for 1-1.5 hours, or until doubled in size. 6. Prepare the Filling: While the dough is rising, combine all filling ingredients in a bowl and mix well. 7. Divide and Fill: Once the dough has doubled, gently punch it down to release air. Divide the dough into 6-8 equal portions. 8. Shape the Hotteok: Flatten one portion of dough into a circle about 3-4 inches in diameter. Place a generous spoonful of the cheese filling in the center. Carefully gather the edges of the dough around the filling, pinching to seal tightly. Repeat with the remaining dough portions. 9. Cook the Hotteok: Heat 1-2 tablespoons of vegetable oil in a large non-stick skillet over medium heat. 10. Flatten and Fry: Place the filled Hotteok in the hot skillet, seam-side down. Use a spatula or a Hotteok press (if you have one) to gently flatten the Hotteok to about 1/2-inch thickness. 11. Cook Until Golden Brown: Cook for 3-4 minutes per side, or until golden brown and the cheese is melted and gooey. Add more oil to the skillet as needed. 12. Serve Immediately: Serve the hotteok immediately for the best flavor and texture. Enjoy!Tales from the Kitchen: My Hotteok Investigation
My first few attempts were a disaster. The dough was either too dry and cracked, or so sticky it was unmanageable. The filling would leak out during cooking, creating a burnt cheesy mess. Then, I had an “Aha!” moment: hydration is key!The Hydration Hypothesis
Like many of you, I initially thought more flour was the answer to a sticky dough. Wrong! Adding too much flour resulted in a tough, dry Hotteok. I realized that a slightly sticky dough is actually desirable; it contributes to the chewy texture. The trick is to lightly oil your hands and work surface.Yeast: The Silent Saboteur
Another hurdle was inconsistent rising. Sometimes the dough would double in size beautifully; other times, it barely budged. I suspected the yeast. Experimenting with different brands and activation methods revealed that proofing the yeast (dissolving it in warm water with sugar) before adding it to the flour ensured consistent results.Cheese Calamities
And then there was the cheese. My early attempts resulted in explosions of molten cheese, a testament to my overzealous filling. I learned to be more strategic with the amount of filling and to ensure a tight seal. Also, using a combination of mozzarella and a bit of cream cheese helped create a smoother, less likely-to-explode filling. I even tried adding a pinch of sugar to the cheese mixture, mimicking the classic sweet filling often found in traditional Hotteok, and it was delicious! It reminded me a bit of the sweet and savory balance you find in Cinnamon Honey Roasted Sweet Potatoes.The Pan-icking Process
Finally, mastering the cooking process was crucial. I experimented with different heat levels and found that medium heat was ideal. Too high, and the Hotteok would burn on the outside before the cheese melted. Too low, and the dough would become greasy. And remember to use a non-stick pan! This is crucial for preventing the Hotteok from sticking and tearing. The gentle flattening action is also key, creating a uniform thickness that allows the dough to cook evenly and the cheese to melt properly. The smell of these cooking reminded me a little bit of when I make Air Fryer Churro Bites; pure comfort.The Foolproof Method: Achieving Hotteok Harmony
Here’s the distilled wisdom from my Hotteok journey, a step-by-step guide to cheesy success: 1. Hydrate Wisely: Start with the recommended amount of water, and only add more if absolutely necessary. Remember, a slightly sticky dough is okay! 2. Proof Your Yeast: Ensure your yeast is active by proofing it in warm water with sugar before adding it to the flour. 3. Knead Thoroughly: Kneading develops gluten, which is essential for a chewy texture. Don’t skimp on this step. 4. Rise Patiently: Allow the dough to rise fully, until doubled in size. This ensures a light and airy texture. 5. Seal Tightly: When filling the Hotteok, pinch the edges tightly to prevent the cheese from leaking out. 6. Flatten Gently: Use a spatula or a Hotteok press to gently flatten the Hotteok to about 1/2-inch thickness. 7. Cook Over Medium Heat: Cook the Hotteok over medium heat until golden brown and the cheese is melted. 8. Serve Immediately: Hotteok are best enjoyed fresh off the skillet, when the cheese is gooey and the dough is chewy. With these tips and techniques, you’ll be well on your way to creating your own Korean Cheese Hotteok masterpieces. And if you’re looking for other delicious snack recipes, you might also enjoy Yakgwa Korean Honey Cookies for a sweet treat, or Gamjajeon Pancakes for a savory option. Perhaps try serving the Hotteok with a side of something refreshing, like a simple fruit salad, similar to how Lemon Ricotta Pancakes are often paired with berries. Or maybe dust them with powdered sugar after frying, like Vanilla French Beignets! Happy cooking!Why is bread flour recommended over all-purpose flour for making Hotteok?
Bread flour has a higher protein content, which leads to better gluten development. This results in a chewier Hotteok, while all-purpose flour may result in a less chewy texture.
What is the importance of proofing the yeast before making the Hotteok dough?
Proofing the yeast (dissolving it in warm water with sugar) ensures that the yeast is active. This leads to more consistent rising and a lighter, airier dough.
What kind of cheese works best for the filling, and why?
Mozzarella is a classic choice, but a blend of cheeses like mozzarella and cheddar can add complexity. The ideal cheese should melt beautifully and offer a slightly salty, savory contrast to the sweet dough. Adding cream cheese can also help create a smoother filling.
Why is it important to cook the Hotteok over medium heat?
Cooking over medium heat ensures that the Hotteok cooks evenly. If the heat is too high, the outside may burn before the cheese melts. If the heat is too low, the dough may become greasy.
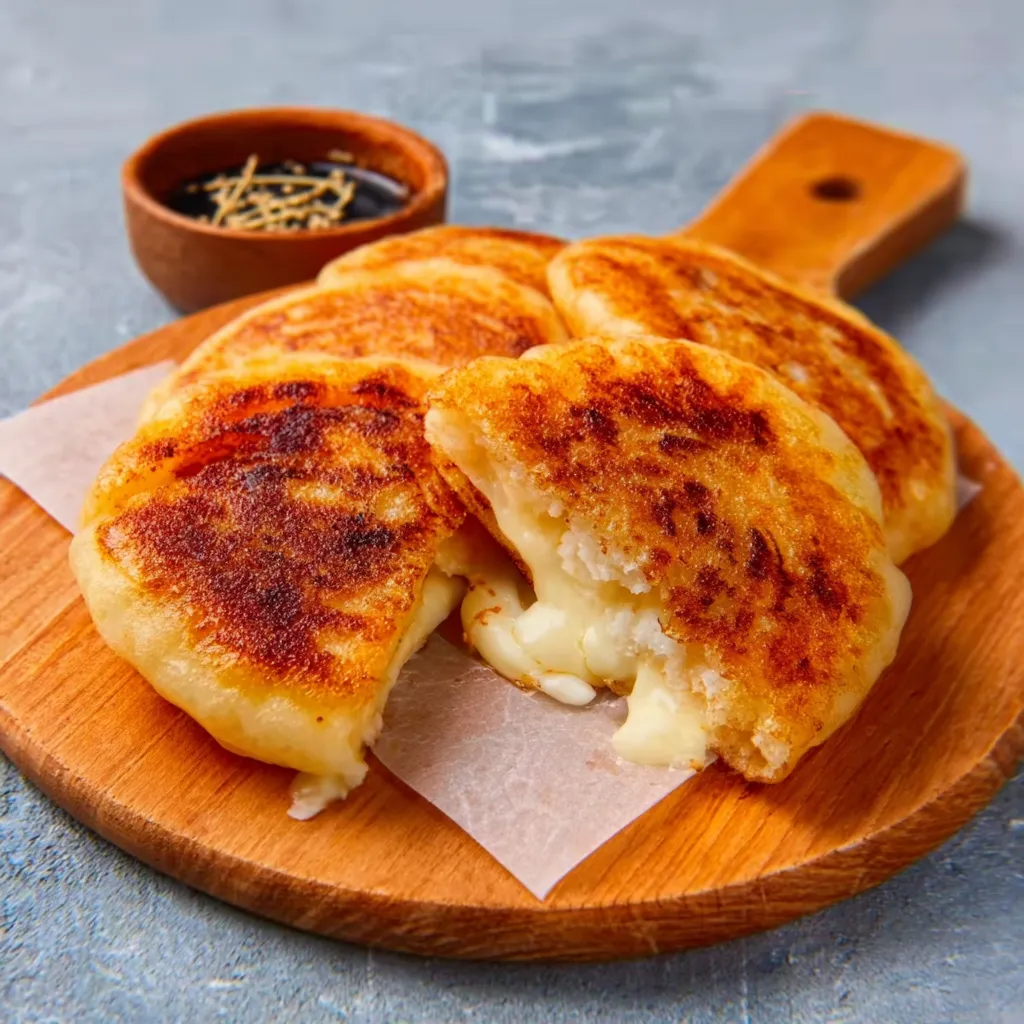
Korean Cheese Hotteok
Ingredients
Equipment
Method
- Activate the Yeast (Optional): In a small bowl, combine warm water, sugar, and instant yeast. Let it sit for 5-10 minutes until foamy.
- Combine Dry Ingredients: In a large bowl, whisk together bread flour and salt.
- Mix Wet and Dry: Pour the yeast mixture (or warm water if not activating yeast separately) and vegetable oil into the dry ingredients.
- Knead the Dough: Knead the dough for 5-7 minutes until it becomes smooth and elastic. The dough will be slightly sticky.
- First Rise: Place the dough in a lightly oiled bowl, turning to coat. Cover and let it rise in a warm place for 1-1.5 hours, or until doubled in size.
- Prepare the Filling: While the dough is rising, combine all filling ingredients in a bowl and mix well.
- Divide and Fill: Once the dough has doubled, gently punch it down to release air. Divide the dough into 6-8 equal portions.
- Shape the Hotteok: Flatten one portion of dough into a circle about 3-4 inches in diameter. Place a generous spoonful of the cheese filling in the center. Carefully gather the edges of the dough around the filling, pinching to seal tightly. Repeat with the remaining dough portions.
- Cook the Hotteok: Heat 1-2 tablespoons of vegetable oil in a large non-stick skillet over medium heat.
- Flatten and Fry: Place the filled Hotteok in the hot skillet, seam-side down. Use a spatula or a Hotteok press to gently flatten the Hotteok to about 1/2-inch thickness.
- Cook Until Golden Brown: Cook for 3-4 minutes per side, or until golden brown and the cheese is melted and gooey. Add more oil to the skillet as needed.
- Serve Immediately: Serve the hotteok immediately for the best flavor and texture.