I still remember the first time I tried katsu; it was at a tiny, unassuming restaurant tucked away in a side street, and the savory, crispy cutlet paired with sweet and tangy sauce was pure magic. Since then, I’ve been on a mission to recreate that experience at home, and I’m so excited to share my take on easy Japanese Katsu Bowls with you. Trust me, with this recipe, you’ll be serving up restaurant-quality katsu bowls in no time, even if you’re a beginner cook!
Let’s Talk Katsu: What Makes it So Special?
Okay, before we dive into the nitty-gritty of the recipe, let’s chat about what makes katsu, well, katsu! At its heart, it’s a Japanese dish consisting of a breaded and deep-fried cutlet – usually pork (tonkatsu) or chicken (chicken katsu). The magic lies in the crispy panko breadcrumb crust and the juicy, tender meat inside. And, of course, that amazing katsu sauce!
The Key Ingredients for Katsu Perfection
Here’s what you’ll need to make truly amazing katsu. Don’t worry; you can find most of these ingredients at your local grocery store, or online.
- Chicken or Pork Cutlets: I usually opt for boneless, skinless chicken breasts or pork loin, pounded to an even thickness. This helps them cook quickly and evenly.
- Flour, Eggs, and Panko Breadcrumbs: The classic breading trifecta! All-purpose flour helps the egg adhere, the egg creates a sticky surface for the panko, and the panko breadcrumbs provide that signature crispy texture. Panko is key here – regular breadcrumbs just don’t give you the same crunch.
- Katsu Sauce: You can find bottled katsu sauce at most Asian grocery stores, or even in the international aisle of your regular supermarket. Alternatively, you can easily make your own (recipe below!).
- Rice: Steamed Japanese short-grain rice is the perfect base for your katsu bowl. It’s sticky and holds the sauce beautifully.
- Cabbage: Finely shredded cabbage is a classic accompaniment to katsu. It adds a refreshing crunch and helps cut through the richness of the fried cutlet.
- Toppings (Optional but Recommended!): Green onions, sesame seeds, a drizzle of Japanese mayo, and a sprinkle of nori seaweed flakes are all fantastic additions.
The Ultimate Japanese Katsu Bowls Recipe (Step-by-Step)

Alright, let’s get cooking! This recipe is designed to be easy and approachable, even if you’ve never made katsu before. I’ll walk you through each step.
Step 1: Preparing the Cutlets
First, if you’re using chicken breasts or a pork loin, you’ll want to pound them to an even thickness. This ensures they cook evenly and quickly. Place the cutlets between two sheets of plastic wrap and use a meat mallet or rolling pin to gently pound them to about ½ inch thickness. Don’t go too crazy – you don’t want to tear the meat.
Next, season the cutlets generously with salt and pepper. This is your chance to add some flavor! You can also add a pinch of garlic powder or onion powder if you like.
Step 2: Setting Up the Breading Station
Now, it’s time to set up your breading station. This is where the magic happens!
- Flour: Place about ½ cup of all-purpose flour in a shallow dish.
- Eggs: In another shallow dish, whisk together 2 large eggs with a tablespoon of water. This helps create a smoother coating.
- Panko: In a third shallow dish, spread out about 2 cups of panko breadcrumbs.
The key to a successful breading station is to keep your hands clean! Use one hand for the dry ingredients (flour and panko) and the other hand for the wet ingredients (eggs). This will prevent your fingers from getting too clumpy.
Step 3: Breading the Cutlets
Now, for the fun part! Dredge each cutlet in the flour, making sure to coat it evenly. Shake off any excess flour.
Next, dip the floured cutlet into the egg mixture, making sure it’s fully coated. Let any excess egg drip off.
Finally, dredge the cutlet in the panko breadcrumbs, pressing gently to make sure the breadcrumbs adhere. You want a nice, even coating of panko. Repeat this process for all of the cutlets.
Step 4: Cooking the Katsu
There are two main ways to cook katsu: deep-frying or pan-frying. Deep-frying will give you the most authentic, crispy result, but pan-frying is a healthier and easier option. I’ll give you instructions for both methods.
Deep-Frying
Heat about 2-3 inches of oil in a large pot or deep fryer to 350°F (175°C). Carefully lower the breaded cutlets into the hot oil, being careful not to overcrowd the pot. Fry for about 3-4 minutes per side, or until golden brown and cooked through. The internal temperature of the chicken should reach 165°F (74°C), and the pork should reach 145°F (63°C).
Remove the cutlets from the oil and place them on a wire rack to drain. This will help them stay crispy.
Pan-Frying
Heat about ¼ inch of oil in a large skillet over medium-high heat. Once the oil is hot, carefully place the breaded cutlets in the skillet. Fry for about 4-5 minutes per side, or until golden brown and cooked through. Again, make sure the internal temperature reaches the safe levels mentioned above.
Remove the cutlets from the skillet and place them on a wire rack to drain.
Step 5: Assembling the Japanese Katsu Bowls
Now, it’s time to assemble your masterpiece! This is where you can get creative and customize your bowl to your liking.
- Rice: Place a generous scoop of cooked rice in the bottom of each bowl.
- Cabbage: Top the rice with a mound of shredded cabbage.
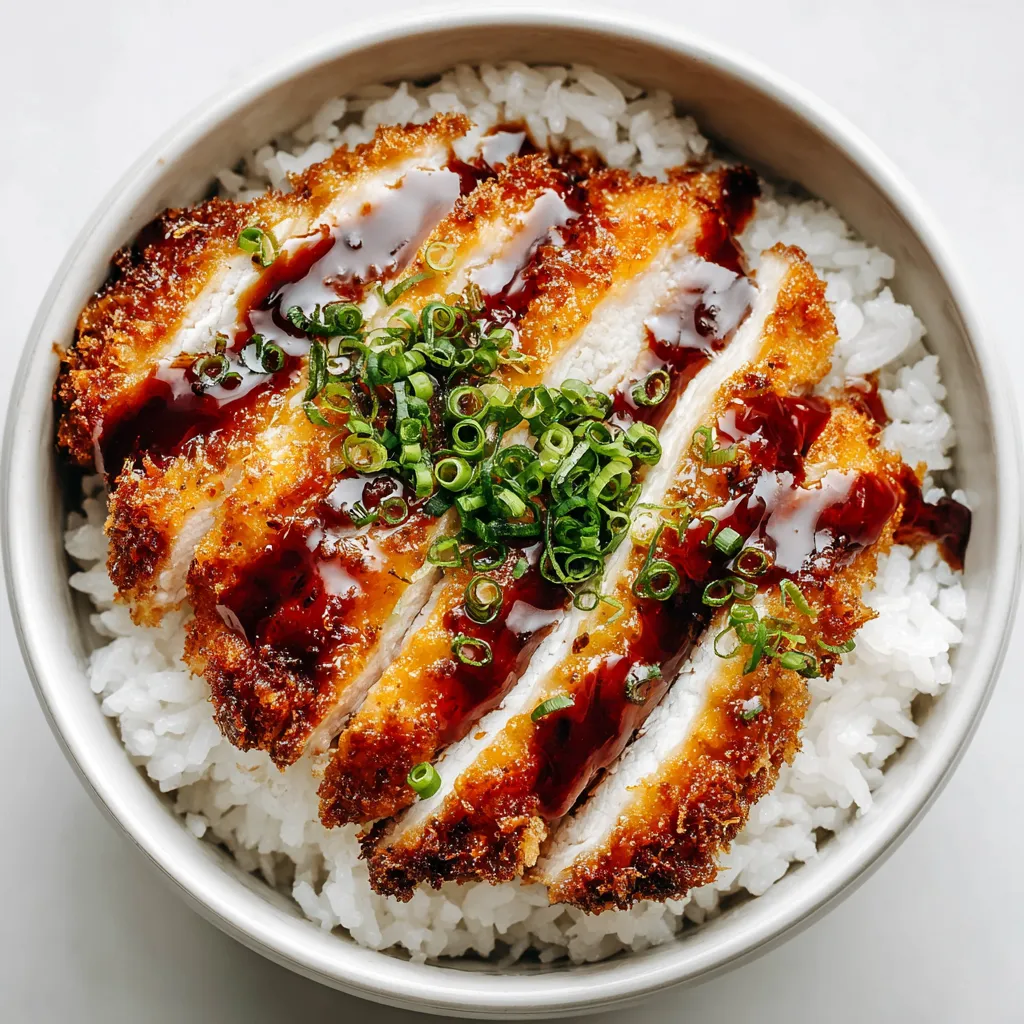
- Katsu: Slice the katsu cutlets into strips and arrange them on top of the cabbage.
- Sauce: Drizzle generously with katsu sauce.
- Toppings: Garnish with green onions, sesame seeds, Japanese mayo, and nori seaweed flakes (if using).
Homemade Katsu Sauce Recipe
While bottled katsu sauce is convenient, making your own is surprisingly easy and tastes even better! Here’s a simple recipe:
Ingredients:
- ¼ cup ketchup
- 2 tablespoons Worcestershire sauce
- 1 tablespoon oyster sauce
- 1 tablespoon soy sauce
- 1 teaspoon sugar
- ½ teaspoon Dijon mustard
- Pinch of ground ginger
Instructions:
Combine all ingredients in a small saucepan. Bring to a simmer over medium heat, stirring constantly. Cook for about 2-3 minutes, or until slightly thickened. Let cool before using. Store in an airtight container in the refrigerator.
Tips and Tricks for Katsu Success
Here are a few extra tips to help you make the best katsu bowls ever:
- Pounding the Cutlets: This is crucial for even cooking. Don’t skip this step!
- Double Breading: For an extra crispy crust, you can double bread the cutlets. Simply repeat the breading process after the first layer of panko.
- Don’t Overcrowd the Pan: When frying, avoid overcrowding the pan. This will lower the oil temperature and result in soggy katsu. Fry in batches instead.
- Use a Thermometer: A meat thermometer is your best friend! Make sure the chicken or pork is cooked to a safe internal temperature.
- Let it Rest: After frying, let the katsu rest on a wire rack for a few minutes before slicing. This allows the juices to redistribute, resulting in a more tender cutlet.
Variations and Adaptations
One of the best things about katsu bowls is that they’re so versatile! Feel free to experiment with different variations and adaptations to suit your taste.
- Different Meats: Try using shrimp (ebi katsu), tofu (tofu katsu), or even vegetables like eggplant or zucchini.
- Spicy Katsu: Add a pinch of cayenne pepper or a drizzle of sriracha to the katsu sauce for a spicy kick.
- Katsu Curry: Serve the katsu with Japanese curry rice for a heartier meal.
- Egg Topping: Add a soft boiled or fried egg on top of the katsu bowl for added richness.
- Vegetable Variety: Try adding other vegetables to the bowl, such as steamed broccoli, edamame, or pickled ginger.
Beyond Katsu Bowls: Other Delicious Bowl Recipes
If you’re a fan of bowls (and who isn’t?), here are a few other recipes you might enjoy. Each offers a unique flavor profile and is guaranteed to satisfy your cravings.
For a sweet and savory option, try these Sticky Chicken Rice Bowls. They are incredibly easy to make and perfect for a weeknight dinner.
If you’re in the mood for something with a little heat, these Firecracker Chicken Bowls will definitely deliver. The spicy sauce is absolutely addictive.
Craving something creamy and tangy? You absolutely HAVE to try this Bang Bang Chicken Bowl. The sauce is simply divine and it’s also easy to make.
Then you should give this recipe for Katsu Rice Bowls a shot, it is very similar to this recipe but contains slight changes you might enjoy.
For a fun and flavorful twist, give these Mexican Street Corn Chicken Bowl a try. It’s packed with flavor and perfect for a summer barbecue.
Finally, for a classic and reliable option, you can never go wrong with this Teriyaki Chicken Rice Bowl Recipe. It’s quick, easy, and always a crowd-pleaser.
Storage and Reheating Instructions
If you have any leftover katsu, you can store it in an airtight container in the refrigerator for up to 3 days. To reheat, you can bake it in the oven at 350°F (175°C) for about 10-15 minutes, or until heated through. You can also reheat it in a skillet over medium heat, but be careful not to burn it.
I don’t recommend microwaving katsu, as it will make the breading soggy. However, if you’re in a pinch, you can microwave it for a short amount of time, but be prepared for a less-than-crispy result.
Store the rice and other toppings separately to prevent them from getting soggy.
Final Thoughts
So, there you have it – my ultimate guide to making easy and delicious Japanese Katsu Bowls! I hope you enjoyed this recipe and feel confident enough to give it a try. Remember, cooking is all about experimenting and having fun, so don’t be afraid to put your own spin on things. I’m confident that with a little practice, you’ll be making restaurant-quality katsu bowls that will impress your friends and family. Happy cooking!
What is the key to getting a crispy katsu crust?
The key is using panko breadcrumbs instead of regular breadcrumbs. Panko provides a signature crispy texture that regular breadcrumbs can’t achieve.
Can I make my own katsu sauce, or do I have to buy it?
While bottled katsu sauce is convenient, the article provides a simple recipe for homemade katsu sauce using ingredients like ketchup, Worcestershire sauce, oyster sauce, soy sauce, sugar, Dijon mustard, and ground ginger.
What are some good toppings for Katsu Bowls?
The article recommends green onions, sesame seeds, a drizzle of Japanese mayo, and a sprinkle of nori seaweed flakes as fantastic additions to your Katsu Bowl.
What kind of meat can I use for Katsu?
While the article focuses on chicken (chicken katsu) and pork (tonkatsu), you can also use shrimp (ebi katsu), tofu (tofu katsu), or even vegetables like eggplant or zucchini.
Easy Japanese Katsu Bowls
Ingredients
Equipment
Method
- Pound the chicken or pork cutlets to an even 1/2 inch thickness between two sheets of plastic wrap using a meat mallet or rolling pin.
- Season the cutlets generously with salt and pepper.
- Set up a breading station with three shallow dishes: one with flour, one with whisked eggs and water, and one with panko breadcrumbs.
- Dredge each cutlet in the flour, shaking off any excess.
- Dip the floured cutlet into the egg mixture, ensuring it’s fully coated and letting any excess drip off.
- Dredge the cutlet in the panko breadcrumbs, pressing gently to make sure they adhere, creating an even coating.
- Repeat the breading process for all cutlets.
- For deep-frying: Heat 2-3 inches of oil to 350°F (175°C) in a large pot or deep fryer. Carefully lower the breaded cutlets into the hot oil, being careful not to overcrowd. Fry for 3-4 minutes per side, until golden brown and cooked through. Chicken should reach an internal temperature of 165°F (74°C), and pork should reach 145°F (63°C).
- For pan-frying: Heat 1/4 inch of oil in a large skillet over medium-high heat. Carefully place the breaded cutlets in the skillet. Fry for 4-5 minutes per side, until golden brown and cooked through, ensuring the safe internal temperature is reached.
- Remove the cutlets from the oil and place them on a wire rack to drain.
- Place a generous scoop of cooked rice in the bottom of each bowl.
- Top the rice with a mound of shredded cabbage.
- Slice the katsu cutlets into strips and arrange them on top of the cabbage.
- Drizzle generously with katsu sauce.
- Garnish with green onions, sesame seeds, Japanese mayo, and nori seaweed flakes (if using).
- For homemade Katsu Sauce: Combine ketchup, Worcestershire sauce, oyster sauce, soy sauce, sugar, Dijon mustard, and ground ginger in a small saucepan. Bring to a simmer over medium heat, stirring constantly. Cook for about 2-3 minutes, or until slightly thickened. Let cool before using. Store in an airtight container in the refrigerator.