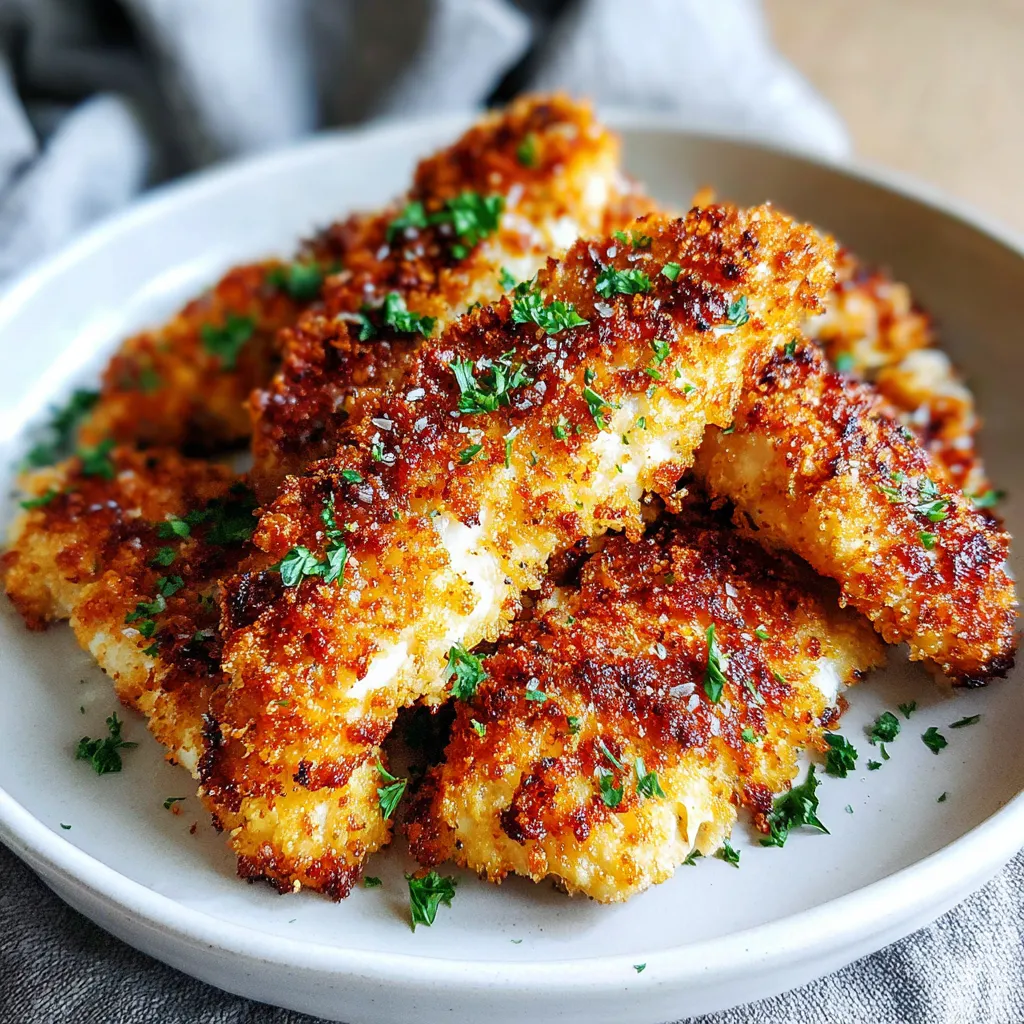
Let’s be honest, who doesn’t love a crispy, juicy chicken tender? But the thought of all that oil and the mess of frying can be a real turn-off. Well, get ready to ditch the guilt and the greasy cleanup because we’re about to make some absolutely irresistible, Easy Crispy Homemade Baked Chicken Tenders that are healthier and just as satisfying! Prepare for a family favorite that you’ll be making again and again.
Gathering Your Superstar Ingredients

Here’s everything you need to create tender perfection. Don’t skimp on the spices – they’re the key to incredible flavor!
For the Chicken:
- 1.5 lbs Boneless, Skinless Chicken Breasts: Cut into 1-inch thick strips.
- 1 cup Buttermilk: This tenderizes the chicken like magic!
- 1 teaspoon Salt: Enhances all the flavors.
- 1/2 teaspoon Black Pepper: Adds a little kick.
For the Crispy Coating:
- 1 1/2 cups Panko Bread Crumbs: These give the best crunch.
- 1/2 cup Grated Parmesan Cheese: Adds a salty, cheesy depth.
- 1/4 cup All-Purpose Flour: Helps the coating adhere.
- 1 teaspoon Garlic Powder: Because everything is better with garlic!
- 1 teaspoon Onion Powder: Adds a subtle sweetness.
- 1 teaspoon Paprika: For color and a smoky hint.
- 1/2 teaspoon Dried Thyme: A touch of herbaceousness.
- 1/2 teaspoon Salt: Seasoning is key.
- 1/4 teaspoon Black Pepper: Adds a little bite.
- 1/4 cup Olive Oil: Helps the breadcrumbs get wonderfully golden brown.
Step-by-Step to Crispy Chicken Bliss
Let’s get started! These are surprisingly easy, and the results are oh-so-worth it.
Prepping the Chicken:
- In a bowl, combine the chicken tenders, buttermilk, 1 teaspoon of salt, and 1/2 teaspoon of black pepper. Make sure the chicken is fully submerged in the buttermilk. Cover the bowl and refrigerate for at least 30 minutes, or up to 2 hours. This is crucial for tender, juicy chicken!
Creating the Crispy Coating:
- While the chicken is marinating, preheat your oven to 400°F (200°C). Line a large baking sheet with parchment paper. This will prevent sticking and make cleanup a breeze.
- In a shallow dish, combine the panko bread crumbs, Parmesan cheese, flour, garlic powder, onion powder, paprika, thyme, 1/2 teaspoon of salt, and 1/4 teaspoon of black pepper. Mix everything together thoroughly.
- Drizzle the olive oil into the breadcrumb mixture and use your fingers to rub the oil into the breadcrumbs until they are evenly moistened. This is the secret to that gorgeous golden-brown color.
Coating and Baking:
- Remove the chicken tenders from the buttermilk, letting any excess drip off. Don’t pat them dry, you want the coating to stick!
- One at a time, dredge each chicken tender in the breadcrumb mixture, pressing firmly to ensure it’s fully coated on all sides. This is where you put your love into each tender!
- Place the coated chicken tenders on the prepared baking sheet, leaving a little space between each one.
- Bake for 20-25 minutes, or until the chicken is cooked through and the coating is golden brown and crispy. The internal temperature should reach 165°F (74°C). Use a meat thermometer to be sure!
Unlock the Secrets to Ultimate Crispy-ness
Want to take your baked chicken tenders to the next level? Here are a few tricks I’ve learned over the years.
- Don’t overcrowd the baking sheet: This will steam the chicken instead of baking it, and you won’t get that crispy coating we’re after. Use two baking sheets if necessary.
- Use a wire rack on the baking sheet: Placing a wire rack on top of your baking sheet allows for air circulation around the chicken tenders, resulting in even crispier bottoms.
- Press the breadcrumbs: Don’t just dip the chicken in the crumbs; press them on firmly. This ensures maximum coverage and a satisfying crunch.
- The Right Breadcrumbs: Panko breadcrumbs are the MVP here. They are larger and lighter than regular breadcrumbs, resulting in a superior crispy texture.
Flavor Variations: Let Your Imagination Run Wild!
The beauty of this recipe is that you can easily customize it to your taste. Here are a few ideas to get you started:
- Spicy: Add a pinch of cayenne pepper or a dash of hot sauce to the breadcrumb mixture for a fiery kick.
- Italian: Increase the amount of Parmesan cheese and add some dried oregano, basil, and rosemary to the breadcrumb mixture.
- Ranch: Add a packet of ranch dressing seasoning to the breadcrumb mixture for a classic, crowd-pleasing flavor.
- Lemon Pepper: Add lemon zest and extra black pepper to the breadcrumb mixture. A squeeze of fresh lemon juice after baking elevates this simple flavor profile.
Serving Suggestions: Beyond the Plate
These Easy Crispy Homemade Baked Chicken Tenders are fantastic on their own, but they’re even better with the right accompaniments. I’ve always loved serving them with a variety of dipping sauces, and they’re also great in wraps, salads, or even as a topping for pasta dishes.
- Dipping Sauces: Honey mustard, BBQ sauce, ranch dressing, ketchup, sweet chili sauce – the possibilities are endless!
- Salads: Slice the chicken tenders and add them to a Caesar salad or a mixed green salad for a protein-packed meal.
- Wraps: Wrap them in a tortilla with lettuce, tomato, cheese, and your favorite sauce for a quick and easy lunch.
- Pasta: Serve them alongside GARLIC PARMESAN CHICKEN PASTA for an extra special meal.
Making It a Meal: Perfect Pairings
Let’s create a complete and balanced meal! Here are a few side dish ideas that complement the chicken tenders perfectly:
- Roasted Vegetables: Broccoli, carrots, Brussels sprouts, or sweet potatoes are all delicious options.
- Mashed Potatoes: Creamy mashed potatoes are always a crowd-pleaser.
- Mac and Cheese: For the ultimate comfort food meal.
- Coleslaw: A cool and refreshing side that balances the richness of the chicken tenders.
Storage and Reheating: Keeping the Crispy Alive
Leftover chicken tenders can be stored in an airtight container in the refrigerator for up to 3 days. To reheat them and maintain their crispy texture, follow these tips:
- Oven: Preheat your oven to 350°F (175°C) and bake the chicken tenders for 10-15 minutes, or until heated through.
- Air Fryer: Reheat the chicken tenders in the air fryer at 350°F (175°C) for 5-7 minutes, or until heated through. This is my preferred method for maintaining crispiness!
- Avoid the Microwave: Microwaving the chicken tenders will make them soggy.
Why I Love Baking, Not Frying
Honestly, the biggest reason I adore this baked version is the health benefit. But it’s more than that! Baking eliminates the risk of oil splatters and burns, and it’s a lot easier to clean up. Plus, the baking process allows the flavors of the chicken and the coating to meld together beautifully, resulting in a more complex and satisfying taste. If you love CROCKPOT GARLIC PARMESAN CHICKEN, you’ll appreciate the ease and flavor development here, too. You can even use leftover chicken from my CHICKEN SPAGHETTI recipe for a new twist!
Baking Time vs. Temperature: Getting It Just Right
The ideal baking time and temperature can vary slightly depending on your oven, so it’s important to keep an eye on the chicken tenders as they bake. You’re looking for a golden-brown color and an internal temperature of 165°F (74°C). If the breadcrumbs start to brown too quickly, you can loosely cover the baking sheet with foil to prevent burning. And remember – always use a meat thermometer to ensure the chicken is cooked through, just like you would for HONEY GARLIC CHICKEN PERFECTION!
Troubleshooting: Common Issues and Solutions
Even the best recipes can sometimes have hiccups. Here are a few common issues you might encounter and how to fix them:
- Chicken tenders are dry: Make sure you’re not overbaking them. Use a meat thermometer to check for doneness. You can also try marinating the chicken for a longer period of time.
- Breadcrumbs aren’t sticking: Make sure the chicken is damp (but not dripping wet) when you dredge it in the breadcrumbs. You can also add a tablespoon of mayonnaise to the buttermilk for extra adhesion.
- Breadcrumbs are burning: Lower the oven temperature slightly and cover the baking sheet with foil.
Dive into Even More Chicken Recipes!
If you enjoyed this recipe, I encourage you to explore some of my other chicken creations. You can get a similar baked flavor profile with my GARLIC PARMESAN CHICKEN PERFECTION or enjoy the convenience of SHEET PAN HAWAIIAN CHICKEN!
There you have it! Easy Crispy Homemade Baked Chicken Tenders that are sure to become a family favorite. Grab your ingredients, follow these simple steps, and get ready to enjoy a delicious and healthier alternative to fried chicken. Happy cooking!
Why is buttermilk used when prepping the chicken?
Buttermilk tenderizes the chicken, making it more juicy and delicious.
What makes Panko bread crumbs better than regular bread crumbs for this recipe?
Panko bread crumbs are larger and lighter than regular breadcrumbs, which results in a superior crispy texture when baked.
How do I store and reheat leftover chicken tenders to keep them crispy?
Store leftover chicken tenders in an airtight container in the refrigerator for up to 3 days. Reheat in the oven at 350°F (175°C) for 10-15 minutes or in the air fryer at 350°F (175°C) for 5-7 minutes. Avoid using the microwave, as it will make them soggy.
What can I do to ensure the breadcrumbs stick properly to the chicken?
Make sure the chicken is damp (but not dripping wet) when you dredge it in the breadcrumbs. You can also add a tablespoon of mayonnaise to the buttermilk for extra adhesion.

Crispy Baked Chicken Tenders
Ingredients
Equipment
Method
- In a bowl, combine the chicken tenders, buttermilk, 1 teaspoon of salt, and 1/2 teaspoon of black pepper. Ensure the chicken is fully submerged in the buttermilk. Cover the bowl and refrigerate for at least 30 minutes, or up to 2 hours.
- Preheat your oven to 400°F (200°C). Line a large baking sheet with parchment paper.
- In a shallow dish, combine the panko bread crumbs, Parmesan cheese, flour, garlic powder, onion powder, paprika, thyme, 1/2 teaspoon of salt, and 1/4 teaspoon of black pepper. Mix everything together thoroughly.
- Drizzle the olive oil into the breadcrumb mixture and use your fingers to rub the oil into the breadcrumbs until they are evenly moistened.
- Remove the chicken tenders from the buttermilk, letting any excess drip off.
- One at a time, dredge each chicken tender in the breadcrumb mixture, pressing firmly to ensure it’s fully coated on all sides.
- Place the coated chicken tenders on the prepared baking sheet, leaving a little space between each one.
- Bake for 20-25 minutes, or until the chicken is cooked through and the coating is golden brown and crispy. The internal temperature should reach 165°F (74°C). Use a meat thermometer to be sure!


