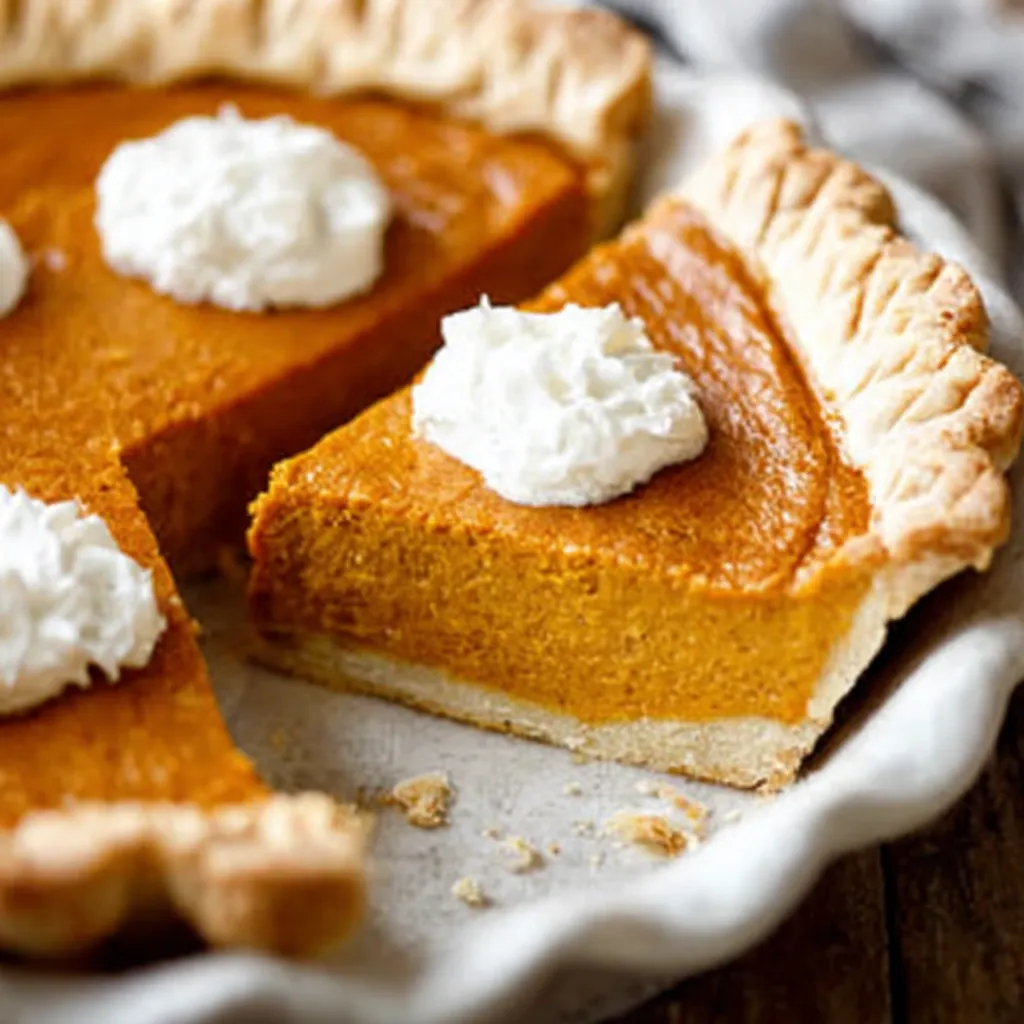
Imagine the warm spices filling your kitchen, the creamy texture melting in your mouth, and the perfectly golden crust holding it all together – this isn’t just any dessert; it’s the quintessential comfort of a homemade Pumpkin Pie. Get ready to bake the most delicious pumpkin pie you’ve ever tasted, a true centerpiece for your holiday table, guaranteed to impress!
Why This Pumpkin Pie Recipe is a Keeper

Okay, let’s be real – there are a million Pumpkin Pie recipes out there. So, why should you trust this one? Because I’ve spent years perfecting it, tweaking it, and making it foolproof (as much as baking allows!). This recipe focuses on maximizing flavor, using the right techniques to prevent cracks (yes, we’re tackling that head-on!), and ensuring a silky-smooth texture that will have everyone begging for seconds. It’s also about using real ingredients wherever possible because, honestly, the difference in taste is HUGE. Think of me as your baking bestie, guiding you every step of the way to Pumpkin Pie perfection.
Taming the Tricky Bits: Common Pumpkin Pie Problems (and Solutions!)
Let’s address the elephant in the room: Pumpkin Pie can be a bit… temperamental. Here are some common pitfalls and how to avoid them:
-
Cracked Pie Surface: This is the bane of every baker’s existence. The culprit? Rapid temperature changes and overbaking. My solutions:
- Bake at a lower temperature (350°F/175°C) for a longer time.
- Use a water bath (more on that later!) for even heat distribution.
- Don’t overbake! The pie should still have a slight jiggle in the center.
-
Soggy Crust: Ugh, nobody wants a soggy bottom!
- Blind bake your crust! This par-bakes the crust before adding the filling, creating a barrier against moisture.
- Brush the bottom of the crust with a beaten egg white before adding the filling. This seals the crust and prevents sogginess.
-
Lack of Flavor: Bland pumpkin pie is a sad pie.
- Use high-quality pumpkin puree (not pumpkin pie filling!).
- Don’t skimp on the spices! Freshly ground spices will give you the best flavor.
- A pinch of salt is crucial to balance the sweetness and enhance the other flavors.
-
Weird Texture: Grainy or curdled filling? No thanks!
- Make sure your eggs and pumpkin puree are at room temperature. This helps them incorporate smoothly.
- Don’t overmix the filling. Overmixing can develop gluten in the pumpkin puree, leading to a tough texture.
The Secret Ingredient: Love (and a Few Other Things)
Okay, love is important, but let’s talk about the real secret weapons in this recipe:
- Brown Butter: Trust me on this one. Browning the butter adds a nutty, caramelly depth of flavor that elevates the entire pie. It’s a simple step that makes a HUGE difference.
- A Touch of Molasses: Molasses complements the pumpkin spice perfectly, adding a hint of warmth and complexity.
- Good Quality Vanilla Extract: Don’t use imitation vanilla! Real vanilla extract is worth the splurge.
The Perfect Crust: Homemade vs. Store-Bought
Let’s have an honest chat about the crust. Making your own pie crust is incredibly rewarding, and the flavor is unbeatable. However, it also requires time and patience. If you’re short on either, a good quality store-bought crust is perfectly acceptable! I won’t judge! If you’re feeling ambitious, though, I highly recommend trying a homemade crust. There are tons of great recipes online. Just be sure to blind bake it for the best results!
Ingredients
For the Crust (or use a store-bought 9-inch pie crust):
- 1 1/4 cups all-purpose flour
- 1/2 teaspoon salt
- 1/2 cup (1 stick) cold unsalted butter, cut into cubes
- 1/4 cup cold vegetable shortening, cut into cubes
- 4-6 tablespoons ice water
For the Pumpkin Pie Filling:
- 1 (15-ounce) can pumpkin puree (not pumpkin pie filling!)
- 1 cup heavy cream
- 1/2 cup whole milk
- 3 large eggs, room temperature
- 3/4 cup granulated sugar
- 1/4 cup packed light brown sugar
- 2 tablespoons unsalted butter, browned
- 1 tablespoon molasses
- 2 teaspoons pumpkin pie spice
- 1 teaspoon vanilla extract
- 1/2 teaspoon salt
Step-by-Step Instructions
Get Started: Preparing the Crust
- Make the Crust (if homemade): In a large bowl, whisk together the flour and salt. Cut in the butter and shortening using a pastry blender or your fingers until the mixture resembles coarse crumbs.
- Gradually add the ice water, one tablespoon at a time, mixing until the dough just comes together.
- Form the dough into a disc, wrap in plastic wrap, and refrigerate for at least 30 minutes.
- On a lightly floured surface, roll out the dough to a 12-inch circle. Transfer to a 9-inch pie plate, trim the edges, and crimp decoratively.
- Blind Bake the Crust: Preheat oven to 375°F (190°C). Line the pie crust with parchment paper and fill with pie weights or dried beans. Bake for 15 minutes. Remove the parchment paper and weights and bake for another 5-10 minutes, or until lightly golden. Let cool completely.
- Reduce oven temperature to 350°F (175°C).
Making the Magic: The Pumpkin Pie Filling
- Brown the Butter: In a small saucepan, melt the butter over medium heat. Continue cooking until the butter turns golden brown and has a nutty aroma. Remove from heat and let cool slightly.
- Combine Ingredients: In a large bowl, whisk together the pumpkin puree, heavy cream, milk, eggs, granulated sugar, brown sugar, browned butter, molasses, pumpkin pie spice, vanilla extract, and salt until smooth. Be careful not to overmix.
- Pour into Crust: Pour the pumpkin pie filling into the prepared pie crust.
Bake to Perfection: The Final Steps
- Water Bath (Optional but Recommended): Wrap the outside of the pie plate with aluminum foil. Place the pie plate inside a larger baking dish. Pour hot water into the larger baking dish until it reaches halfway up the sides of the pie plate. This helps prevent cracking and ensures even baking.
- Bake: Bake for 50-60 minutes, or until the filling is set but still has a slight jiggle in the center. If the crust starts to brown too quickly, cover the edges with aluminum foil.
- Cool: Remove the pie from the oven and let it cool completely on a wire rack. Refrigerate for at least 4 hours before serving.
Serving Suggestions: The Grand Finale
Pumpkin Pie is fantastic on its own, but it’s even better with a few simple additions:
- Whipped Cream: A classic for a reason!
- Vanilla Ice Cream: The cold ice cream against the warm pie is heavenly.
- Caramel Sauce: Adds a touch of extra sweetness and richness.
- Pecan Streusel Topping: For a little crunch and nutty flavor.
Making Ahead and Storage
Good news! Pumpkin Pie is a great make-ahead dessert. You can bake it up to 2 days in advance and store it in the refrigerator. Just be sure to cover it tightly with plastic wrap to prevent it from drying out. It also freezes well! Wrap the cooled pie tightly in plastic wrap and then in foil. It will keep in the freezer for up to 2 months. Thaw in the refrigerator overnight before serving.
Level Up Your Holiday Spread
While you’re at it, why not expand your Thanksgiving or Christmas menu with some other incredible recipes? Consider adding a Sweet Potato Casserole or maybe even a Apple Crumble Cheesecake for a delightful twist. For a more traditional touch, don’t forget the Homemade Stuffing or a perfectly roasted Roast Turkey. And if you are looking for another pie recipe, the Chocolate Pecan Pie is also a great choice. If you want a unique spin on traditional desserts, try Pumpkin Crème Brûlée or Pumpkin Pecan Cobbler. You can also enjoy your morning coffee with Pumpkin Cinnamon Roll Muffins, Pumpkin Cheesecake Muffins or Pumpkin Muffins. If you like roll cakes, try Pumpkin Spice Roll Cake. You can also enjoy side dishes such as Garlic Parmesan Sweet Potato Wedges or Maple Walnut Sweet Potatoes. Consider also making an Apple Bundt Cake or Salted Caramel Apple Bars.
Final Thoughts: Enjoy Your Masterpiece!
Congratulations! You’ve just baked the best Pumpkin Pie ever! Take a moment to admire your creation, breathe in that amazing aroma, and pat yourself on the back. Sharing this pie with loved ones is what it’s all about, so go ahead and slice yourself a generous piece and savor every bite. Happy baking!
What are some common problems when making pumpkin pie, and how can I avoid them?
Common issues include a cracked pie surface (avoid by baking at a lower temperature, using a water bath, and not overbaking), a soggy crust (blind bake and brush with egg white), lack of flavor (use high-quality puree and spices), and weird texture (use room temperature ingredients and don’t overmix).
What is the secret ingredient to make this pumpkin pie extra special?
While love is important, the recipe highlights brown butter, a touch of molasses, and good quality vanilla extract as secret weapons to enhance the flavor.
Can I use a store-bought crust for this pumpkin pie recipe?
Yes, a good quality store-bought crust is acceptable if you are short on time or patience. However, the recipe recommends trying a homemade crust for the best flavor.
How far in advance can I make this pumpkin pie?
You can bake the pumpkin pie up to 2 days in advance and store it in the refrigerator, tightly covered. It also freezes well for up to 2 months.
Best Pumpkin Pie Ever
Ingredients
Equipment
Method
- Make the Crust (if homemade): In a large bowl, whisk together the flour and salt. Cut in the butter and shortening using a pastry blender or your fingers until the mixture resembles coarse crumbs.
- Gradually add the ice water, one tablespoon at a time, mixing until the dough just comes together.
- Form the dough into a disc, wrap in plastic wrap, and refrigerate for at least 30 minutes.
- On a lightly floured surface, roll out the dough to a 12-inch circle. Transfer to a 9-inch pie plate, trim the edges, and crimp decoratively.
- Blind Bake the Crust: Preheat oven to 375°F (190°C). Line the pie crust with parchment paper and fill with pie weights or dried beans. Bake for 15 minutes. Remove the parchment paper and weights and bake for another 5-10 minutes, or until lightly golden. Let cool completely.
- Reduce oven temperature to 350°F (175°C).
- Brown the Butter: In a small saucepan, melt the butter over medium heat. Continue cooking until the butter turns golden brown and has a nutty aroma. Remove from heat and let cool slightly.
- Combine Ingredients: In a large bowl, whisk together the pumpkin puree, heavy cream, milk, eggs, granulated sugar, brown sugar, browned butter, molasses, pumpkin pie spice, vanilla extract, and salt until smooth. Be careful not to overmix.
- Pour into Crust: Pour the pumpkin pie filling into the prepared pie crust.
- Water Bath (Optional but Recommended): Wrap the outside of the pie plate with aluminum foil. Place the pie plate inside a larger baking dish. Pour hot water into the larger baking dish until it reaches halfway up the sides of the pie plate. This helps prevent cracking and ensures even baking.
- Bake: Bake for 50-60 minutes, or until the filling is set but still has a slight jiggle in the center. If the crust starts to brown too quickly, cover the edges with aluminum foil.
- Cool: Remove the pie from the oven and let it cool completely on a wire rack. Refrigerate for at least 4 hours before serving.