How do you transform a humble burrito into a golden, crispy, utterly irresistible Chicken Chimichanga that even Abuela would be proud of? That’s the question that plagued me for weeks, a culinary puzzle I was determined to solve.
The Alchemic Equation: Unlocking Chimichanga Perfection
The secret to a truly exceptional Chicken Chimichanga lies in understanding the interplay of moisture, heat, and fat. Let’s break down the science:
- Moisture Control: Too much moisture in your filling will result in a soggy, sad chimichanga that steams rather than crisps. We need a filling that is flavorful and moist, but not so wet that it compromises the tortilla.
- Heat Application: High heat is crucial for achieving that golden-brown, blistered exterior. Whether you’re frying or baking, ensuring your cooking surface is properly preheated is key.
- Fat’s Role: Fat is the flavor carrier and the agent of crispiness. In frying, it’s obvious, but even in baking, a light coating of oil or cooking spray is essential for promoting browning and that satisfying crunch.
- The Tortilla Itself: Not all tortillas are created equal. A good quality, sturdy flour tortilla is vital. Thin, flimsy tortillas are prone to tearing and falling apart.
The Golden Ticket: My Ultimate Chicken Chimichanga Recipe

Ingredients:
- For the Chicken Filling:
- 1.5 lbs boneless, skinless chicken breasts
- 1 tbsp olive oil
- 1 medium onion, diced
- 1 bell pepper (any color), diced
- 1 (15 ounce) can black beans, rinsed and drained
- 1 (15 ounce) can corn, drained
- 1 (10 ounce) can diced tomatoes and green chilies (Rotel), undrained
- 1 packet taco seasoning
- 1/2 cup chicken broth
- 1/4 cup chopped cilantro
- For the Chimichangas:
- 8 large flour tortillas (burrito size)
- Vegetable oil, for frying (or cooking spray for baking)
- Optional Toppings: Sour cream, guacamole, salsa, shredded cheese
Instructions:
- Prepare the Chicken: Cook chicken breasts using your preferred method (boiling, baking, or grilling). Once cooked, shred the chicken using two forks.
- Sauté the Vegetables: Heat olive oil in a large skillet over medium heat. Add onion and bell pepper and cook until softened, about 5-7 minutes.
- Combine the Filling: Add shredded chicken, black beans, corn, Rotel, and taco seasoning to the skillet. Stir well to combine.
- Simmer: Pour in chicken broth and bring to a simmer. Cook for 10-15 minutes, stirring occasionally, until the sauce has thickened slightly.
- Finish the Filling: Stir in cilantro and remove from heat. Allow the filling to cool slightly.
- Assemble the Chimichangas: Warm tortillas slightly (this makes them more pliable and less likely to tear). Place about 1/2 cup of chicken filling in the center of each tortilla.
- Fold: Fold in the sides of the tortilla, then tightly roll up from the bottom, like a burrito.
- Fry (Preferred): Heat about 1/2 inch of vegetable oil in a large skillet over medium-high heat. Carefully place chimichangas seam-side down in the hot oil (work in batches to avoid overcrowding the pan). Fry for 2-3 minutes per side, or until golden brown and crispy. Drain on paper towels.
- Bake (Alternative): Preheat oven to 400°F (200°C). Place chimichangas seam-side down on a baking sheet lined with parchment paper. Lightly spray with cooking spray. Bake for 15-20 minutes, or until golden brown and crispy, flipping halfway through.
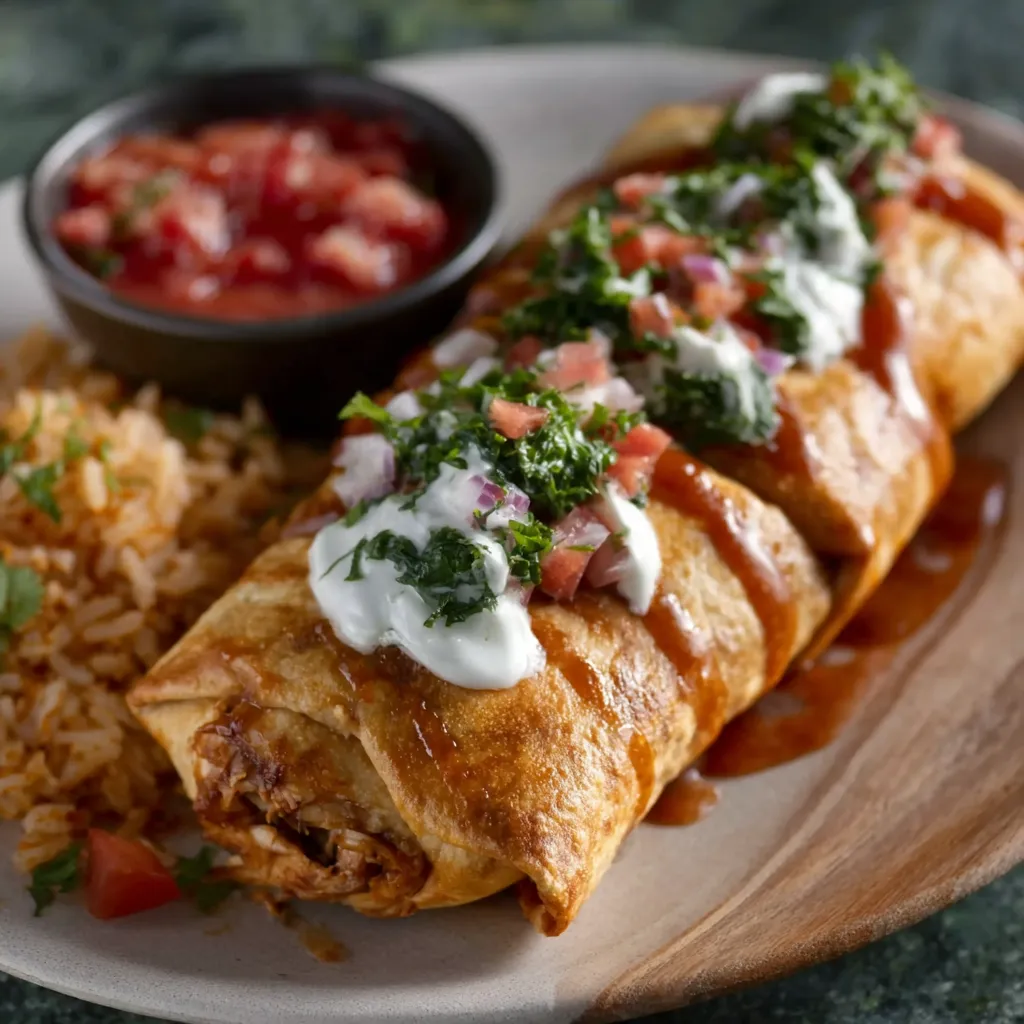
- Serve: Serve immediately with your favorite toppings.
My Chimichanga Odyssey: A Culinary Confessional
The Soggy Start: My Humbling Beginnings
My first few attempts were a disaster. I overloaded the tortillas with a watery chicken filling, resulting in a soggy, pale imitation of a chimichanga. The tortillas tore, the filling leaked, and the whole experience was deeply unsatisfying. Like many of you, I initially thought a chimichanga was simply a deep-fried burrito. I was so wrong!
The Moisture Mystery: Cracking the Code
Then, I had an “Aha!” moment. I realized the key was moisture control. I started experimenting with different cooking methods for the chicken and vegetables, focusing on reducing excess liquid. I also discovered the importance of draining the canned beans and corn thoroughly. Suddenly, things started to improve. I even tried different versions of the recipe, some with ground beef like you might find in Crispy Baked Ground Beef Tacos, but ultimately preferred the chicken.
The Tortilla Tango: Finding the Perfect Partner
Next, I tackled the tortilla issue. I tried various brands and sizes, and I learned that warming the tortillas before filling them made a world of difference. They became more pliable and less prone to cracking. It was a revelation! I also started experimenting with different folding techniques, striving for a tight, secure roll that would prevent the filling from escaping during frying. I even considered using the tortillas from my Chipotle Ranch Grilled Chicken Burrito recipe but they were too small.
Frying vs. Baking: The Great Debate
Finally, I delved into the age-old debate: frying versus baking. While frying undoubtedly produces the crispiest, most authentic results, I wanted to create a baked version that was equally delicious but slightly healthier. After numerous trials, I discovered that a generous coating of cooking spray and a hot oven were the keys to achieving a satisfyingly crispy baked chimichanga. It wasn’t quite the same as fried, but it was a worthy compromise. I even briefly considered making them into Taco Sticks for a different presentation, but I decided to stick with the classic form.
The Chimichanga Code: The Foolproof Method
- Master Moisture Control: Ensure your filling isn’t too wet. Cook vegetables until softened but not soggy, and drain canned ingredients thoroughly.
- Warm the Tortillas: Warm tortillas slightly to make them more pliable and prevent tearing.
- Don’t Overfill: Avoid overfilling the tortillas. About 1/2 cup of filling is the sweet spot.
- Fold Tightly: Fold in the sides and roll up tightly to create a secure package.
- Fry or Bake with Confidence: Use high heat and plenty of fat (either oil for frying or cooking spray for baking) to achieve a golden-brown, crispy exterior.
- Seam-Side Down: Always place chimichangas seam-side down when frying or baking to help seal the edges.
- Serve Immediately: Enjoy your perfectly crispy Chicken Chimichangas hot and fresh with your favorite toppings.
What is the key to preventing soggy chimichangas?
The key is moisture control. Ensure your filling isn’t too wet by cooking vegetables until softened but not soggy and draining canned ingredients thoroughly.
Why is it important to warm the tortillas before filling them?
Warming the tortillas makes them more pliable and less prone to tearing during the folding and cooking process.
What’s the difference between frying and baking the chimichangas?
Frying produces a crispier, more authentic result, while baking, with a generous coating of cooking spray and a hot oven, offers a slightly healthier alternative that still provides a satisfying crispiness.
How much filling should I put in each tortilla?
About 1/2 cup of filling is the recommended amount to avoid overfilling and potential tearing of the tortilla.
BEST CHICKEN CHIMICHANGAS EVER
Ingredients
Equipment
Method
- Cook chicken breasts using your preferred method (boiling, baking, or grilling). Once cooked, shred the chicken using two forks.
- Heat olive oil in a large skillet over medium heat. Add onion and bell pepper and cook until softened, about 5-7 minutes.
- Add shredded chicken, black beans, corn, Rotel, and taco seasoning to the skillet. Stir well to combine.
- Pour in chicken broth and bring to a simmer. Cook for 10-15 minutes, stirring occasionally, until the sauce has thickened slightly.
- Stir in cilantro and remove from heat. Allow the filling to cool slightly.
- Warm tortillas slightly (this makes them more pliable and less likely to tear). Place about 1/2 cup of chicken filling in the center of each tortilla.
- Fold in the sides of the tortilla, then tightly roll up from the bottom, like a burrito.
- For frying: Heat about 1/2 inch of vegetable oil in a large skillet over medium-high heat. Carefully place chimichangas seam-side down in the hot oil (work in batches to avoid overcrowding the pan). Fry for 2-3 minutes per side, or until golden brown and crispy. Drain on paper towels.
- For baking: Preheat oven to 400°F (200°C). Place chimichangas seam-side down on a baking sheet lined with parchment paper. Lightly spray with cooking spray. Bake for 15-20 minutes, or until golden brown and crispy, flipping halfway through.
- Serve immediately with your favorite toppings.