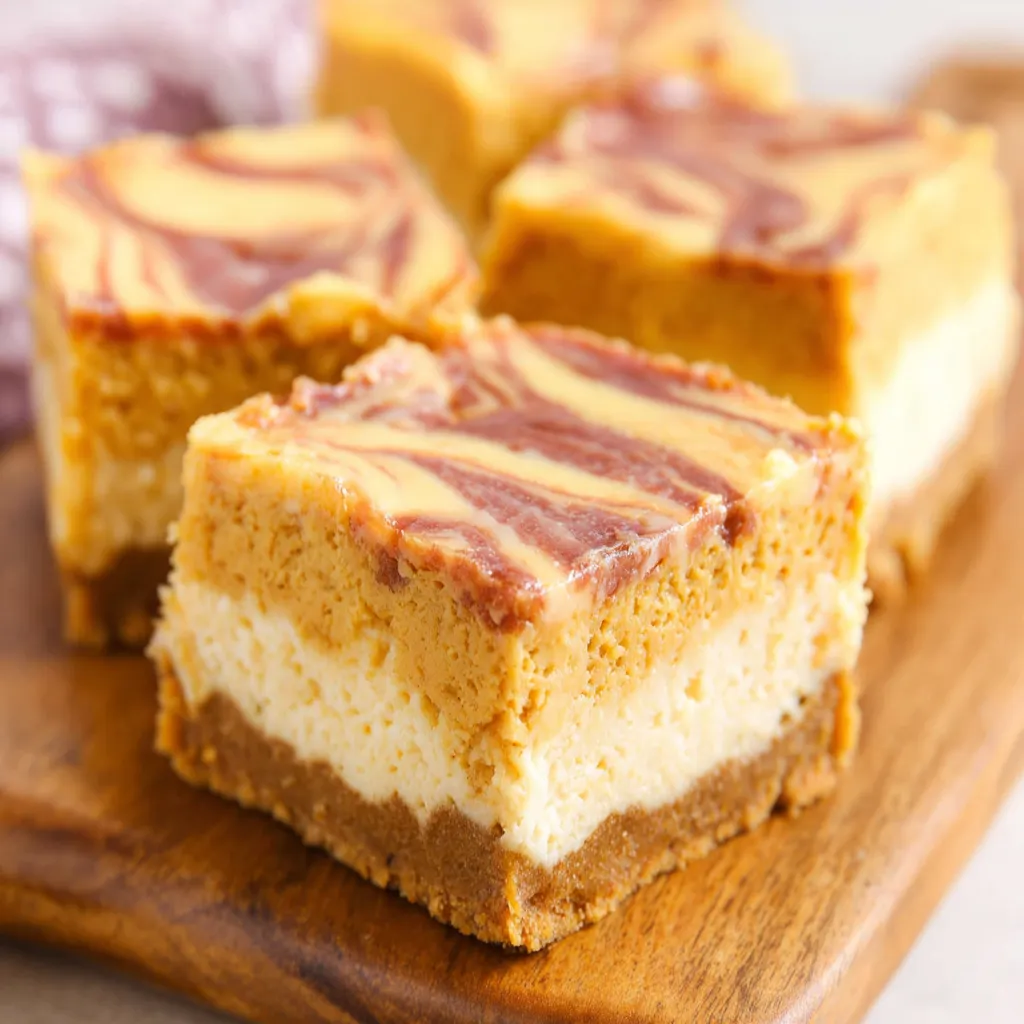
The Alchemy of Autumn: Decoding Cheesecake Science
 Cheesecake, at its heart, is a custard. And like all custards, it’s a delicate balance of protein coagulation and starch gelatinization. Too much heat, and the proteins seize up, leading to a dry, curdled texture and those dreaded cracks. Too little, and it’s a gloppy mess. The addition of pumpkin puree complicates things further. Pumpkin is mostly water, which can dilute the custard and make it prone to sinking in the middle. It also contains starch and fiber, which, if not properly managed, can affect the final texture. The key is to control the heat, bind the excess moisture, and choose the right ingredients in the correct ratios. We also have to consider the crust. A soggy crust is a common complaint, usually resulting from moisture seeping out of the filling during baking. Pre-baking, or “blind baking,” is essential to create a barrier. Finally, the cooling process is crucial. A rapid temperature change can shock the cheesecake, causing it to crack. A slow, gradual cooling in the oven helps to stabilize the structure.
The Grand Finale: A Foolproof Pumpkin Cheesecake Recipe
This recipe incorporates everything I’ve learned through my trials and tribulations. Follow it carefully, and you’ll be rewarded with a creamy, decadent pumpkin cheesecake that’s sure to impress.Ingredients:
- For the Crust:
- 1 ½ cups graham cracker crumbs
- 5 tablespoons unsalted butter, melted
- ¼ cup granulated sugar
- ¼ teaspoon ground cinnamon
- For the Filling:
- 24 ounces cream cheese, softened to room temperature
- 1 ½ cups granulated sugar
- 1 cup pumpkin puree (not pumpkin pie filling)
- 3 large eggs
- ½ cup heavy cream
- 2 tablespoons sour cream
- 2 teaspoons pumpkin pie spice
- 1 teaspoon vanilla extract
- ¼ teaspoon salt
Instructions:
- Prepare the Crust:
- Preheat oven to 350°F (175°C).
- In a medium bowl, combine graham cracker crumbs, melted butter, sugar, and cinnamon.
- Press mixture firmly into the bottom of a 9-inch springform pan.
- Bake for 8-10 minutes, or until lightly golden. Let cool completely.
- Make the Filling:
- Reduce oven temperature to 325°F (160°C).
- In a large bowl, beat cream cheese and sugar until smooth and creamy.
- Add pumpkin puree and beat until combined.
- Beat in eggs one at a time, mixing well after each addition.
- Stir in heavy cream, sour cream, pumpkin pie spice, vanilla extract, and salt. Mix until just combined. Be careful not to overmix.
- Bake the Cheesecake:
- Wrap the bottom of the springform pan tightly with aluminum foil to prevent water from seeping in during the water bath.
- Place the springform pan in a larger roasting pan. Pour hot water into the roasting pan until it reaches halfway up the sides of the springform pan.
- Carefully pour the filling into the prepared crust.
- Bake for 65-75 minutes, or until the edges are set but the center still has a slight jiggle.
- Cooling is Key:
- Turn off the oven and crack the oven door open slightly. Let the cheesecake cool in the oven for 1 hour.
- Remove the cheesecake from the water bath and let it cool completely on a wire rack.
- Cover the cheesecake and refrigerate for at least 4 hours, or preferably overnight, before serving.
- Serving:
- Run a thin knife around the edge of the cheesecake before releasing it from the springform pan.
- Serve chilled, garnished with whipped cream, a sprinkle of pumpkin pie spice, or a drizzle of caramel sauce, if desired.
Through the Oven Door: My Pumpkin Cheesecake Odyssey
My quest for the perfect pumpkin cheesecake was not a straight path. It was a winding road paved with cracked tops, soggy bottoms, and textures ranging from gummy to grainy. But like any good scientist (or obsessive baker), I meticulously documented each failure, analyzed the results, and adjusted my approach.The Great Graham Cracker Catastrophe
My first few attempts were a disaster, starting with the crust. I initially skipped the pre-baking step, a decision I quickly regretted. The filling’s moisture seeped into the crust, turning it into a soggy, unappetizing mess. I also experimented with different graham cracker to butter ratios. Too much butter, and the crust was greasy; too little, and it crumbled into oblivion. Finally, I found the sweet spot: 1 ½ cups of graham cracker crumbs to 5 tablespoons of melted butter, pre-baked for 8 minutes. This created a sturdy, flavorful base that could withstand the onslaught of pumpkin-infused filling. I considered using a gingersnap crust for a spicier note, similar to what I use for my Maple Pecan Pumpkin Cheesecake, but I wanted to keep the flavors classic for this recipe.The Case of the Cracked Crown
The biggest challenge, however, was the filling. Like many of you, I initially thought that simply throwing all the ingredients together and baking it would suffice. Wrong! My cheesecakes consistently emerged from the oven with deep, unsightly cracks. The texture was often dry and curdled. Then, I had an “Aha!” moment. I realized that overbaking was the culprit. Cheesecake, being a custard, needs to be treated with care. High heat and prolonged baking times cause the proteins to coagulate too quickly, resulting in a cracked surface and a grainy texture. I switched to a water bath, which provides a more even and gentle heat, and lowered the oven temperature to 325°F (160°C). I also started paying closer attention to the internal temperature of the cheesecake, aiming for a slight jiggle in the center when it was done.The Pumpkin Predicament
The pumpkin itself presented its own set of challenges. Too much pumpkin, and the cheesecake became dense and heavy. Too little, and the pumpkin flavor was lost. I also learned the importance of using pure pumpkin puree, not pumpkin pie filling. Pumpkin pie filling contains added sugar and spices, which can throw off the balance of the recipe. I experimented with different brands of pumpkin puree, finding that some were more watery than others. I found that draining the puree through cheesecloth helped to remove excess moisture and prevent the cheesecake from becoming soggy. This is a tip I also use when making my Pumpkin Pie.The Cooling Conundrum
Finally, I discovered the importance of slow cooling. Taking the cheesecake directly from the hot oven to the refrigerator was a recipe for disaster. The sudden temperature change caused the cheesecake to contract rapidly, leading to cracks. I started letting the cheesecake cool in the oven with the door ajar for an hour before transferring it to a wire rack to cool completely. Then, I refrigerated it for at least 4 hours, or preferably overnight, to allow the flavors to meld and the texture to set. This slow cooling process made a world of difference.The Baker’s Blueprint: A No-Fail Pumpkin Cheesecake Method
After countless experiments, failures, and triumphs, I’ve distilled the process down to a simple, foolproof method. Follow these steps, and you’ll be on your way to pumpkin cheesecake perfection:- Pre-bake the crust: This creates a moisture barrier and prevents a soggy bottom.
- Use room-temperature ingredients: Softened cream cheese blends more easily and prevents lumps.
- Don’t overmix: Overmixing incorporates too much air, which can cause the cheesecake to puff up and crack during baking.
- Use a water bath: This provides a gentle, even heat that prevents the cheesecake from drying out and cracking.
- Bake low and slow: A lower oven temperature and longer baking time ensures a creamy, even texture.
- Cool slowly: Let the cheesecake cool gradually in the oven to prevent cracking.
- Chill thoroughly: Refrigerate for at least 4 hours, or preferably overnight, to allow the flavors to meld and the texture to set.
Why is pre-baking the crust important for this pumpkin cheesecake recipe?
Pre-baking the crust creates a moisture barrier, preventing the filling’s moisture from seeping into the crust and causing a soggy bottom.
Why does the recipe call for a water bath when baking the cheesecake?
A water bath provides a gentle, even heat that prevents the cheesecake from drying out and cracking during baking. It helps to maintain a creamy texture.
What is the significance of cooling the cheesecake slowly in the oven?
Slow cooling in the oven helps prevent the cheesecake from cracking. A rapid temperature change can shock the cheesecake, causing it to contract rapidly and crack. Gradual cooling stabilizes the structure.
Why is it important to use pumpkin puree and not pumpkin pie filling in this recipe?
Pumpkin pie filling contains added sugar and spices, which can throw off the balance of the recipe. Using pure pumpkin puree allows you to control the sweetness and spice levels.
Perfect Pumpkin Cheesecake
Ingredients
Equipment
Method
- Preheat oven to 350°F (175°C).
- In a medium bowl, combine graham cracker crumbs, melted butter, sugar, and cinnamon.
- Press mixture firmly into the bottom of a 9-inch springform pan.
- Bake for 8-10 minutes, or until lightly golden. Let cool completely.
- Reduce oven temperature to 325°F (160°C).
- In a large bowl, beat cream cheese and sugar until smooth and creamy.
- Add pumpkin puree and beat until combined.
- Beat in eggs one at a time, mixing well after each addition.
- Stir in heavy cream, sour cream, pumpkin pie spice, vanilla extract, and salt. Mix until just combined. Be careful not to overmix.
- Wrap the bottom of the springform pan tightly with aluminum foil to prevent water from seeping in during the water bath.
- Place the springform pan in a larger roasting pan. Pour hot water into the roasting pan until it reaches halfway up the sides of the springform pan.
- Carefully pour the filling into the prepared crust.
- Bake for 65-75 minutes, or until the edges are set but the center still has a slight jiggle.
- Turn off the oven and crack the oven door open slightly. Let the cheesecake cool in the oven for 1 hour.
- Remove the cheesecake from the water bath and let it cool completely on a wire rack.
- Cover the cheesecake and refrigerate for at least 4 hours, or preferably overnight, before serving.
- Run a thin knife around the edge of the cheesecake before releasing it from the springform pan.
- Serve chilled, garnished with whipped cream, a sprinkle of pumpkin pie spice, or a drizzle of caramel sauce, if desired.
