The All-Important Ingredients

Let’s gather everything we need! Don’t worry, it’s a pretty straightforward list, and you can easily customize it to your liking. These measurements are guidelines; feel free to adjust to your taste!
Base Ingredients:
- Cream Cheese: 16 ounces, softened to room temperature (this is KEY!)
- Shredded Cheddar Cheese: 1 cup (sharp or mild, your choice!)
- Shredded Monterey Jack Cheese: 1 cup (or another melty cheese like Colby Jack)
- Garlic Powder: 1 teaspoon
- Onion Powder: 1 teaspoon
- Worcestershire Sauce: 1 teaspoon
Mix-In Options (Get Creative!):
- Cooked Bacon: 1/2 cup, crumbled (because, bacon!)
- Green Onions: 1/4 cup, finely chopped
- Chopped Pecans or Walnuts: 1/4 cup, toasted (for extra flavor)
- Dried Cranberries: 1/4 cup (adds a sweet and tangy touch)
- Jalapeño Peppers: 1-2 tablespoons, finely minced (for a kick!)
Coating Ingredients (for a Beautiful Finish):
- Finely Chopped Pecans: 1 cup (or walnuts, or almonds – whatever you prefer!)
- Everything Bagel Seasoning: 1/4 cup (for a savory and crunchy coating)
- Shredded Cheddar Cheese: 1 cup (for a cheesy coating)
- Chopped Fresh Parsley: 1/4 cup (for a fresh, vibrant look)
Step-by-Step Instructions: Let’s Get Rolling!
Okay, now for the fun part! Follow these simple steps, and you’ll have a delicious cheese ball in no time. Don’t be afraid to experiment with flavors and coatings!
Step 1: Combining the Base
- In a large bowl, beat the softened cream cheese with an electric mixer until smooth and creamy. This is really important – lumpy cream cheese will make for a lumpy cheese ball!
- Add the shredded cheddar cheese, Monterey Jack cheese, garlic powder, onion powder, and Worcestershire sauce.
- Mix everything together until well combined. Make sure there are no pockets of cream cheese left.
Step 2: Incorporating Your Mix-Ins
- Now comes the fun part! Gently fold in your chosen mix-ins (bacon, green onions, nuts, cranberries, jalapeños, etc.). Distribute them evenly throughout the cheese mixture.
- Taste and adjust seasonings as needed. Want more garlic? Add it! Need a little heat? Throw in some more jalapeño. This is your cheese ball, so make it your own!
Step 3: Forming the Cheese Ball
- Cover the bowl with plastic wrap and refrigerate for at least 2 hours, or preferably overnight. This allows the flavors to meld together and the cheese mixture to firm up, making it easier to shape.
- Once chilled, remove the cheese mixture from the refrigerator.
- On a large piece of plastic wrap, shape the cheese mixture into a ball. You can use your hands or a large spoon to help.
- Wrap the cheese ball tightly in plastic wrap and return it to the refrigerator for another 30 minutes to an hour to firm up even more.
Step 4: Coating the Cheese Ball
- While the cheese ball is chilling, prepare your chosen coating on a shallow plate or dish. I often like to use a mix of finely chopped pecans and everything bagel seasoning.
- Remove the cheese ball from the refrigerator and unwrap it.
- Gently roll the cheese ball in the coating, pressing lightly to help the coating adhere. Make sure the entire cheese ball is covered.
- If you’re using a coating that doesn’t stick easily (like shredded cheese), you can lightly spray the cheese ball with cooking spray before rolling it in the coating.
Step 5: Final Chill and Serving
- Wrap the coated cheese ball in plastic wrap one last time and refrigerate for at least 30 minutes to allow the coating to set.
- Before serving, remove the cheese ball from the refrigerator and place it on a serving platter.
- Serve with your favorite crackers, pretzels, vegetables, or baguette slices.
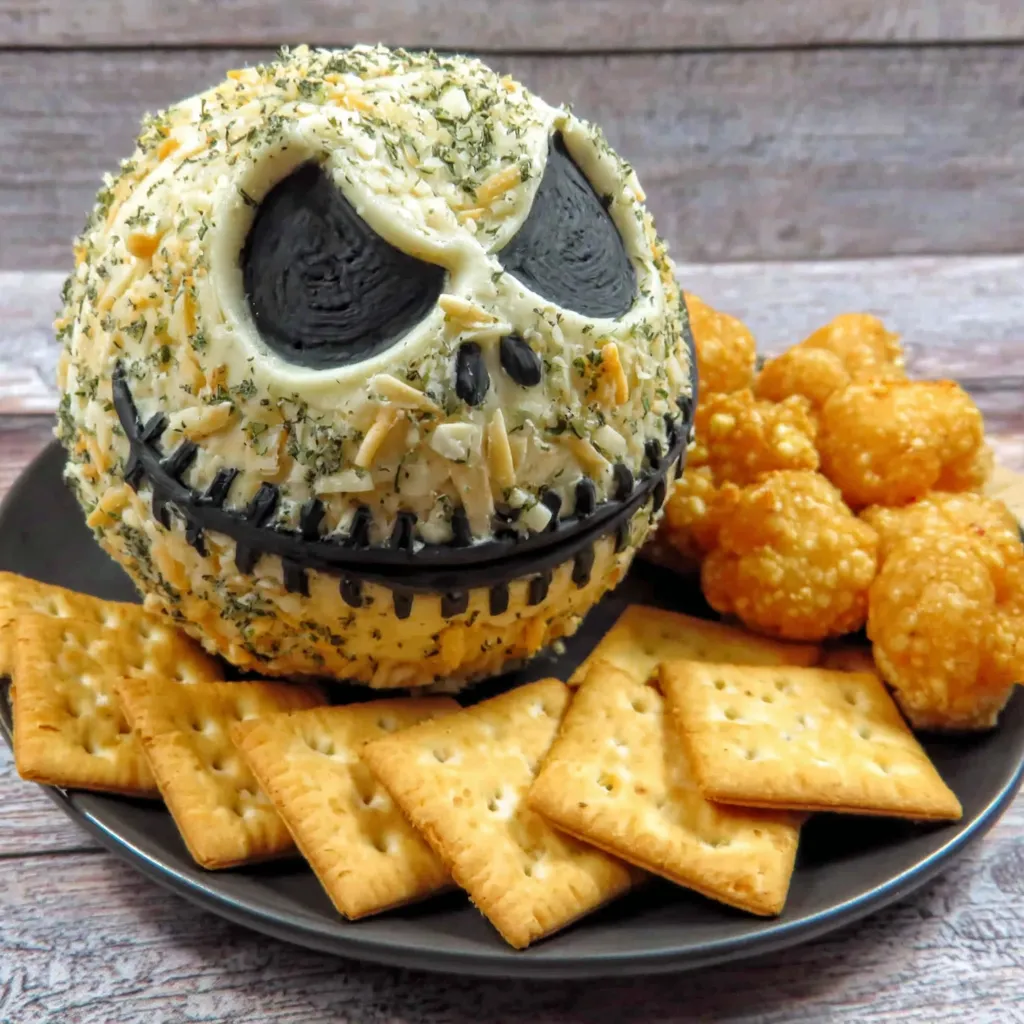
Halloween Cheese Ball Variations
Let’s get spooky! Here are a few ideas to give your cheese ball a Halloween twist.
Spider Cheese Ball
Coat your cheese ball with black sesame seeds. Then, use black olives to create a spider on top. Slice one olive in half for the body and use thin strips of olive for the legs.
Pumpkin Cheese Ball
Mix orange food coloring into your cheese ball base. Coat with shredded cheddar cheese to resemble a pumpkin. Use a pretzel stick for the stem.
Mummy Cheese Ball
Wrap strips of crescent roll dough around the cheese ball to resemble a mummy. Bake until golden brown. Use black olives for the eyes. This is inspired by the incredibly popular Crescent Mummy Dogs, Mummy Hot Dogs, and Hot Dog Mummies!
Tips and Tricks for the Perfect Cheese Ball
Here are a few extra tips to ensure cheese ball success!
- Softened Cream Cheese is Key: Seriously, don’t skip this step! It will make all the difference in the texture of your cheese ball.
- Don’t Overmix: Overmixing can make the cheese ball tough. Mix until just combined.
- Chill Time is Important: Don’t rush the chilling process. It allows the flavors to meld and the cheese ball to firm up.
- Get Creative with Coatings: The coating is where you can really let your personality shine. Experiment with different nuts, seeds, herbs, and spices.
- Make Ahead: Cheese balls can be made a day or two in advance. Just wrap them tightly in plastic wrap and store them in the refrigerator.
Serving Suggestions and Pairings
The possibilities are endless! Here are some of my favorite ways to serve and pair a cheese ball:
- Crackers: Serve with a variety of crackers, such as Ritz, Triscuits, and Wheat Thins.
- Pretzels: Pretzel crisps or pretzel rods add a salty and crunchy element.
- Vegetables: Carrot sticks, celery sticks, cucumber slices, and bell pepper strips make a healthy and colorful addition.
- Baguette Slices: Toasted baguette slices are perfect for scooping up the cheesy goodness.
- Wine: Pair your cheese ball with a crisp white wine, such as Sauvignon Blanc or Pinot Grigio, or a light-bodied red wine, such as Pinot Noir.
Other Delicious Appetizer Ideas
Looking for more inspiration for your next party? Check out these other appetizer recipes:
- Pumpkin Whipped Feta Dip: A savory and seasonal dip perfect for fall gatherings.
- Cranberry Pecan Cheese Ball: A festive and flavorful cheese ball with cranberries and pecans.
- Halloween Eyeball Jello Shots: Get spooky with these Halloween themed jello shots.
Final Thoughts
So there you have it – everything you need to make the BEST Cheese Ball ever! I hope you enjoy this recipe as much as I do. Remember, cooking is all about having fun and experimenting, so don’t be afraid to put your own spin on things. Happy cooking!
Why is it important to use softened cream cheese when making the cheese ball?
Using softened cream cheese is key to achieving a smooth and creamy texture. Lumpy cream cheese will result in a lumpy cheese ball.
Can I prepare the cheese ball in advance?
Yes, cheese balls can be made a day or two in advance. Just wrap them tightly in plastic wrap and store them in the refrigerator.
What are some Halloween-themed variations I can make?
You can create a Spider Cheese Ball using black sesame seeds and olives, a Pumpkin Cheese Ball by adding orange food coloring and shredded cheddar, or a Mummy Cheese Ball by wrapping it in crescent roll dough and using olives for the eyes.
What are some serving suggestions for the cheese ball?
Serve the cheese ball with crackers, pretzels, vegetables like carrot and celery sticks, or toasted baguette slices. Consider pairing it with a crisp white wine like Sauvignon Blanc.
BEST CHEESE BALL HALLOWEEN
Ingredients
Equipment
Method
- In a large bowl, beat the softened cream cheese with an electric mixer until smooth and creamy.
- Add the shredded cheddar cheese, Monterey Jack cheese, garlic powder, onion powder, and Worcestershire sauce.
- Mix everything together until well combined.
- Gently fold in your chosen mix-ins (bacon, green onions, nuts, cranberries, jalapeños, etc.). Distribute them evenly throughout the cheese mixture.
- Taste and adjust seasonings as needed.
- Cover the bowl with plastic wrap and refrigerate for at least 2 hours, or preferably overnight.
- Once chilled, remove the cheese mixture from the refrigerator.
- On a large piece of plastic wrap, shape the cheese mixture into a ball.
- Wrap the cheese ball tightly in plastic wrap and return it to the refrigerator for another 30 minutes to an hour.
- While the cheese ball is chilling, prepare your chosen coating on a shallow plate or dish.
- Remove the cheese ball from the refrigerator and unwrap it.
- Gently roll the cheese ball in the coating, pressing lightly to help the coating adhere.
- Wrap the coated cheese ball in plastic wrap one last time and refrigerate for at least 30 minutes to allow the coating to set.
- Before serving, remove the cheese ball from the refrigerator and place it on a serving platter.
- Serve with your favorite crackers, pretzels, vegetables, or baguette slices.
