The question that haunts every Halloween host is this: how do you concoct a Witch’s Potion Punch that’s not only visually stunning and deliciously spooky, but also scientifically sound and genuinely appealing to both kids and adults?
Unveiling the Alchemic Secrets: The Science Behind the Potion

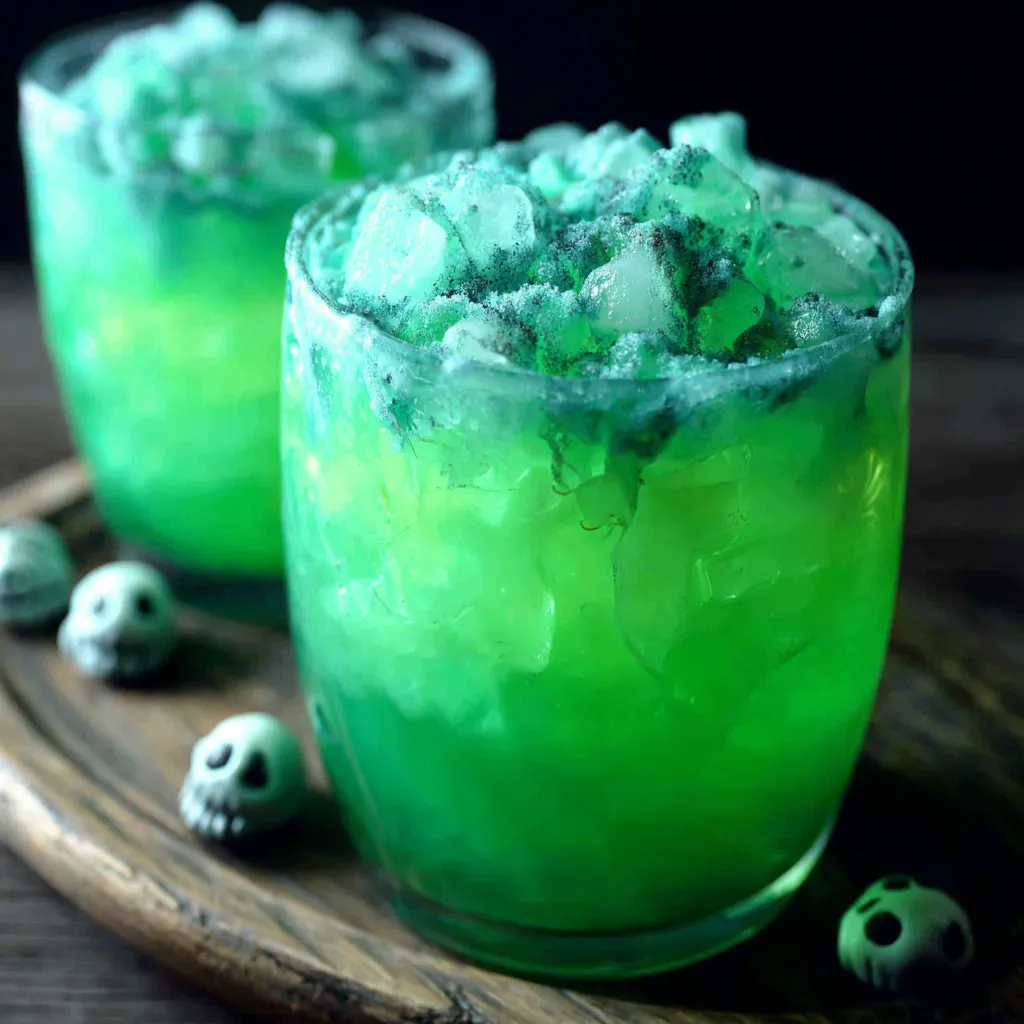
The magic of Witch’s Potion Punch isn’t just in the bubbling dry ice or the gummy worms; it’s rooted in some fundamental principles of food science. Firstly, color plays a HUGE role. We eat with our eyes, and vibrant, unnatural colors (achieved safely, of course!) are key to creating a spooky atmosphere. Think deep greens, purples, and reds. Secondly, texture and visual effects elevate the experience. The ‘bubbling’ effect from dry ice is sublimation – the direct transition of solid carbon dioxide to gas. This creates that signature smoky aesthetic. Finally, flavor profiles need to be balanced. Too sweet, and it’s cloying; not sweet enough, and it lacks that ‘potion’ allure. Carbonation adds a pleasant tingle and can enhance the perception of flavor, while a touch of acidity (lemon or lime juice) cuts through the sweetness and provides complexity. Understanding these elements is critical to ensuring your punch isn’t just a sugar bomb but a delightful sensory experience.
The Official Witch’s Potion Punch Recipe
Here is my meticulously tested recipe, designed for maximum spooky impact and balanced flavor. Get ready to brew some magic!
Ingredients:
- 64 oz. Green Hawaiian Punch
- 64 oz. Ginger Ale (or club soda for less sweetness)
- 12 oz. Frozen Limeade Concentrate, thawed
- 1 liter Lemon-Lime Soda (e.g., Sprite or 7-Up)
- 1/2 cup Fresh Lime Juice
- Green Food Coloring (gel preferred, for intensity)
- Gummy Worms, gummy eyeballs, plastic spiders (for garnish)
- Dry Ice (food grade), optional
- Optional: 2 oz Vodka (for adult version)
Equipment:
- Large Punch Bowl or cauldron-like vessel
- Ladle
- Measuring Cups and Spoons
- Gloves for handling dry ice (absolutely essential!)
Instructions:
- Combine Liquids: In your punch bowl, pour in the Green Hawaiian Punch, Ginger Ale, thawed Limeade Concentrate, Lemon-Lime Soda, and Fresh Lime Juice.
- Adjust Color: Add green food coloring, a few drops at a time, until you achieve your desired shade of eerie green. Stir well to ensure even distribution.
- Sweetness Check: Taste the punch. If it’s too tart, add a little simple syrup or additional limeade concentrate, one tablespoon at a time, until it reaches your preferred sweetness level.
- Boozy Addition (Optional): If making an adult version, stir in the vodka.
- Chill: Refrigerate the punch for at least 2 hours to allow the flavors to meld. This also helps to keep it cold before adding the dry ice.
- Garnish: Just before serving, add gummy worms, gummy eyeballs, and plastic spiders to the punch bowl.
- Dry Ice Effect (Optional): Using gloves, carefully add small pieces of dry ice to the punch. Be aware that dry ice will sink to the bottom and should not be ingested. As the dry ice sublimates, it will create a spooky, bubbling effect. Replenish as needed to maintain the effect.
- Serve: Ladle the punch into glasses, ensuring that no dry ice is transferred into the individual servings.
My Potion-Brewing Journey: A Culinary Investigation
My first few attempts were a disaster. Like many of you, I initially thought the key was just throwing a bunch of sweet ingredients together with some food coloring. The result? An overly sweet, neon-green concoction that resembled something more akin to toxic waste than a mystical potion. The kids bounced off the walls from the sugar rush, and the adults politely sipped and then discreetly switched to wine.
The “Too Sweet” Debacle
The first hurdle was the excessive sweetness. I had relied too heavily on sugary sodas and juices, resulting in a cloying taste that masked any other flavors. I considered using simple syrup but worried that it would just exacerbate the problem. Then, I had an “Aha!” moment: acidity!
The Lime Revelation
Introducing fresh lime juice was a game-changer. The tartness not only balanced the sweetness but also added a layer of complexity that was previously missing. It transformed the punch from a one-dimensional sugar bomb into a more sophisticated, palatable beverage.
The Color Conundrum
Achieving the perfect shade of eerie green proved trickier than anticipated. Liquid food coloring tended to disperse unevenly, resulting in a mottled, unappetizing appearance. Switching to gel food coloring solved this problem. The gel provided a more concentrated, uniform color, allowing me to achieve that vibrant, spooky green that I was after. I even considered adding a touch of blue to deepen the green for a more mysterious look, but ultimately decided against it, preferring the brighter, more classic “witchy” hue. I learned the importance of small additions and thorough stirring.
The Dry Ice Dilemma
Handling dry ice requires caution and respect. My initial attempt involved dropping a large chunk directly into the punch bowl. The resulting eruption was impressive, but also short-lived and potentially dangerous. I quickly learned that smaller pieces, added gradually, provide a more sustained and controlled bubbling effect. I also realized the importance of providing clear instructions to guests about the dangers of ingesting dry ice. Always supervise, and never let children handle it.
While preparing for Halloween, maybe you’d like to serve Hot Dog Mummies (https://therecipesmom.com/best-hot-dog-mummies-ever/) alongside this potion. If you’re looking for something sweeter, perhaps Christmas Puppy Chow, even though it’s not Halloween themed, could be an option. For a more complete meal, consider Meatball Mummy Dinner. And for another spooky snack, Skull Potato Bites are always a hit. Don’t forget the adults! A Pumpkin Martini could add a bit of festive sophistication. Or, if you prefer something non-alcoholic but equally enchanting, the Apple Cider Spell would be perfect.
The Foolproof Potion-Making Technique: A Step-by-Step Guide to Success
After many trials (and errors!), I’ve distilled the process into a simple, foolproof method. Follow these steps, and your Witch’s Potion Punch will be the star of your Halloween gathering.
- Prepare Ingredients: Gather all ingredients and equipment. Thaw the limeade concentrate completely. Ensure you have gloves for handling dry ice.
- Combine Liquids Gradually: Start with the Green Hawaiian Punch, then add the Ginger Ale and Limeade Concentrate. This prevents excessive fizzing and makes it easier to mix.
- Color with Precision: Add gel food coloring one drop at a time, stirring thoroughly after each addition. Remember, you can always add more, but you can’t take it away!
- Taste and Adjust: This is crucial! Taste the punch after combining the liquids and food coloring. Adjust the sweetness with small amounts of simple syrup or additional limeade concentrate. Adjust the tartness with small amounts of fresh lime juice.
- Chill Thoroughly: Refrigerating the punch for at least 2 hours allows the flavors to meld and the punch to become properly chilled. Cold punch is more refreshing and palatable.
- Garnish Strategically: Add gummy worms, gummy eyeballs, and plastic spiders just before serving. This prevents the gummy candies from becoming soggy and ensures that the garnishes remain visually appealing.
- Dry Ice with Caution: If using dry ice, add small pieces gradually, using gloves. Supervise guests closely, and ensure that no one ingests the dry ice.
- Serve Responsibly: Ladle the punch into glasses, ensuring that no dry ice is transferred. Enjoy the spooky atmosphere and the delicious taste of your Witch’s Potion Punch!
What makes this Witch’s Potion Punch recipe “scientifically sound”?
The recipe considers food science principles like the impact of color, texture (bubbling from dry ice), and balanced flavor profiles (sweetness, acidity, and carbonation) to create a satisfying sensory experience.
What are some tips for achieving the best color for the punch?
Use gel food coloring instead of liquid for a more concentrated and uniform color. Add the coloring a few drops at a time and stir thoroughly. Consider a touch of blue to deepen the green, but a brighter green is more classic.
How should I safely use dry ice in the Witch’s Potion Punch?
Always use gloves when handling dry ice. Add small pieces gradually to the punch bowl for a sustained bubbling effect. Supervise guests closely and ensure no one ingests the dry ice. Do not put dry ice directly into individual serving glasses.
What can I do if the punch is too sweet?
Add fresh lime juice to balance the sweetness. Start with small amounts and taste as you go until you reach your preferred level of tartness.
Witch’s Potion Punch Amazing
Ingredients
Equipment
Method
- Combine Liquids: In your punch bowl, pour in the Green Hawaiian Punch, Ginger Ale, thawed Limeade Concentrate, Lemon-Lime Soda, and Fresh Lime Juice.
- Adjust Color: Add green food coloring, a few drops at a time, until you achieve your desired shade of eerie green. Stir well to ensure even distribution.
- Sweetness Check: Taste the punch. If it’s too tart, add a little simple syrup or additional limeade concentrate, one tablespoon at a time, until it reaches your preferred sweetness level.
- Boozy Addition (Optional): If making an adult version, stir in the vodka.
- Chill: Refrigerate the punch for at least 2 hours to allow the flavors to meld. This also helps to keep it cold before adding the dry ice.
- Garnish: Just before serving, add gummy worms, gummy eyeballs, and plastic spiders to the punch bowl.
- Dry Ice Effect (Optional): Using gloves, carefully add small pieces of dry ice to the punch. Be aware that dry ice will sink to the bottom and should not be ingested. As the dry ice sublimates, it will create a spooky, bubbling effect. Replenish as needed to maintain the effect.
- Serve: Ladle the punch into glasses, ensuring that no dry ice is transferred into the individual servings.
