What Makes This Apple Crisp So Special?
 Hey there, friend! I’m so excited you’re here, ready to bake up a batch of apple crisp. Let me tell you, this isn’t just *any* apple crisp. This is the kind of dessert that brings everyone to the kitchen, spoons in hand, practically fighting over the last bite. I’ve tweaked and perfected this recipe over the years, and I’m spilling all my secrets.
What makes it so good? Well, for starters, we’re not skimping on the flavor. We’re using a blend of spices that will make your kitchen smell absolutely divine. And the topping? Oh, the topping! It’s perfectly crisp and buttery, with just the right amount of sweetness.
But most importantly, it’s *easy*. I know baking can sometimes feel intimidating, but trust me on this one. This recipe is foolproof. I’ll walk you through every step, so you can relax and enjoy the process. Plus, cleanup is a breeze!
Hey there, friend! I’m so excited you’re here, ready to bake up a batch of apple crisp. Let me tell you, this isn’t just *any* apple crisp. This is the kind of dessert that brings everyone to the kitchen, spoons in hand, practically fighting over the last bite. I’ve tweaked and perfected this recipe over the years, and I’m spilling all my secrets.
What makes it so good? Well, for starters, we’re not skimping on the flavor. We’re using a blend of spices that will make your kitchen smell absolutely divine. And the topping? Oh, the topping! It’s perfectly crisp and buttery, with just the right amount of sweetness.
But most importantly, it’s *easy*. I know baking can sometimes feel intimidating, but trust me on this one. This recipe is foolproof. I’ll walk you through every step, so you can relax and enjoy the process. Plus, cleanup is a breeze!
Ingredients: Let’s Gather Our Supplies
Apple Filling:
- 6-8 medium apples (such as Granny Smith, Honeycrisp, or a mix), peeled, cored, and sliced
- 1/4 cup granulated sugar (adjust to your sweetness preference)
- 2 tablespoons all-purpose flour
- 1 teaspoon ground cinnamon
- 1/4 teaspoon ground nutmeg
- 1 tablespoon lemon juice (to prevent browning and add brightness)
- 2 tablespoons butter, cut into small pieces
Crisp Topping:
- 1 cup all-purpose flour
- 1 cup rolled oats (old-fashioned oats work best)
- 3/4 cup packed brown sugar
- 1/2 teaspoon ground cinnamon
- 1/4 teaspoon salt
- 1/2 cup (1 stick) cold unsalted butter, cut into small cubes
Step-by-Step Instructions: Let’s Get Baking!
1. Prep the Apples:
- Preheat your oven to 375°F (190°C).
- In a large bowl, combine the sliced apples, granulated sugar, flour, cinnamon, nutmeg, and lemon juice. Toss gently to coat all the apple slices evenly.
- Dot the apple mixture with the small pieces of butter.
2. Make the Crisp Topping:
- In a separate bowl, whisk together the flour, rolled oats, brown sugar, cinnamon, and salt.
- Add the cold, cubed butter to the dry ingredients. Use a pastry blender or your fingertips to cut the butter into the mixture until it resembles coarse crumbs. The mixture should hold together slightly when squeezed. This is key for that perfect crisp texture!
3. Assemble and Bake:
- Pour the apple mixture into a 9-inch square baking dish (or a similar-sized oven-safe dish).
- Sprinkle the crisp topping evenly over the apples. Make sure to distribute it well!
- Bake for 30-40 minutes, or until the topping is golden brown and the apple filling is bubbly. If the topping starts to brown too quickly, you can loosely tent it with foil.
- Let the apple crisp cool for at least 15 minutes before serving. This allows the filling to thicken slightly and prevents you from burning your tongue!
Troubleshooting: Common Apple Crisp Problems and How to Solve Them
Okay, let’s be real. Sometimes things don’t go exactly as planned. But don’t worry, I’ve got you covered! Here are a few common apple crisp problems and how to fix them:- Topping is too dry: If your topping is dry and crumbly, it probably needs more butter. Next time, try adding a tablespoon or two of melted butter to the topping mixture.
- Topping is not crisp: This usually happens when the butter isn’t cold enough. Make sure your butter is ice-cold before you start. You can even chill the dry ingredients for a few minutes before adding the butter.
- Filling is too watery: This can happen if your apples are very juicy. To prevent this, you can add an extra tablespoon of flour to the apple filling. You can also try using a mix of apple varieties, as some are juicier than others.
- Burning: Oven temperatures can vary. If you notice your crisp is burning before it is finished, cover it loosely with aluminum foil to allow the apples to cook through without the topping burning.
Apple Crisp Variations: Let’s Get Creative!
The beauty of apple crisp is that it’s so versatile! Here are a few ideas to get your creative juices flowing:- Add nuts: Chopped pecans, walnuts, or almonds add a delightful crunch to the topping.
- Spice it up: Experiment with different spices, such as cardamom, ginger, or allspice.
- Add fruit: Throw in some cranberries, blueberries, or raspberries for a burst of extra flavor.
- Use different apples: Try a mix of different apple varieties for a more complex flavor. I love using Granny Smith for tartness and Honeycrisp for sweetness.
- Maple Syrup: Drizzle a tablespoon or two of pure maple syrup over the apples before topping with the crisp mixture.
- Vanilla Extract: Add 1 teaspoon of vanilla extract to the apple mixture or the crisp topping for enhanced flavor.
Serving Suggestions: The Perfect Apple Crisp Experience
Apple crisp is delicious on its own, but it’s even better with a scoop of vanilla ice cream or a dollop of whipped cream. A drizzle of caramel sauce is also a fantastic addition. I also enjoy it with a warm cup of coffee or tea. Consider baking Apple Pie Cheesecake Bites for your next gathering! If you’re looking for other apple-themed desserts, you might also like my recipes for Caramel Apple Cupcake Heaven, which are always a crowd-pleaser. For a fun, individual serving option, check out my Muffin Tin Apple Pies. And if you’re craving something a little different, my Apple Brownies are a must-try. For a cozy fall treat, you can’t go wrong with Apple Dumplings. Or, for a delightful salad option, try the Twix Caramel Apple Salad.Storing Leftovers: Keeping Your Apple Crisp Fresh
If you happen to have any leftovers (which is rare!), you can store them in the refrigerator for up to 3 days. To reheat, simply warm it up in the oven or microwave. You can also freeze apple crisp for longer storage. Just make sure to wrap it tightly in plastic wrap and foil before freezing.Enjoy Your Homemade Apple Crisp!
There you have it – my foolproof recipe for the most irresistible Homemade Apple Crisp! I hope you enjoy it as much as my family and I do. Remember, baking is all about having fun and experimenting, so don’t be afraid to put your own spin on this recipe. Happy baking!What types of apples are recommended for this apple crisp recipe?
The recipe suggests using Granny Smith, Honeycrisp, or a mix of apple varieties for the best flavor.
What can I do if my apple crisp topping is not crisp enough?
Make sure your butter is ice-cold before adding it to the dry ingredients for the topping. You can even chill the dry ingredients beforehand.
How should I store leftover apple crisp?
Leftover apple crisp can be stored in the refrigerator for up to 3 days. For longer storage, wrap it tightly in plastic wrap and foil before freezing.
What are some variations I can make to this apple crisp recipe?
You can add nuts, experiment with different spices like cardamom or ginger, add other fruits like cranberries or blueberries, use a variety of apples, or drizzle maple syrup over the apples before baking.
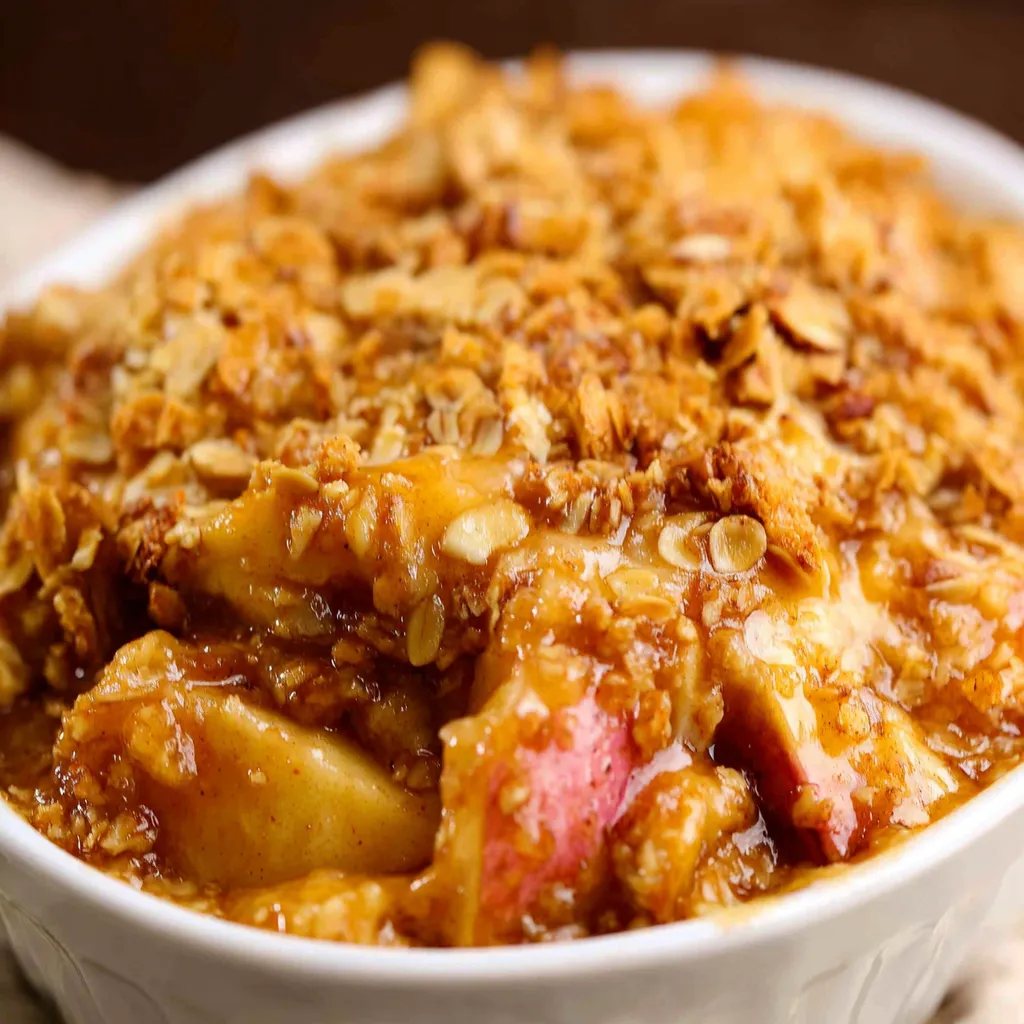
Irresistible Homemade Apple Crisp
This homemade apple crisp recipe features a warm, spiced apple filling topped with a buttery, crisp oat topping. It’s an easy-to-make dessert perfect for any occasion and brings everyone to the kitchen. Enjoy the aroma of cinnamon and sweet apples filling your home as you bake this delightful treat.
Ingredients
Equipment
Method
- Preheat your oven to 375°F (190°C).
- In a large bowl, combine the sliced apples, granulated sugar, flour, cinnamon, nutmeg, and lemon juice. Toss gently to coat all the apple slices evenly.
- Dot the apple mixture with the small pieces of butter.
- In a separate bowl, whisk together the flour, rolled oats, brown sugar, cinnamon, and salt.
- Add the cold, cubed butter to the dry ingredients. Use a pastry blender or your fingertips to cut the butter into the mixture until it resembles coarse crumbs. The mixture should hold together slightly when squeezed.
- Pour the apple mixture into a 9-inch square baking dish.
- Sprinkle the crisp topping evenly over the apples.
- Bake for 30-40 minutes, or until the topping is golden brown and the apple filling is bubbly. If the topping starts to brown too quickly, you can loosely tent it with foil.
- Let the apple crisp cool for at least 15 minutes before serving.
Notes
For a topping that’s too dry, add a tablespoon or two of melted butter to the topping mixture. If the topping is not crisp, make sure your butter is ice-cold. For a filling that’s too watery, add an extra tablespoon of flour to the apple filling or use a mix of apple varieties. Store leftovers in the refrigerator for up to 3 days or freeze for longer storage. Reheat in the oven or microwave. Add nuts, different spices, or fruits for variations. Serve with vanilla ice cream, whipped cream, or caramel sauce.
