Ever crave that satisfying crunch of peanut brittle but dread the thought of candy thermometers and complicated stovetop simmering? I get it! That’s why I’m thrilled to share my ridiculously simple recipe for Easy Microwave Peanut Brittle. It’s quick, requires minimal ingredients, and delivers that classic sweet-and-salty flavor you adore. Get ready to amaze yourself (and your friends!) with this fool-proof treat.
Gathering Your Golden Ingredients

Here’s what you’ll need to whip up this delightful treat. Don’t worry, it’s a short and sweet list!
Ingredients:
- 1 cup granulated sugar: The key to brittle’s sweet crunch.
- 1/2 cup light corn syrup: Prevents crystallization and keeps things smooth.
- 1/4 cup (1/2 stick) salted butter: Adds richness and delicious flavor.
- 1 cup raw peanuts: Unsalted is also fine, but salted adds a wonderful dimension!
- 1 teaspoon vanilla extract: Enhances the overall flavor profile.
- 1 teaspoon baking soda: Creates air bubbles for that perfect brittle texture.
Step-by-Step to Peanut Brittle Perfection
Let’s get cracking! This is so easy, you’ll be making batches in no time.
- Prepare Your Surface: Lightly grease a baking sheet or line it with parchment paper or a silicone mat. This will prevent the brittle from sticking.
- Combine Ingredients: In a microwave-safe bowl (glass or ceramic is best), combine the granulated sugar, corn syrup, and butter.
- Microwave Power: Microwave on high for 3 minutes. The mixture will be bubbly and will change slightly in color.
- Stir and Microwave Again: Carefully remove the bowl from the microwave (it will be HOT!). Stir in the peanuts. Microwave on high for another 1 1/2 to 2 minutes. Watch closely – you want the mixture to turn a light golden brown. Don’t overcook, or it will burn!
- Vanilla and Baking Soda Magic: Remove the bowl from the microwave. Quickly stir in the vanilla extract and baking soda. The mixture will foam up. Don’t be alarmed; that’s exactly what we want!
- Spread and Cool: Immediately pour the mixture onto your prepared baking sheet. Spread it into a thin, even layer using a spatula or the back of a spoon. Work quickly, as it will harden as it cools.
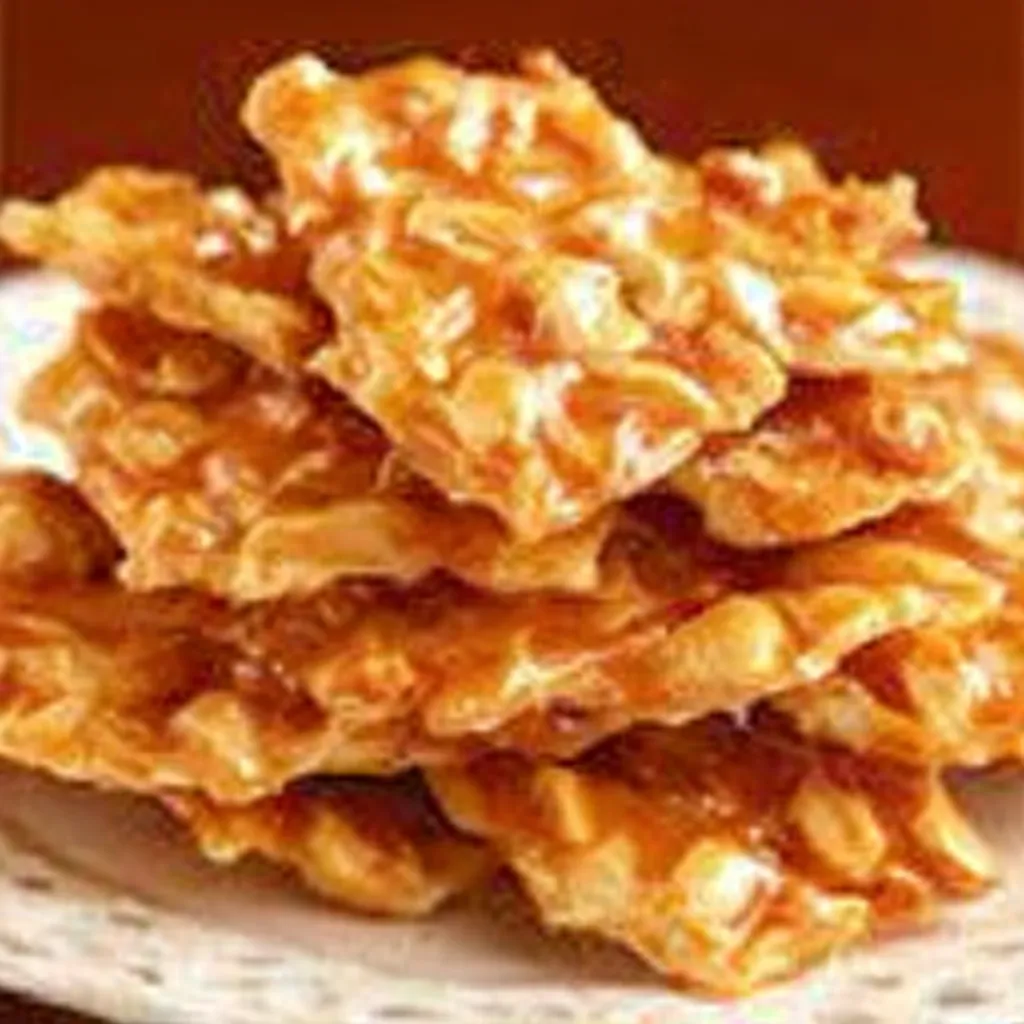
- Break and Enjoy: Let the brittle cool completely. This usually takes about 30 minutes to an hour. Once cool, break it into pieces and enjoy! Store in an airtight container to keep it fresh.
The Secret to Golden Brown Success
Getting that perfect color and texture is all about understanding your microwave. Here’s what to watch out for:
- Microwave Power Varies: All microwaves are different! The times listed in the recipe are a guideline. Keep a close eye on the mixture, especially during the second microwave cycle. You want it to be a light golden brown, not burnt.
- Don’t Overcook: Overcooked brittle will be hard and bitter. Err on the side of undercooking rather than overcooking. It will continue to harden as it cools.
- Glass vs. Ceramic: I prefer glass for even heating. Ceramic works too, but watch closely for hot spots.
Peanut Brittle Troubleshooting: My Best Friend Fixes
Even with an easy recipe like this, things can sometimes go a little wonky. Here’s how to handle some common peanut brittle mishaps:
Problem: Brittle is too sticky.
Solution: This usually means it wasn’t cooked long enough. Next time, microwave it for a slightly longer time, but be careful not to burn it. You can also try placing the sticky brittle in the freezer for a few minutes to help it harden.
Problem: Brittle is burnt.
Solution: Unfortunately, there’s no real fix for burnt brittle. But don’t despair! Learn from your mistake and adjust the microwave time for your next batch. Start with less time and add more in small increments.
Problem: Brittle is too hard.
Solution: This usually means it was overcooked. Try to microwave for a shorter amount of time in your next batch, keep a close eye on it. Consider breaking it into smaller pieces; sometimes a smaller piece makes it feel less hard!
Problem: My baking soda didn’t make it foamy.
Solution: Make sure your baking soda is fresh! Old baking soda loses its potency. Also, make sure you stir it in *quickly* once you’ve added it, and that you add it right after the last microwave cycle.
Elevate Your Brittle: Flavor Variations to Explore
Once you’ve mastered the basic recipe, it’s time to get creative! Here are some fun variations to try:
- Spicy Peanut Brittle: Add a pinch of cayenne pepper or a dash of hot sauce to the mixture for a spicy kick.
- Chocolate Peanut Brittle: Drizzle melted chocolate over the cooled brittle for a decadent treat.
- Cashew Brittle: Substitute cashews for peanuts for a different flavor and texture.
- Sea Salt Peanut Brittle: Sprinkle a pinch of sea salt over the warm brittle before it cools for an extra salty crunch.
Storing Your Sweet Success
Proper storage is key to keeping your peanut brittle fresh and crunchy. Here’s how to do it:
- Airtight Container: Store the brittle in an airtight container at room temperature. This will prevent it from becoming sticky or stale.
- Layering: If you’re stacking the brittle, place a sheet of parchment paper between the layers to prevent sticking.
- Avoid Humidity: Keep the container away from humidity, as this can make the brittle soft.
- How Long It Lasts: Properly stored, peanut brittle will last for about 2 weeks. But let’s be honest, it probably won’t last that long!
Why I Love This Easy Microwave Peanut Brittle
Look, I’ve made peanut brittle the traditional way, with candy thermometers and all the fuss. And while that has its place, sometimes you just need a quick and easy treat! This microwave version delivers that classic peanut brittle flavor and texture without all the hassle. It’s perfect for satisfying a sweet craving, gifting to friends, or even as a last-minute party snack. Plus, it’s so simple that even kids can help make it (with adult supervision, of course!). So, go ahead and give it a try. I promise you won’t be disappointed!
Final Thoughts: Share the Brittle Love!
I hope this recipe becomes a staple in your kitchen as it has in mine. There’s nothing quite like the homemade touch, and this Easy Microwave Peanut Brittle is proof that you don’t need fancy equipment or tons of time to create something truly special. Happy brittle-making, my friends! And don’t forget to share your creations – and any variations you come up with – in the comments below. I can’t wait to see what you create!
Why is light corn syrup used in this peanut brittle recipe?
Light corn syrup is used to prevent crystallization, ensuring a smooth and desirable texture in the peanut brittle.
What kind of bowl is recommended for microwaving the peanut brittle?
A microwave-safe bowl made of glass or ceramic is recommended for even heating. Glass is preferred, but ceramic can also be used while watching for hot spots.
My peanut brittle came out too sticky, what did I do wrong?
Sticky brittle usually means it wasn’t cooked long enough. Next time, microwave it for a slightly longer time, being careful not to burn it. You can also try placing the sticky brittle in the freezer for a few minutes to help it harden.
How should I store my microwave peanut brittle?
Store the peanut brittle in an airtight container at room temperature, away from humidity. If layering, place parchment paper between the layers to prevent sticking. Properly stored, it should last about 2 weeks.
Microwave Peanut Brittle Magic
Ingredients
Equipment
Method
- Lightly grease a baking sheet or line it with parchment paper or a silicone mat.
- In a microwave-safe bowl, combine the granulated sugar, corn syrup, and butter.
- Microwave on high for 3 minutes. The mixture will be bubbly.
- Carefully remove the bowl from the microwave (it will be HOT!). Stir in the peanuts.
- Microwave on high for another 1 1/2 to 2 minutes. Watch closely – you want the mixture to turn a light golden brown. Don’t overcook.
- Remove the bowl from the microwave. Quickly stir in the vanilla extract and baking soda. The mixture will foam up.
- Immediately pour the mixture onto your prepared baking sheet. Spread it into a thin, even layer using a spatula or the back of a spoon. Work quickly, as it will harden as it cools.
- Let the brittle cool completely. This usually takes about 30 minutes to an hour.
- Once cool, break it into pieces and enjoy!
