Deconstructing Deliciousness: The Katsu Kernel
") The magic of a truly exceptional Katsu Rice Bowl lies in the interplay of textures and flavors. It’s not just fried pork; it’s a symphony. The science behind this quick and satisfying meal revolves around a few key principles:
The magic of a truly exceptional Katsu Rice Bowl lies in the interplay of textures and flavors. It’s not just fried pork; it’s a symphony. The science behind this quick and satisfying meal revolves around a few key principles:
- The Maillard Reaction: This is where the magic happens! The Maillard reaction is a chemical reaction between amino acids and reducing sugars that gives browned food its distinctive flavor. A dry surface and high heat are crucial for maximizing this reaction, leading to that irresistible golden-brown crust.
- Protein Tenderization: Pork cutlets can be tough if not handled correctly. Pounding the cutlets not only flattens them for even cooking but also breaks down muscle fibers, resulting in a more tender bite.
- Starch Structure of Rice: The quality of the rice is paramount. Short-grain Japanese rice, with its higher starch content, provides a wonderfully sticky and slightly sweet base for the katsu and sauce. Proper rinsing removes excess starch, preventing gummy rice.
- Emulsification of Sauce: The katsu sauce, often a blend of Worcestershire sauce, ketchup, soy sauce, and other ingredients, needs to be balanced and emulsified. A touch of sugar helps to create a glossy, cohesive sauce that clings beautifully to the katsu and rice.
The 30-Minute Katsu Rice Bowl Blueprint
Key Equipment:
- Large skillet or Dutch oven
- Shallow dishes for breading
- Meat mallet or rolling pin
Ingredients:
- For the Katsu:
- 2 boneless pork cutlets (about 1/2 inch thick)
- 1/2 cup all-purpose flour
- 1 large egg, beaten
- 1 cup panko breadcrumbs
- Salt and pepper to taste
- Vegetable oil, for frying
- For the Rice Bowl:
- 2 cups cooked Japanese short-grain rice (prepared according to package directions)
- 1/4 cup thinly sliced green onions, for garnish
- Optional toppings: sesame seeds, shredded cabbage
- For the Katsu Sauce:
- 2 tablespoons Worcestershire sauce
- 2 tablespoons ketchup
- 1 tablespoon soy sauce
- 1 tablespoon mirin (or 1 teaspoon sugar)
- 1 teaspoon Dijon mustard (optional)
Step-by-Step Instructions:
- Prepare the Pork Cutlets: Place each pork cutlet between two sheets of plastic wrap. Using a meat mallet or rolling pin, pound the cutlets to about 1/4-inch thickness. Season both sides with salt and pepper.
- Set up the Breading Station: In three separate shallow dishes, place the flour, beaten egg, and panko breadcrumbs.
- Bread the Pork: Dredge each pork cutlet in the flour, shaking off any excess. Then, dip it in the beaten egg, allowing the excess to drip off. Finally, coat the cutlet thoroughly with panko breadcrumbs, pressing gently to adhere.
- Fry the Katsu: Heat about 1/2 inch of vegetable oil in a large skillet over medium-high heat until it reaches 350°F (175°C). Carefully place the breaded pork cutlets in the hot oil, being careful not to overcrowd the pan.
- Cook the Katsu: Fry for 2-3 minutes per side, or until golden brown and cooked through. The internal temperature should reach 145°F (63°C).
- Drain the Katsu: Remove the katsu from the skillet and place it on a wire rack lined with paper towels to drain excess oil.
- Prepare the Sauce: In a small bowl, whisk together the Worcestershire sauce, ketchup, soy sauce, mirin (or sugar), and Dijon mustard (if using).
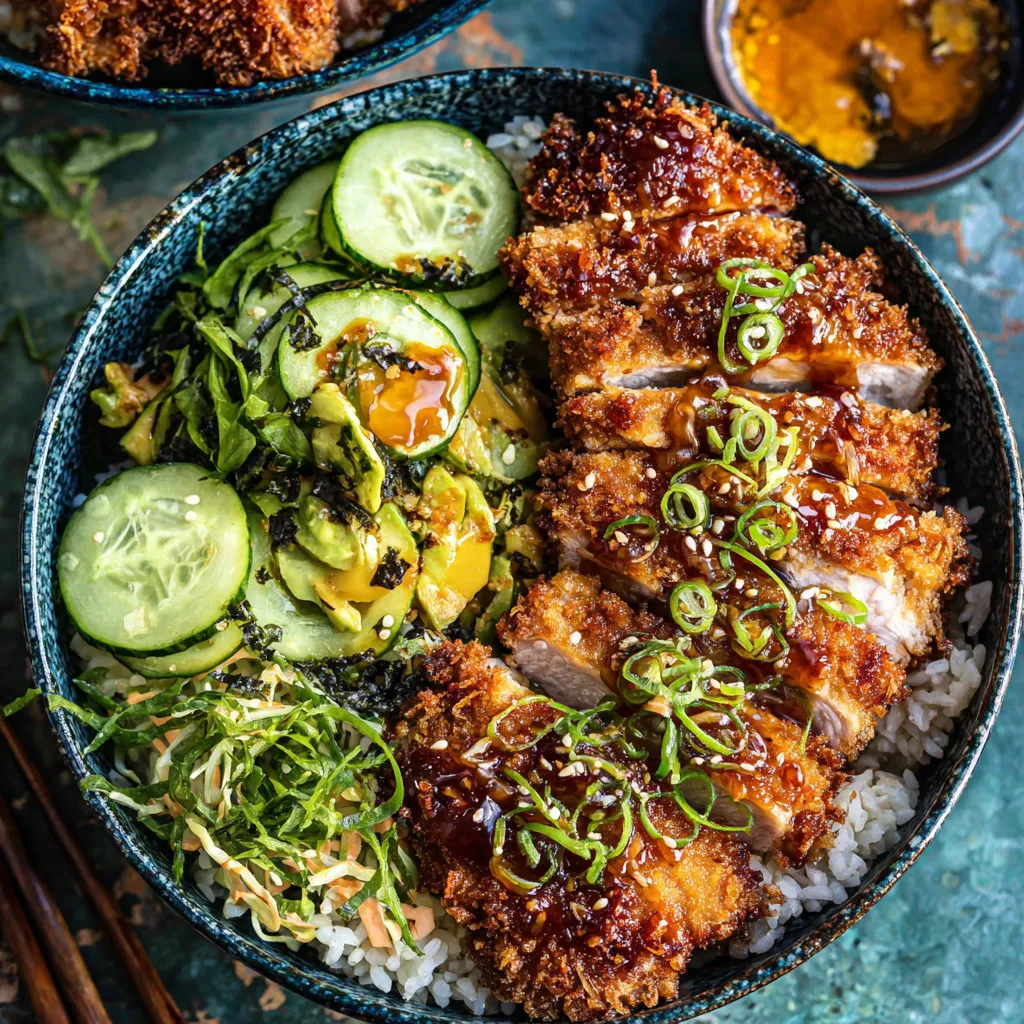
- Assemble the Rice Bowls: Divide the cooked rice between two bowls. Slice the katsu into strips and arrange them on top of the rice. Drizzle generously with the katsu sauce.
- Garnish and Serve: Garnish with thinly sliced green onions and sesame seeds. Serve immediately. Optional toppings include shredded cabbage for added crunch.
From Soggy to Spectacular: My Katsu Crusade
My first few attempts at making Katsu Rice Bowls were, to put it mildly, a disaster. The katsu was either soggy and pale or burnt on the outside and raw on the inside. The sauce was either too sweet or overwhelmingly salty. And the rice? Let’s just say it resembled more of a gluey paste than fluffy grains. I was determined to conquer this dish. Then, I had an “Aha!” moment regarding the oil temperature. I initially thought higher heat was better for achieving maximum crispiness, but that just led to burnt exteriors. Lowering the temperature slightly allowed the panko to brown evenly and the pork to cook through without burning. Using a thermometer to monitor the oil temperature became non-negotiable. Another turning point was the breading process. Like many of you, I initially thought just slapping the panko on was sufficient. But I quickly realized that a proper three-step breading process – flour, egg, panko – was essential for creating a truly crispy and durable crust. The flour helps the egg adhere, and the egg acts as a glue for the panko. Pressing the panko firmly onto the pork also made a huge difference. It prevented the breading from falling off during frying. Finally, I experimented with different katsu sauce ratios. The standard recipes I found online were either too sweet or too salty. After countless tweaks, I landed on the perfect balance of Worcestershire sauce, ketchup, soy sauce, and mirin (or sugar), with a touch of Dijon mustard for added tang. The key was to taste and adjust as you go! Also, it is important to remember the Teriyaki Chicken Rice Bowl Recipe is a good baseline to start from for sauces. And don’t forget the rice! While the CROCKPOT HONEY GARLIC CHICKEN is a great meal, you wouldn’t want to serve it over mushy rice. I learned that rinsing the rice thoroughly before cooking is crucial for removing excess starch and preventing it from becoming gummy.The Foolproof Katsu Technique: 5 Steps to Crunchy Perfection
Here’s my distilled wisdom, gleaned from countless batches of katsu, presented in a simple, actionable format:- Pound it Out: Flattening the pork cutlets to 1/4-inch thickness ensures even cooking and tenderizes the meat. Don’t skip this step!
- Master the Breading Ritual: Flour, egg, panko, in that order. Press the panko firmly onto the pork for a secure and crispy coating.
- Temperature is King: Maintain a consistent oil temperature of 350°F (175°C) for even browning and thorough cooking. An instant-read thermometer is your best friend.
- Don’t Overcrowd the Pan: Fry the katsu in batches to prevent the oil temperature from dropping too low. Overcrowding leads to soggy katsu.
- The Right Sauce is Essential: Taste and adjust the katsu sauce to your liking. Don’t be afraid to experiment with different ratios to find your perfect balance. The BUTTER CHICKEN is a completely different meal, but has a similar sauce concept that shows how important flavors are. Also consider the spices from a Spicy Ginger Chicken Delight recipe and consider if you want to add a bit of those spices into the sauce.
Why is pounding the pork cutlets important for this Katsu Rice Bowl recipe?
Pounding the pork cutlets to about 1/4-inch thickness ensures even cooking and tenderizes the meat by breaking down muscle fibers, resulting in a more tender bite.
What is the correct order for the breading process to achieve a crispy katsu?
The correct order for breading the pork is flour, then beaten egg, and finally panko breadcrumbs. Press the panko firmly onto the pork to help it adhere and create a crispy coating.
What is the ideal oil temperature for frying the katsu, and why is it important?
The ideal oil temperature for frying the katsu is 350°F (175°C). Maintaining this temperature is crucial for even browning and thorough cooking of the pork. Too high a temperature will result in a burnt exterior and undercooked interior, while too low a temperature will result in soggy katsu.
How do I prevent the rice from becoming gummy in the Katsu Rice Bowl?
Rinsing the Japanese short-grain rice thoroughly before cooking is crucial for removing excess starch, which prevents the rice from becoming gummy.
30-Minute Katsu Rice Bowls
Ingredients
Equipment
Method
- Place each pork cutlet between two sheets of plastic wrap. Using a meat mallet or rolling pin, pound the cutlets to about 1/4-inch thickness. Season both sides with salt and pepper.
- In three separate shallow dishes, place the flour, beaten egg, and panko breadcrumbs.
- Dredge each pork cutlet in the flour, shaking off any excess. Then, dip it in the beaten egg, allowing the excess to drip off. Finally, coat the cutlet thoroughly with panko breadcrumbs, pressing gently to adhere.
- Heat about 1/2 inch of vegetable oil in a large skillet over medium-high heat until it reaches 350°F (175°C).
- Carefully place the breaded pork cutlets in the hot oil, being careful not to overcrowd the pan.
- Fry for 2-3 minutes per side, or until golden brown and cooked through. The internal temperature should reach 145°F (63°C).
- Remove the katsu from the skillet and place it on a wire rack lined with paper towels to drain excess oil.
- In a small bowl, whisk together the Worcestershire sauce, ketchup, soy sauce, mirin (or sugar), and Dijon mustard (if using).
- Divide the cooked rice between two bowls.
- Slice the katsu into strips and arrange them on top of the rice.
- Drizzle generously with the katsu sauce.
- Garnish with thinly sliced green onions and sesame seeds. Serve immediately. Optional toppings include shredded cabbage for added crunch.
