I remember the very first time I attempted apple pie – it was a complete disaster! The crust was tough, the filling was watery, and the whole thing ended up in the trash. But that experience fueled my determination to find easier, more foolproof ways to enjoy the flavors of fall. And that’s how I stumbled upon these incredibly Easy Irresistible Salted Caramel Apple Bars for Fall, a dessert that captures all the cozy vibes without all the fuss. Today, I’m sharing all my secrets for the most amazing Easy Irresistible Salted Caramel Apple Bars for Fall you’ll ever make – I promise you’ll be hooked!
Why You’ll Absolutely Adore These Salted Caramel Apple Bars

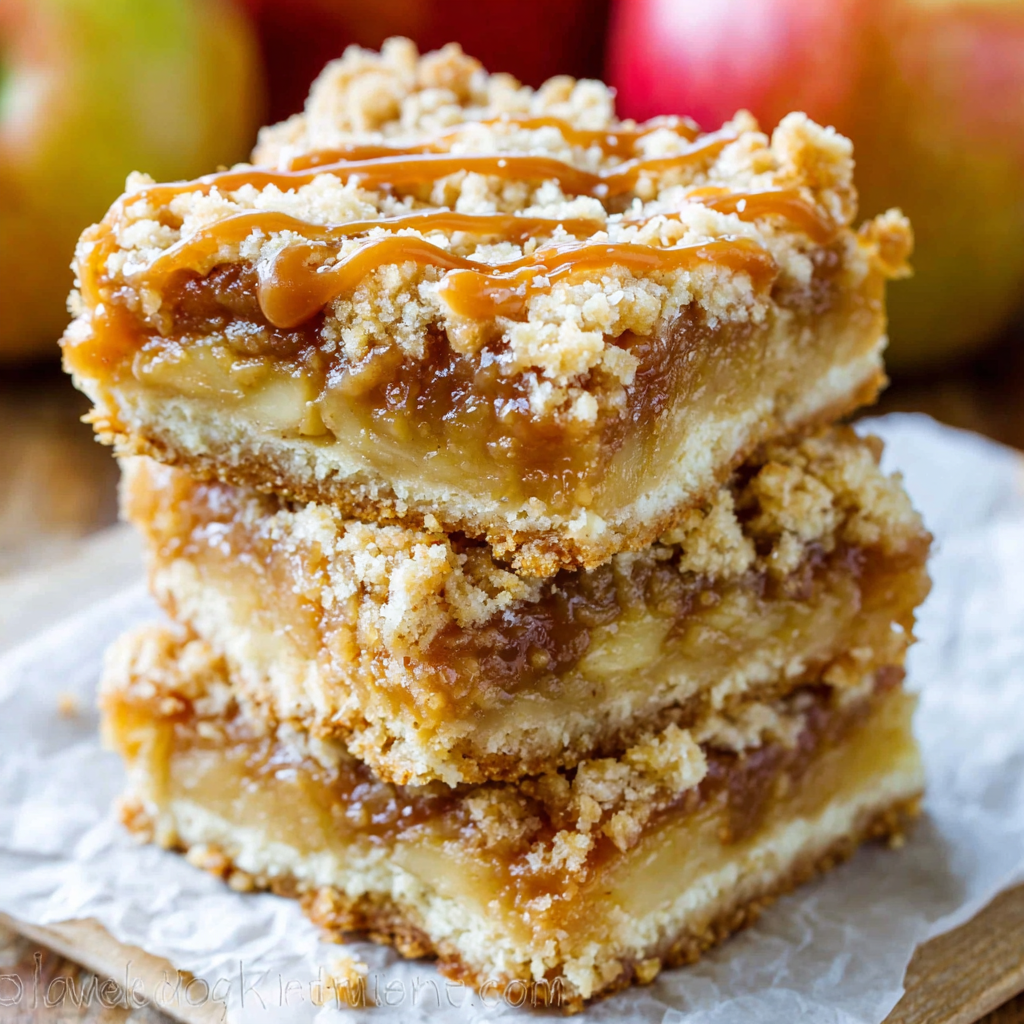
Okay, let’s be real: fall baking can sometimes feel like a daunting task. Pies with finicky crusts, cakes that require precise measurements… it can all be a bit much. That’s where these Salted Caramel Apple Bars come in. They’re the answer to your cozy-autumn-dessert cravings, with minimal effort and maximum flavor. Think of them as a cross between an apple pie, a crumble, and a caramel candy – all baked into one glorious, easy-to-slice bar. I’m telling you, it’s a truly magical combination!
Here’s why these bars will become your new go-to fall treat:
- They’re incredibly easy to make: No complicated pie crusts or fussy techniques. Just a simple press-in crust and a delicious apple filling.
- The salted caramel is divine: The combination of sweet caramel and flaky sea salt is simply irresistible. It elevates the whole dessert to another level of deliciousness.
- They’re perfect for sharing: These bars are easy to cut and serve, making them ideal for potlucks, parties, or just a cozy night in with family.
- They capture the essence of fall: The warm spices, sweet apples, and rich caramel create a comforting and nostalgic flavor profile that’s perfect for the season.
- They are customizable: You can easily adapt the recipe to use different types of apples, add nuts, or adjust the spices to your liking.
The Ultimate Salted Caramel Apple Bar Recipe
Alright, let’s get baking! This recipe is straightforward, but I’m going to walk you through each step to ensure you have the most success. Don’t worry if you’re a beginner – I’ve got you covered. I promise, the results are worth every single step!
Ingredients You’ll Need
For the Crust:
- 1 ½ cups (192g) all-purpose flour
- ¾ cup (75g) rolled oats
- ¾ cup (150g) packed brown sugar
- ¾ teaspoon baking soda
- ½ teaspoon ground cinnamon
- ½ cup (1 stick or 113g) cold unsalted butter, cut into cubes
For the Apple Filling:
- 6 medium apples (such as Honeycrisp, Gala, or Fuji), peeled, cored, and sliced
- ¼ cup (50g) granulated sugar
- 2 tablespoons all-purpose flour
- 1 teaspoon ground cinnamon
- ¼ teaspoon ground nutmeg
- 2 tablespoons lemon juice
For the Salted Caramel:
- ½ cup (1 stick or 113g) unsalted butter
- ½ cup (100g) granulated sugar
- ¼ cup (60ml) heavy cream
- 1 teaspoon vanilla extract
- ¼ teaspoon sea salt, plus more for sprinkling
Step-by-Step Instructions
- Preheat your oven to 375°F (190°C). Grease and line a 9×13 inch baking pan with parchment paper, leaving an overhang on the sides for easy removal. This is crucial – trust me, you don’t want these sticking to the pan!
- Make the crust: In a large bowl, whisk together the flour, oats, brown sugar, baking soda, and cinnamon. Make sure everything is evenly distributed.
- Cut in the butter: Add the cold butter cubes to the dry ingredients. Using a pastry blender (or your fingertips), cut the butter into the mixture until it resembles coarse crumbs. You should still see small pieces of butter – that’s what will give the crust its flakiness.
- Press the crust: Press about two-thirds of the crumb mixture into the bottom of the prepared baking pan. Press firmly and evenly to create a solid base.
- Prepare the apple filling: In a large bowl, combine the sliced apples, granulated sugar, flour, cinnamon, nutmeg, and lemon juice. Toss everything together until the apples are evenly coated. The lemon juice will help prevent the apples from browning.
- Layer the filling: Spread the apple mixture evenly over the crust.
- Add the topping: Sprinkle the remaining crumb mixture evenly over the apple filling.
- Bake: Bake for 30-35 minutes, or until the topping is golden brown and the apples are tender. A toothpick inserted into the center should come out with just a few moist crumbs.
- Make the salted caramel: While the bars are baking, prepare the salted caramel. In a medium saucepan, melt the butter over medium heat.
- Add sugar and cream: Stir in the granulated sugar and heavy cream. Bring the mixture to a simmer, stirring constantly, until the sugar is dissolved and the mixture is smooth.
- Cook until golden: Continue to cook, without stirring, until the caramel is a deep golden brown color, about 5-7 minutes. Watch it carefully, as it can burn easily.
- Remove from heat: Remove the saucepan from the heat and stir in the vanilla extract and salt. The mixture will bubble up slightly – that’s normal.
- Pour and cool: Pour the salted caramel evenly over the baked apple bars. Sprinkle with additional sea salt.
- Cool completely: Let the bars cool completely in the pan before cutting and serving. This is important because the caramel will firm up as it cools, making the bars easier to slice. I know it’s hard to wait, but trust me – it’s worth it!
- Slice and serve: Use the parchment paper overhang to lift the bars out of the pan. Cut into squares and serve. Enjoy every delicious bite!
Success Tips for Perfect Salted Caramel Apple Bars
Want to guarantee your Salted Caramel Apple Bars turn out absolutely perfect every single time? Here are a few of my golden rules:
- Use cold butter for the crust: This is crucial for creating a flaky, tender crust. The cold butter will create pockets of steam as it bakes, resulting in a light and airy texture.
- Don’t overmix the crust: Overmixing can develop the gluten in the flour, resulting in a tough crust. Mix just until the ingredients are combined.
- Choose the right apples: I recommend using a combination of sweet and tart apples for the best flavor. Honeycrisp, Gala, Fuji, and Granny Smith are all great choices.
- Don’t overbake the bars: Overbaking can result in dry, tough bars. Bake until the topping is golden brown and the apples are tender, but still slightly firm.
- Let the bars cool completely before cutting: This will allow the caramel to firm up and prevent the bars from falling apart. Patience is key!
- Make-Ahead & Freezing Instructions: You can make the apple bars ahead of time and store them in the refrigerator for up to 3 days. You can also freeze the baked bars for up to 2 months. Wrap them tightly in plastic wrap and then in foil to prevent freezer burn. Thaw them overnight in the refrigerator before serving. The salted caramel can be made a day in advance and stored in an airtight container in the refrigerator. Reheat gently before pouring over the bars.
Variations and Adaptations
The beauty of this recipe is that it’s incredibly versatile. Feel free to experiment and make it your own! Here are a few ideas to get you started:
- Add nuts: Add chopped pecans, walnuts, or almonds to the crust or topping for a nutty crunch.
- Use different spices: Experiment with different spices, such as ground ginger, cardamom, or cloves, for a unique flavor profile.
- Add chocolate chips: Stir chocolate chips into the apple filling for a decadent twist.
- Use a different caramel sauce: If you’re short on time, you can use a store-bought caramel sauce. Just make sure it’s a good quality sauce!
- Make it gluten-free: Use a gluten-free flour blend in the crust.
Serving Suggestions
These Salted Caramel Apple Bars are delicious on their own, but here are a few ideas to take them to the next level:
- Serve with a scoop of vanilla ice cream: The cold ice cream is the perfect complement to the warm, gooey bars.
- Drizzle with extra caramel sauce: Because you can never have too much caramel!
- Top with whipped cream: A dollop of whipped cream adds a light and airy touch.
- Serve with a warm beverage: Pair these bars with a cup of coffee, tea, or hot chocolate for the ultimate cozy treat.
The Science Behind the Deliciousness
Ever wondered why these bars taste so darn good? Let’s break down the science behind the magic:
- The Maillard Reaction: This chemical reaction occurs when sugars and amino acids are heated, resulting in browning and the development of complex flavors. It’s what gives the crust its golden-brown color and nutty flavor, and the caramel its rich, toasty notes.
- The Role of Fat: The butter in the crust and caramel contributes to the richness and tenderness of the bars. It also helps to carry the flavors of the other ingredients.
- The Importance of Salt: Salt enhances the sweetness of the caramel and balances the overall flavor profile. It also helps to create a more complex and interesting taste experience.
- The Texture Contrast: The combination of the crumbly crust, the tender apples, and the gooey caramel creates a delightful texture contrast that keeps you coming back for more.
Final Thoughts: A Fall Baking Staple
These Easy Irresistible Salted Caramel Apple Bars for Fall are more than just a dessert; they’re a symbol of cozy autumn days, warm gatherings, and delicious memories. I truly believe that everyone can make this recipe successfully, and I hope you enjoy it as much as my family and I do. So, gather your ingredients, preheat your oven, and get ready to create a little bit of magic in your kitchen. Happy baking!
What makes these salted caramel apple bars easier to make than a traditional apple pie?
These bars have a simple press-in crust, eliminating the need for a complicated pie crust. The recipe is also straightforward, making it ideal for beginner bakers.
What are some good apple varieties to use in the filling?
The recipe suggests using Honeycrisp, Gala, or Fuji apples for the filling, but a combination of sweet and tart apples is recommended.
Can I make the salted caramel apple bars ahead of time?
Yes, you can make the apple bars ahead of time and store them in the refrigerator for up to 3 days, or freeze them for up to 2 months. The salted caramel can also be made a day in advance and stored in the refrigerator.
What is the key to a flaky crust?
Using cold butter for the crust and avoiding overmixing are crucial for creating a flaky, tender crust. The cold butter will create pockets of steam as it bakes, resulting in a light and airy texture.
Salty Caramel Apple Bars
Ingredients
Equipment
Method
- Preheat your oven to 375°F (190°C). Grease and line a 9×13 inch baking pan with parchment paper, leaving an overhang on the sides for easy removal.
- In a large bowl, whisk together the flour, oats, brown sugar, baking soda, and cinnamon.
- Add the cold butter cubes to the dry ingredients. Using a pastry blender (or your fingertips), cut the butter into the mixture until it resembles coarse crumbs.
- Press about two-thirds of the crumb mixture into the bottom of the prepared baking pan. Press firmly and evenly to create a solid base.
- In a large bowl, combine the sliced apples, granulated sugar, flour, cinnamon, nutmeg, and lemon juice. Toss everything together until the apples are evenly coated.
- Spread the apple mixture evenly over the crust.
- Sprinkle the remaining crumb mixture evenly over the apple filling.
- Bake for 30-35 minutes, or until the topping is golden brown and the apples are tender. A toothpick inserted into the center should come out with just a few moist crumbs.
- While the bars are baking, prepare the salted caramel. In a medium saucepan, melt the butter over medium heat.
- Stir in the granulated sugar and heavy cream. Bring the mixture to a simmer, stirring constantly, until the sugar is dissolved and the mixture is smooth.
- Continue to cook, without stirring, until the caramel is a deep golden brown color, about 5-7 minutes. Watch it carefully, as it can burn easily.
- Remove the saucepan from the heat and stir in the vanilla extract and salt.
- Pour the salted caramel evenly over the baked apple bars. Sprinkle with additional sea salt.
- Let the bars cool completely in the pan before cutting and serving.
- Use the parchment paper overhang to lift the bars out of the pan. Cut into squares and serve.
