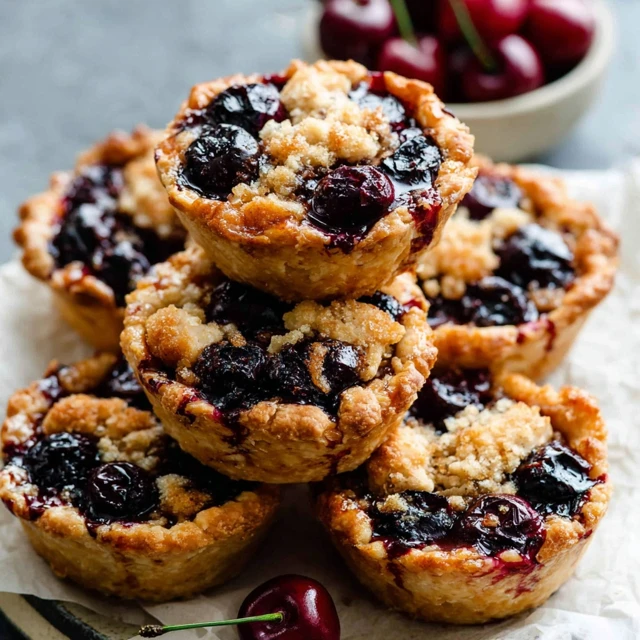
Holding a whole universe of cherry pie flavor in the palm of your hand is a special kind of magic. We’re not just shrinking a classic dessert; we’re concentrating its joy, creating a perfect, two-bite treasure where flaky, buttery crust gives way to a burst of sweet, jammy cherries. This isn’t about reinventing the wheel; it’s about making the wheel incredibly convenient, adorable, and impossible to eat just one of. This is the ultimate finger food dessert, designed for sharing, celebrating, or simply making an ordinary Tuesday feel extraordinary.
Get ready for a buttery, golden-brown crust that cradles a vibrant, ruby-red cherry filling, all baked to perfection in a standard muffin tin. Each bite is a self-contained masterpiece, offering that nostalgic pie experience without the need for plates or forks. These mini cherry pie bites are the epitome of easy baking, delivering maximum flavor and charm with minimal fuss, making them the star of any party dessert table.
Why This Mini Cherry Pie Bites Works
- Perfectly Portioned: These bite sized treats eliminate the mess of slicing a large pie, making them ideal for parties, potlucks, and grab-and-go snacking.
- Incredibly Easy: Using pre-made pie crust and canned cherry filling makes this one of the simplest muffin tin recipes you’ll ever try. It’s a fantastic entry point for beginner bakers.
- Visually Stunning: The beautiful lattice top and golden-brown finish make these mini pies look like they came from a professional bakery, guaranteeing they’ll impress your guests.
Gather Your Supplies
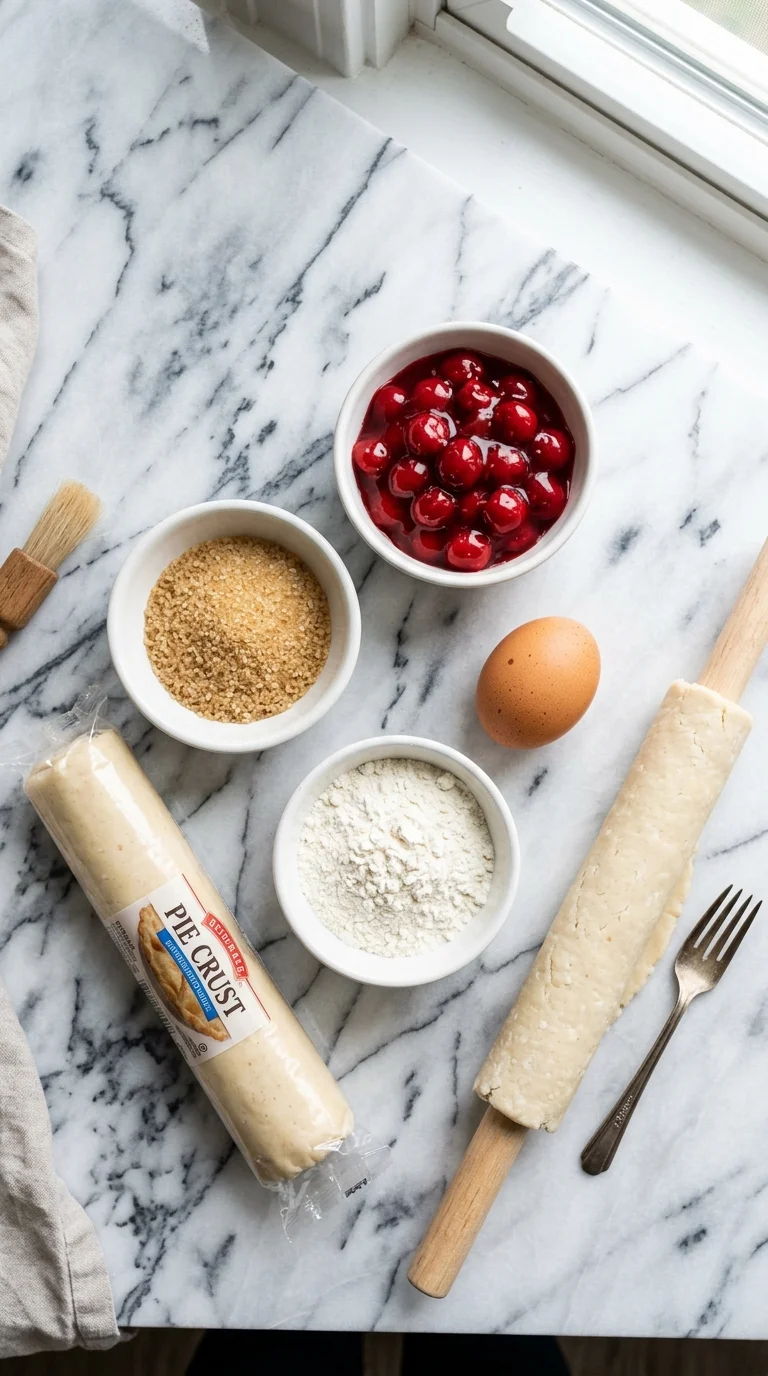
- Refrigerated Pie Crusts: (The time-saving hero! Using pre-made dough gives you a consistently flaky, buttery crust without the work of making it from scratch.)
- Cherry Pie Filling: (The heart of our bites. A quality canned filling provides the perfect balance of sweet and tart cherries in a thick, glossy sauce.)
- Large Egg: (This is for our egg wash, which is the secret to that beautiful, shiny, golden-brown finish on the crust.)
- Water: A splash to mix with the egg for the wash.
- Coarse Sugar (like Turbinado or Sanding Sugar): (Optional, but highly recommended for a sparkling, crunchy topping that adds texture and visual appeal.)
- All-Purpose Flour: Just a little for dusting your work surface to prevent the dough from sticking.
Pantry Alternatives
Don’t have everything on hand? No problem! This recipe is wonderfully flexible.- No Pie Crust? You can use puff pastry for an even flakier, lighter texture. Just be sure to watch it closely as it bakes, since it can brown faster.
- Different Filling: This method works beautifully with other canned pie fillings. Try apple, blueberry, peach, or even lemon for a fun twist. If you’re a fan of mini lemon desserts, our Baby Lemon Impossible Pies are another must-try.
- Egg-Free Wash: For an egg-free version, you can brush the tops of the pies with a little bit of milk or heavy cream before sprinkling with sugar.
- Homemade Filling: If you have fresh or frozen cherries, feel free to make your own cherry filling! Just cook down the cherries with sugar, a little cornstarch for thickening, and a squeeze of lemon juice.
Flavor Twists
While the classic version is pure perfection, there are so many ways to customize these little gems and make them your own. Think of this recipe as a delicious canvas for your creativity.Add a Hint of Spice
A small pinch of spice can elevate the cherry filling beautifully. Before filling the pie crusts, stir a ¼ teaspoon of ground cinnamon or a tiny pinch of ground cardamom into the cherry pie filling. This adds a subtle warmth that complements the fruit perfectly.Incorporate Almond Extract
Cherry and almond are a classic flavor pairing. Add just a drop or two of almond extract to your cherry filling. It enhances the natural “cherry-ness” of the fruit and adds a sophisticated, nutty background note that is absolutely irresistible.Introduce a Citrus Zest
For a brighter, fresher flavor, grate a little bit of lemon or orange zest into the cherry filling. The citrus oils cut through the sweetness and add a vibrant zing that makes the entire bite pop. This is a simple trick that makes a huge difference.Chocolate and Cherry
For a truly decadent treat, sprinkle a few mini chocolate chips into the bottom of each pie cup before adding the cherry filling. The melted chocolate pairs wonderfully with the tart cherries, reminiscent of a Black Forest cake. If you love this combo, you have to try our Chocolate Covered Cherry Brownie Bombs next!Step-by-Step Instructions
Step 1: Prepare Your Pan and Dough
First things first, preheat your oven to 425°F (220°C). Lightly grease a standard 12-cup muffin tin. On a lightly floured surface, unroll your refrigerated pie crusts. Using a 3.5-inch round cookie cutter (or the rim of a wide-mouth glass), cut out 12 circles from the dough. Gently press one circle into each cup of the prepared muffin tin, making sure it comes up the sides.Step 2: Fill the Pie Bites
Now for the star of the show: the cherry filling. Spoon about 1 to 1.5 tablespoons of the cherry pie filling into each dough-lined muffin cup. Be careful not to overfill them! Too much filling can bubble over and make a sticky mess in your oven. You want them full, but not overflowing.Step 3: Create the Lattice Top
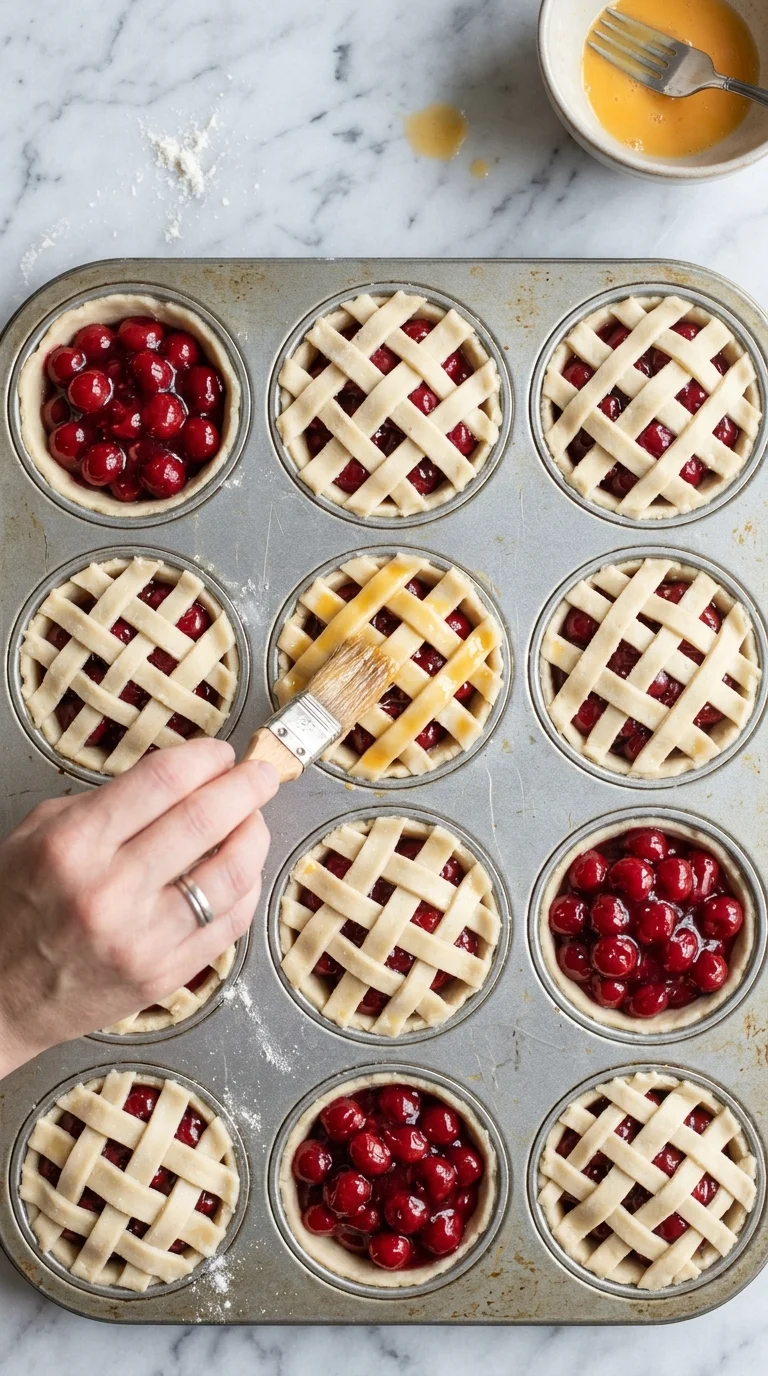
Unroll the remaining pie dough. Using a pizza cutter or a small knife, cut the dough into thin strips, about ¼-inch wide. Create a simple lattice top for each mini pie by laying two strips horizontally and two strips vertically over the filling. Gently press the ends of the strips into the edge of the bottom crust to seal. This step makes them look so professional, just like a miniature version of Grandmas Classic Apple Pie.Step 4: Apply the Egg Wash
In a small bowl, whisk together the large egg and one tablespoon of water. This is your egg wash. Using a pastry brush, lightly brush the lattice top of each mini pie. This is the secret to getting that gorgeous, deep golden-brown color and a beautiful shine.Step 5: Add the Finishing Touch and Bake
For that extra sparkle and crunch, sprinkle a little coarse sugar over the egg-washed tops. Place the muffin tin on a baking sheet to catch any potential drips. Bake for 12-15 minutes, or until the crust is a beautiful golden brown and the filling is bubbly. The exact time will depend on your oven.Step 6: Cool and Serve
Once baked, remove the muffin tin from the oven and let the mini cherry pie bites cool in the pan for at least 10-15 minutes. This is a crucial step! It allows the filling to set up, making them much easier to remove. Run a thin knife around the edge of each bite to loosen, then carefully lift them out and transfer to a wire rack to cool completely.Expert Tips for Success
- Keep Your Dough Cold: For the flakiest possible crust, work with cold pie dough. If it becomes too soft or sticky while you’re working, just pop it back in the fridge for 10 minutes to firm up.
- Don’t Overfill: It’s tempting to pack in as much cherry filling as possible, but resist the urge! Overfilling is the number one cause of messy spills. A level tablespoon is the perfect amount.
- Let Them Cool: Be patient and let the bites cool in the muffin tin before trying to remove them. This allows the buttery crust to firm up and the filling to set, preventing them from falling apart.
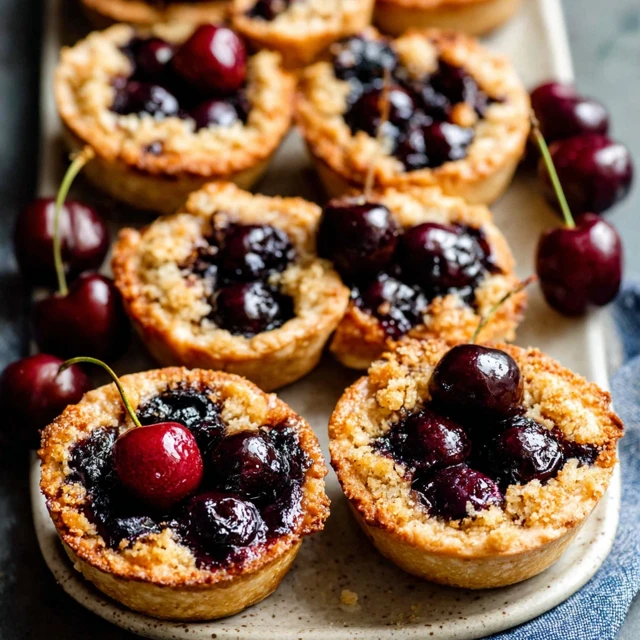
How to Serve
These mini cherry pie bites are incredibly versatile and perfect for any occasion. They are the definition of a crowd-pleasing finger food dessert.Serve them warm, straight from the oven, for a comforting and gooey treat. A small scoop of vanilla bean ice cream on the side is a classic pairing that never fails to delight. The contrast of the warm, tart pie with the cold, creamy ice cream is simply divine.
For parties and gatherings, arrange them on a platter at room temperature. They hold up beautifully and are easy for guests to grab and enjoy. They look fantastic next to other bite sized treats, like our popular Strawberry Cheesecake Bites.
You can also add a dollop of fresh whipped cream or a drizzle of a simple powdered sugar glaze (just powdered sugar and a splash of milk) right before serving for an extra touch of elegance. These are a fantastic alternative to larger, more cumbersome desserts like traditional Cherry Hand Pies or even Muffin Tin Apple Pies when you want something even smaller and more poppable.
If you tried this recipe and loved it, please leave a 5-star rating below. It helps us so much
Can I use a different type of filling for these mini pies?
Yes, this recipe is very flexible. You can substitute the cherry filling with other canned pie fillings such as apple, blueberry, or peach. You can also create your own homemade filling using fresh or frozen fruit.
How do I get the shiny, golden-brown top on the crust?
The secret to a beautiful, shiny, golden-brown finish is to use an egg wash. Simply whisk a large egg with a tablespoon of water and brush it over the lattice top before baking. For extra sparkle, you can also sprinkle on some coarse sugar.
What can I use if I don’t have pre-made pie crust?
If you don’t have refrigerated pie crust, you can use puff pastry for an even flakier and lighter texture. Just be sure to watch it closely while baking, as puff pastry can brown more quickly than pie dough.
Why did my mini pies fall apart when I tried to remove them from the pan?
It is crucial to let the mini pie bites cool in the muffin tin for at least 10-15 minutes after they come out of the oven. This allows the filling to set properly and the crust to firm up, which prevents them from breaking apart upon removal.
Easy Mini Cherry Pie Bites
Ingredients
Equipment
Method
- Preheat your oven to 425°F (220°C). Lightly grease a standard 12-cup muffin tin.
- On a lightly floured surface, unroll the refrigerated pie crusts. Using a 3.5-inch round cookie cutter, cut out 12 circles from the dough.
- Gently press one circle into each cup of the prepared muffin tin, ensuring the dough comes up the sides.
- Spoon approximately 1 to 1.5 tablespoons of the cherry pie filling into each dough-lined muffin cup. Avoid overfilling.
- With the remaining pie dough, use a pizza cutter or knife to cut it into thin, ¼-inch wide strips.
- Create a simple lattice top for each mini pie by laying two strips horizontally and two strips vertically over the filling. Gently press the ends of the strips into the edge of the bottom crust to seal.
- In a small bowl, whisk together the large egg and one tablespoon of water to create an egg wash.
- Using a pastry brush, lightly brush the egg wash over the lattice top of each mini pie.
- Sprinkle a little coarse sugar over the egg-washed tops for extra sparkle and crunch.
- Place the muffin tin on a baking sheet to catch any potential drips. Bake for 12-15 minutes, or until the crust is golden brown and the filling is bubbly.
- Remove the muffin tin from the oven and let the mini pies cool in the pan for at least 10-15 minutes to allow the filling to set.
- Carefully run a thin knife around the edge of each bite to loosen, then lift them out and transfer to a wire rack to cool completely before serving.
Notes
– **Keep Dough Cold:** For the flakiest crust, work with cold pie dough. If it becomes soft, return it to the fridge for 10 minutes to firm up.
– **Don’t Overfill:** Resist the urge to add too much filling, as it can bubble over and create a mess. A level tablespoon is ideal.
– **Flavor Twists:** Enhance the filling by stirring in ¼ teaspoon of cinnamon, a pinch of cardamom, a drop of almond extract, or some fresh lemon or orange zest.
– **Substitutions:** You can use puff pastry for a lighter texture or swap the cherry filling for apple, blueberry, or peach. For an egg-free wash, brush the tops with milk or heavy cream.
