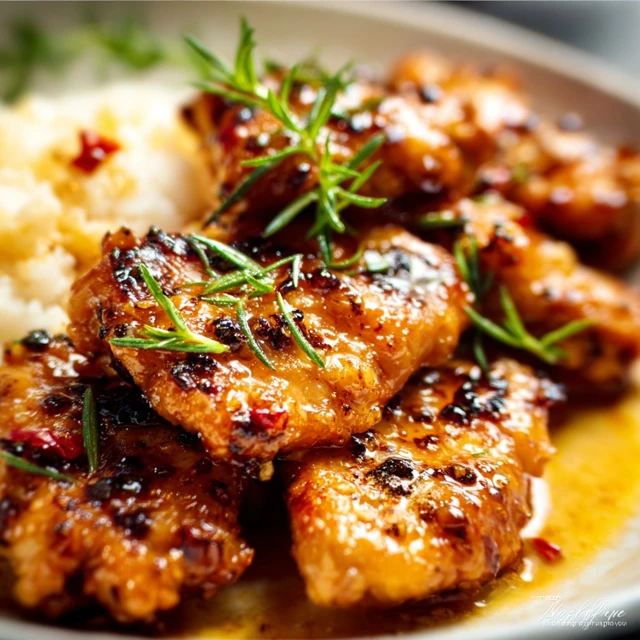
That moment the sauce hits the hot pan is pure kitchen magic, a symphony of sizzles and steam that promises something incredible is about to happen. It’s the sound of simple ingredients—honey, garlic, soy sauce—transforming from a humble liquid into a glossy, bubbling lacquer that clings to every single piece of chicken. This isn’t just cooking; it’s alchemy, happening right in your skillet on a Tuesday night when you thought you were just making dinner.
What you end up with is so much more than the sum of its parts. It’s tender, juicy chicken enveloped in a sauce that’s the perfect dance of sweet and savory, with a garlicky punch and a sticky finish that will have you licking your fork clean. This is the “fakeaway” that ruins takeout for you forever, in the best possible way, proving that you can create something truly spectacular with minimal time and effort.
Why You Need This Version
- The Perfect Sauce Ratio: We’ve nailed the balance of sweet honey, savory soy sauce, and tangy vinegar. The sauce isn’t just flavorful; it reduces to the perfect syrupy consistency that coats the chicken beautifully without being cloying.
- Crispy-Juicy Chicken Technique: The light cornstarch dredge is a non-negotiable step. It creates a whisper-thin, crispy crust that locks in the chicken’s juices and gives the sticky sauce something to grab onto.
- 30-Minute Takeout Killer: This recipe is designed for speed. From prep to plate, you’re looking at under 30 minutes, making it faster, fresher, and infinitely more delicious than waiting for a delivery driver.
The Essential Components

- Boneless, Skinless Chicken Breasts: Cut into 1-inch cubes. You can also use thighs for a richer flavor and more moisture.
- Cornstarch: (The secret weapon for texture) This is used to both coat the chicken for a light, crispy exterior and to thicken our sauce into a perfect glaze.
- Avocado Oil or other neutral oil: For pan-frying. You need something with a high smoke point.
- Garlic: (The aromatic heart of the dish) Freshly minced is a must. The pre-minced jarred kind just doesn’t have the same potent, bright flavor.
- Honey: (For that signature stickiness) This provides the sweetness and helps create the thick, syrupy glaze.
- Low-Sodium Soy Sauce: (The savory foundation) Using low-sodium gives you control over the saltiness, which is key. The flavor profile is complex and savory, much like you’d find in a classic Mongolian Chicken.
- Rice Vinegar: (The balancing act) A splash of acidity cuts through the richness of the honey and soy, brightening up the entire dish. Don’t skip it!
- Water or Chicken Broth: To create the right volume and consistency for the sauce.
- Optional Garnishes: Toasted sesame seeds and thinly sliced green onions for a fresh, crunchy finish.
Swaps & Alternatives
Don’t have everything on hand? No problem. This recipe is wonderfully flexible.- Chicken: Boneless, skinless chicken thighs work beautifully here and are more forgiving than breasts if you accidentally overcook them.
- Honey: Maple syrup can be used as a 1:1 substitute for a slightly different, but still delicious, sweet and sticky flavor.
- Soy Sauce: For a gluten-free option, use tamari or coconut aminos. Just be sure to taste and adjust, as salt levels can vary.
- Rice Vinegar: Apple cider vinegar can work in a pinch, though it will have a slightly fruitier tang.
- Cornstarch: Arrowroot powder or tapioca starch can be used as a direct replacement for thickening the sauce and coating the chicken.
Flavor Boosts
Ready to make this recipe your own? Here are a few of my favorite ways to add a little extra personality to the dish.First, a bit of fresh ginger, grated on a microplane, adds a warm, zesty complexity that pairs perfectly with the garlic. Add about a teaspoon along with the garlic for an instant flavor upgrade.
For those who like a little heat, a pinch of red pepper flakes or a half-teaspoon of sriracha whisked into the sauce will do the trick. It creates a sweet and spicy dynamic that is absolutely addictive, similar to the vibe in a good Hot Honey Chicken.
Finally, for a deeper, nuttier finish, drizzle a tiny bit of toasted sesame oil over the chicken right at the end, after you’ve taken it off the heat. A little goes a long way and adds a wonderful, aromatic layer.
How to Make Sticky Honey Garlic Chicken

1. Prep and Coat the Chicken
First things first, pat your chicken pieces completely dry with a paper towel. This is a critical step for getting a good sear. In a medium bowl, toss the dry chicken pieces with the cornstarch, salt, and pepper until every piece is lightly and evenly coated. This thin layer is what will give you that crave-able crispy exterior.2. Whisk the Magic Sauce
In a separate small bowl or liquid measuring cup, whisk together the honey, low-sodium soy sauce, minced garlic, rice vinegar, and water (or chicken broth). Set this aside right next to your stove. You’ll need it ready to go in a flash.3. Sear to Golden Perfection
Heat your oil in a large skillet or wok over medium-high heat. Once the oil is shimmering, carefully add the coated chicken in a single layer. Be sure not to overcrowd the pan; work in batches if you need to. Cook for 3-4 minutes per side, until the chicken is golden brown, crispy, and cooked through. Remove the cooked chicken from the skillet and set it aside on a plate.4. Create the Glaze
Lower the heat to medium-low. Pour your prepared honey garlic sauce mixture into the now-empty skillet. Let it bubble and simmer, stirring constantly with a whisk or spatula. The sauce will begin to thicken pretty quickly, usually within 2-3 minutes. You’re looking for a consistency that can coat the back of a spoon.5. Combine and Serve
Once the sauce has thickened to a beautiful glaze, returnWhat is the secret to getting the chicken crispy in this recipe?
The key to crispy chicken is the light cornstarch dredge. Before cooking, toss the completely dry chicken pieces in cornstarch until they are evenly coated. This creates a thin, crispy crust when pan-fried and helps the sticky sauce adhere to the chicken.
Can I make this recipe gluten-free?
Yes, you can easily make this dish gluten-free. Simply substitute the low-sodium soy sauce with a gluten-free alternative like tamari or coconut aminos. The rest of the core ingredients are naturally gluten-free.
Are there any recommended substitutions for honey or chicken?
Absolutely. For a different flavor, you can use maple syrup as a 1:1 substitute for honey. If you prefer a richer, more moist meat, you can use boneless, skinless chicken thighs instead of chicken breasts.
How can I add some heat or extra flavor to the dish?
To add a spicy kick, whisk a pinch of red pepper flakes or a half-teaspoon of sriracha into the sauce. For a warm, zesty complexity, add about a teaspoon of freshly grated ginger along with the garlic. For a nutty finish, drizzle a small amount of toasted sesame oil over the chicken after cooking.
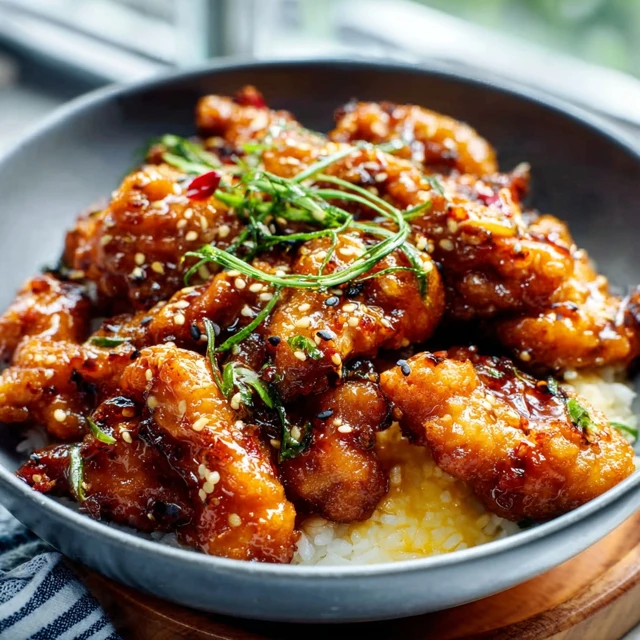
Sticky Honey Garlic Chicken Takeout Fakeaway
Ingredients
Equipment
Method
- Pat the chicken pieces completely dry with a paper towel. In a medium bowl, combine the cornstarch, salt, and pepper. Add the dry chicken pieces and toss until every piece is lightly and evenly coated.
- In a separate small bowl or liquid measuring cup, whisk together the honey, low-sodium soy sauce, minced garlic, rice vinegar, and water (or chicken broth). Set aside.
- Heat the oil in a large skillet or wok over medium-high heat. Once the oil is shimmering, carefully add the coated chicken in a single layer, working in batches if necessary to avoid overcrowding. Cook for 3-4 minutes per side, until golden brown, crispy, and cooked through.
- Remove the cooked chicken from the skillet and set it aside on a plate.
- Lower the heat to medium-low. Pour the prepared honey garlic sauce mixture into the empty skillet. Bring to a simmer, stirring constantly with a whisk or spatula. Cook for 2-3 minutes, until the sauce thickens to a glaze that can coat the back of a spoon.
- Return the cooked chicken to the skillet. Toss gently to coat every piece in the glossy sauce. Cook for another minute until everything is heated through.
- Serve immediately, garnished with toasted sesame seeds and sliced green onions. This dish is excellent served over steamed rice or with steamed vegetables.
