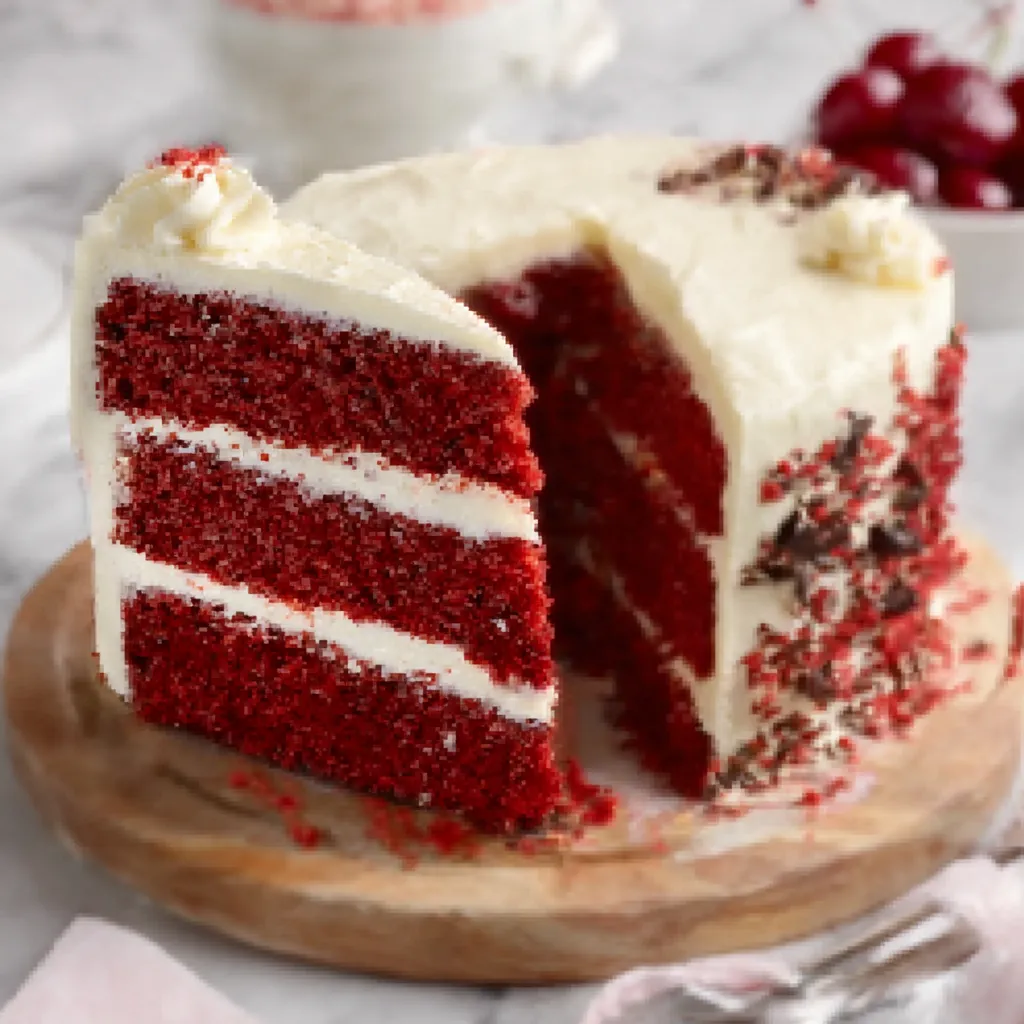
Imagine sinking your fork into a slice of incredibly moist, slightly tangy, and supremely decadent Red Velvet Cake, topped with a luscious cream cheese frosting that melts in your mouth. This isn’t just any cake; it’s a showstopper perfect for birthdays, holidays, or any occasion that calls for a little bit of indulgence, and I promise to guide you through every step to bake the perfect cake!
Ingredients
For the Cake:
- 2 ½ cups all-purpose flour
- 1 ½ cups granulated sugar
- 1 teaspoon baking soda
- 1 teaspoon baking powder
- 1 teaspoon salt
- 1 cup buttermilk
- 1 cup vegetable oil
- 2 large eggs
- 2 tablespoons unsweetened cocoa powder
- 1 ounce (2 tablespoons) red food coloring
- 1 teaspoon white vinegar
- 1 teaspoon vanilla extract
For the Cream Cheese Frosting:
- 8 ounces cream cheese, softened
- ½ cup (1 stick) unsalted butter, softened
- 4 cups powdered sugar
- 1 teaspoon vanilla extract
- Pinch of salt
Let’s Talk Red Velvet: Understanding the Magic

Before we dive into the recipe, let’s quickly explore what makes Red Velvet Cake so special. It’s not just about the vibrant color! The combination of buttermilk and vinegar creates a subtle tang that balances the sweetness perfectly. The cocoa powder adds a hint of chocolate, and the cream cheese frosting ties everything together in a symphony of flavors.
Essential Tools You’ll Need
- Two 9-inch round cake pans
- Parchment paper
- Mixing bowls (large and medium)
- Electric mixer (stand or hand mixer)
- Measuring cups and spoons
- Rubber spatula
- Cake tester or toothpick
- Cooling rack
- Offset spatula (for frosting)
Step-by-Step Instructions: Baking Perfection
Get Started: Prep Work is Key!
- Preheat your oven to 350°F (175°C). Grease and flour two 9-inch round cake pans. For extra insurance against sticking, line the bottoms with parchment paper rounds. This step is crucial for easy cake removal later.
- In a medium bowl, whisk together the flour, sugar, baking soda, baking powder, and salt. Set aside.
Mixing the Batter: The Art of Combining
- In a large bowl, whisk together the buttermilk, oil, eggs, cocoa powder, red food coloring, vinegar, and vanilla extract. Don’t be alarmed by the amount of food coloring; it’s essential for that signature red hue!
- Gradually add the dry ingredients to the wet ingredients, mixing on low speed until just combined. Be careful not to overmix, as this can lead to a tough cake. A few streaks of flour are okay at this point.
Baking Time: Patience is a Virtue
- Divide the batter evenly between the prepared cake pans.
- Bake for 25-30 minutes, or until a cake tester inserted into the center comes out clean.
- Let the cakes cool in the pans for 10 minutes before inverting them onto a wire rack to cool completely. Make sure they are completely cool before frosting!
Cream Cheese Frosting: The Crowning Glory
Whipping Up the Magic:
- In a large bowl, beat the softened cream cheese and butter with an electric mixer until smooth and creamy.
- Gradually add the powdered sugar, one cup at a time, beating on low speed until combined.
- Add the vanilla extract and salt, and beat on high speed for 2-3 minutes, or until the frosting is light and fluffy.
Assembling Your Masterpiece: Frosting Like a Pro
Putting It All Together:
- Place one cake layer on a serving plate or cake stand.
- Spread a generous layer of cream cheese frosting over the top.
- Carefully place the second cake layer on top of the frosting.
- Frost the entire cake with the remaining cream cheese frosting.
- Get creative! You can swirl the frosting, create peaks, or keep it smooth and simple.
Tips for Red Velvet Perfection: My Secret Weapons
- Room Temperature is Key: Make sure your butter, cream cheese, and eggs are at room temperature for a smooth and even batter and frosting.
- Don’t Overmix: Overmixing develops the gluten in the flour, resulting in a tough cake. Mix until just combined.
- Even Layers: Use a kitchen scale to ensure that each cake pan has the same amount of batter. This will result in even layers.
- Cool Completely: Frosting a warm cake will cause the frosting to melt and slide off.
- The Vinegar Trick: Don’t skip the vinegar! It reacts with the baking soda to create a light and airy texture, and also contributes to the unique Red Velvet flavor.
Variations and Twists: Let’s Get Creative!
While the classic Red Velvet Cake is divine, don’t be afraid to experiment!
- Red Velvet Cupcakes: Bake the batter in cupcake liners for individual treats. Reduce baking time accordingly.
- Chocolate Chips: Add chocolate chips to the batter for an extra layer of chocolatey goodness.
- Nuts: Fold in chopped pecans or walnuts for added texture and flavor.
- Different Frostings: While cream cheese frosting is traditional, you could also try a Swiss meringue buttercream or a simple vanilla buttercream.
Troubleshooting: Common Problems and Solutions
- Cake is Dry: You may have overbaked the cake. Use a cake tester to check for doneness, and don’t overmix the batter.
- Cake is Dense: You may have overmixed the batter or used too much flour.
- Frosting is Too Soft: Your butter or cream cheese may have been too warm. Chill the frosting in the refrigerator for 30 minutes before using.
- Frosting is Lumpy: Your cream cheese may have been too cold. Make sure it’s at room temperature before using.
Serving and Storage: Keeping It Fresh
Red Velvet Cake is best served at room temperature. Store leftover cake in an airtight container in the refrigerator for up to 3 days.
Level Up with These Recipes
If you are a fan of the red velvet flavor you should try these Red Velvet Blossoms Cookies, they are so easy to make and a total crowd pleaser. For a fun twist on a classic treat check out the Deviled Strawberries Ultimate Cheesecake Bites. Looking for another brownie recipe, try these Chocolate Covered Strawberry Brownies Ultimate, or these Chocolate Covered Cherry Brownie Bombs. Don’t forget to try these Chocolate Peanut Butter Valentine’s Hearts Ultimate, and these Pink Champagne Cupcakes Irresistible Dessert too.
Final Thoughts: Your Red Velvet Adventure Awaits
Congratulations! You’re now equipped to bake the most amazing Red Velvet Cake you’ve ever tasted. Don’t be intimidated by the steps; take your time, follow the instructions, and enjoy the process. Baking is a journey, and every cake is a learning experience. Now go forth and create some Red Velvet magic!
Why is buttermilk and vinegar important in Red Velvet Cake?
The combination of buttermilk and vinegar creates a subtle tang that balances the sweetness perfectly. The vinegar also reacts with the baking soda to create a light and airy texture.
What is the ideal temperature for the ingredients used to make the cake and frosting?
Make sure your butter, cream cheese, and eggs are at room temperature for a smooth and even batter and frosting.
How should I store leftover Red Velvet Cake?
Store leftover cake in an airtight container in the refrigerator for up to 3 days.
What can I do if my cream cheese frosting is too soft?
If your frosting is too soft, your butter or cream cheese may have been too warm. Chill the frosting in the refrigerator for 30 minutes before using.
ULTIMATE RED VELVET CAKE
Ingredients
Equipment
Method
- Preheat your oven to 350°F (175°C). Grease and flour two 9-inch round cake pans. Line the bottoms with parchment paper rounds.
- In a medium bowl, whisk together the flour, sugar, baking soda, baking powder, and salt. Set aside.
- In a large bowl, whisk together the buttermilk, oil, eggs, cocoa powder, red food coloring, vinegar, and vanilla extract.
- Gradually add the dry ingredients to the wet ingredients, mixing on low speed until just combined. Be careful not to overmix.
- Divide the batter evenly between the prepared cake pans.
- Bake for 25-30 minutes, or until a cake tester inserted into the center comes out clean.
- Let the cakes cool in the pans for 10 minutes before inverting them onto a wire rack to cool completely.
- In a large bowl, beat the softened cream cheese and butter with an electric mixer until smooth and creamy.
- Gradually add the powdered sugar, one cup at a time, beating on low speed until combined.
- Add the vanilla extract and salt, and beat on high speed for 2-3 minutes, or until the frosting is light and fluffy.
- Place one cake layer on a serving plate or cake stand.
- Spread a generous layer of cream cheese frosting over the top.
- Carefully place the second cake layer on top of the frosting.
- Frost the entire cake with the remaining cream cheese frosting.
- Get creative with decorating the cake.
