The Magic Starts Here: Gather Your Ingredients
For the Crust:
- 1 1/4 cups (150g) all-purpose flour
- 1/2 teaspoon salt
- 1/2 cup (1 stick, 113g) cold unsalted butter, cut into cubes
- 1/4 cup (60ml) ice water
For the Burnt Honey Filling:
- 1/2 cup (170g) honey
- 1/2 cup (120ml) heavy cream
- 1/4 cup (50g) granulated sugar
- 3 large egg yolks
- 1/4 teaspoon salt
- 2 tablespoons (30g) unsalted butter, cut into small pieces
- 1 teaspoon vanilla extract
Let’s Talk Crust: The Foundation of Flavor

Okay, pie crust. It can be intimidating, I know! But trust me, it’s totally doable. The key is keeping everything *cold*. Cold butter, cold water – cold, cold, cold! This prevents the gluten from overdeveloping, resulting in a tender, flaky crust instead of a tough one.
Making the Crust: Step-by-Step
- Combine Dry Ingredients: In a large bowl, whisk together the flour and salt.
- Cut in the Butter: Add the cold, cubed butter to the flour mixture. Use a pastry blender (or your fingertips – but work quickly!) to cut the butter into the flour until the mixture resembles coarse crumbs. You should still see some pea-sized pieces of butter. This is good! Those little butter pockets will create flaky layers.
- Add the Water: Gradually add the ice water, one tablespoon at a time, mixing gently after each addition, until the dough just comes together. Be careful not to overmix!
- Shape and Chill: Form the dough into a disc, wrap it tightly in plastic wrap, and refrigerate for at least 30 minutes (or up to 2 days). This allows the gluten to relax, making the dough easier to roll out.
- Roll Out the Dough: On a lightly floured surface, roll out the dough into a 12-inch circle.
- Transfer to Pie Plate: Gently transfer the dough to a 9-inch pie plate. Trim the edges and crimp them decoratively.
- Pre-bake the Crust (Blind Bake): This is important to prevent a soggy bottom! Line the pie crust with parchment paper and fill it with pie weights (or dried beans). Bake in a preheated oven at 375°F (190°C) for 15 minutes. Remove the parchment paper and pie weights and bake for another 5-10 minutes, or until the crust is lightly golden brown. Let cool completely before filling.
Burnt Honey Magic: Creating the Filling
Now for the star of the show: the burnt honey! Don’t be scared by the “burnt” part. We’re not actually burning the honey to a crisp. We’re just caramelizing it to deepen the flavor and give it that gorgeous amber color. It’s a delicate balance, but the results are SO worth it.
Crafting the Burnt Honey Filling: Step-by-Step
- Caramelize the Honey: In a medium saucepan, heat the honey over medium heat. Cook, swirling occasionally, until the honey turns a deep amber color and begins to smell nutty and slightly smoky (about 5-7 minutes). Watch it carefully! It can burn quickly.
- Whisk in the Cream: Carefully whisk in the heavy cream. The mixture will bubble up vigorously, so be cautious!
- Temper the Egg Yolks: In a separate bowl, whisk together the sugar, egg yolks, and salt. Slowly drizzle a small amount of the hot honey mixture into the egg yolk mixture, whisking constantly to temper the eggs (this prevents them from scrambling).
- Combine Mixtures: Pour the tempered egg yolk mixture back into the saucepan with the remaining honey mixture.
- Cook the Filling: Cook over low heat, stirring constantly, until the filling thickens slightly and coats the back of a spoon (about 3-5 minutes). Be careful not to boil!
- Finish the Filling: Remove from heat and stir in the butter and vanilla extract until smooth.
Putting It All Together: Baking the Burnt Honey Pie
We’re almost there! Now it’s just a matter of filling that beautiful crust and letting the oven work its magic.
Assembling and Baking: The Final Steps
- Pour in the Filling: Pour the warm burnt honey filling into the pre-baked pie crust.
- Bake the Pie: Bake in a preheated oven at 325°F (160°C) for 30-40 minutes, or until the filling is set but still slightly jiggly in the center. The edges of the filling should be set.
- Cool Completely: Let the pie cool completely on a wire rack before slicing and serving. This is crucial! The filling needs time to set properly.
Tips and Tricks for Pie Perfection
- Dealing with a Sticky Crust: If your pie dough is sticking while rolling it out, chill it again for 15-20 minutes. This will firm up the butter and make it easier to handle.
- Preventing a Soggy Bottom: Blind baking the crust is key! Also, make sure your oven is properly preheated.
- Achieving the Perfect Burnt Honey Flavor: Don’t be afraid to let the honey get dark! But keep a close eye on it to prevent actual burning. The color should be a deep amber, like maple syrup.
- Serving Suggestions: This Burnt Honey Pie is delicious on its own, but it’s even better with a dollop of whipped cream or a scoop of vanilla ice cream. A sprinkle of sea salt on top adds a nice contrast to the sweetness.
Variations to Spice Things Up
Feeling adventurous? Here are a few ideas to customize your Burnt Honey Pie:
- Add a Touch of Spice: Stir a pinch of ground cinnamon or nutmeg into the filling for a warm, cozy flavor.
- Incorporate Citrus: Add a teaspoon of orange or lemon zest to the filling for a bright, zesty twist.
- Make it Nutty: Sprinkle chopped pecans or walnuts on top of the pie before baking for added texture and flavor.
More Delicious Pies to Explore
Once you’ve mastered this Burnt Honey Pie, why not expand your pie repertoire? For a fruity treat, try these Cherry Hand Pies. If you are looking for a dessert for the holidays, then you can’t go wrong with Christmas Peppermint Pie. For another amazing pie, I highly recommend the Cinnamon-vanilla Custard Pie, or you can try Salted Caramel Apple Pie Cheesecake. And if you want the flavors in a bar form, check out these Salted Caramel Apple Bars. You might also love this Salted Caramel Apple Pie Cheesecake for a unique twist. The possibilities are endless!
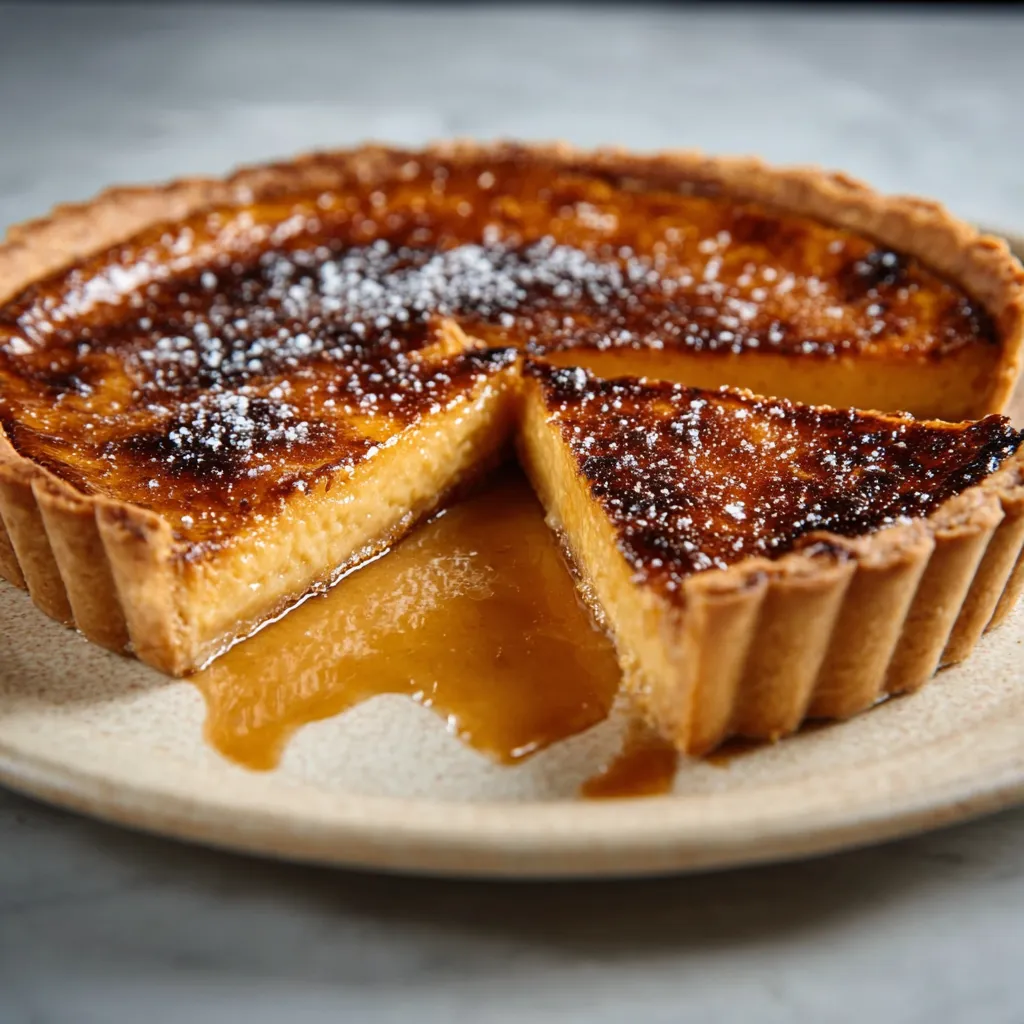
Enjoy Your Homemade Pie!
There you have it! Your very own Burnt Honey Pie, ready to impress. I know making a pie from scratch can seem like a lot of work, but the satisfaction of creating something so delicious is totally worth it. So go ahead, grab a slice, and savor the sweet, smoky goodness. Happy baking!
Why is it important to keep the ingredients cold when making the pie crust?
Keeping the butter and water cold prevents the gluten from overdeveloping. This results in a tender, flaky crust instead of a tough one.
What does it mean to ‘blind bake’ the pie crust, and why is it necessary?
Blind baking means pre-baking the crust before adding the filling. This is important to prevent the bottom of the pie from becoming soggy.
How do I know when the honey is properly ‘burnt’ for the filling?
The honey should turn a deep amber color and begin to smell nutty and slightly smoky. Watch it carefully, as it can burn quickly. The color should resemble maple syrup.
How can I tell when the Burnt Honey Pie is done baking?
The filling should be set but still slightly jiggly in the center. The edges of the filling should be set. It’s crucial to let the pie cool completely on a wire rack before slicing.
Perfect Burnt Honey Pie
Ingredients
Equipment
Method
- In a large bowl, whisk together the flour and salt.
- Add the cold, cubed butter to the flour mixture. Use a pastry blender (or your fingertips – but work quickly!) to cut the butter into the flour until the mixture resembles coarse crumbs. You should still see some pea-sized pieces of butter.
- Gradually add the ice water, one tablespoon at a time, mixing gently after each addition, until the dough just comes together. Be careful not to overmix!
- Form the dough into a disc, wrap it tightly in plastic wrap, and refrigerate for at least 30 minutes (or up to 2 days).
- On a lightly floured surface, roll out the dough into a 12-inch circle.
- Gently transfer the dough to a 9-inch pie plate. Trim the edges and crimp them decoratively.
- Line the pie crust with parchment paper and fill it with pie weights (or dried beans). Bake in a preheated oven at 375°F (190°C) for 15 minutes.
- Remove the parchment paper and pie weights and bake for another 5-10 minutes, or until the crust is lightly golden brown. Let cool completely before filling.
- In a medium saucepan, heat the honey over medium heat. Cook, swirling occasionally, until the honey turns a deep amber color and begins to smell nutty and slightly smoky (about 5-7 minutes). Watch it carefully! It can burn quickly.
- Carefully whisk in the heavy cream. The mixture will bubble up vigorously, so be cautious!
- In a separate bowl, whisk together the sugar, egg yolks, and salt. Slowly drizzle a small amount of the hot honey mixture into the egg yolk mixture, whisking constantly to temper the eggs.
- Pour the tempered egg yolk mixture back into the saucepan with the remaining honey mixture.
- Cook over low heat, stirring constantly, until the filling thickens slightly and coats the back of a spoon (about 3-5 minutes). Be careful not to boil!
- Remove from heat and stir in the butter and vanilla extract until smooth.
- Pour the warm burnt honey filling into the pre-baked pie crust.
- Bake in a preheated oven at 325°F (160°C) for 30-40 minutes, or until the filling is set but still slightly jiggly in the center. The edges of the filling should be set.
- Let the pie cool completely on a wire rack before slicing and serving.
