Is your holiday baking list a mile long, and you’re craving something that’s both festive and ridiculously delicious? Forget making a dozen different cookies – these Christmas Kitchen Sink Cookies are the answer to your prayers, a delightful medley of sweet, salty, and crunchy that everyone will adore. Get ready to bake a batch (or three!) of these unforgettable cookies; I promise you won’t regret it!
The Ultimate Christmas Cookie Combo: What Makes These So Good?
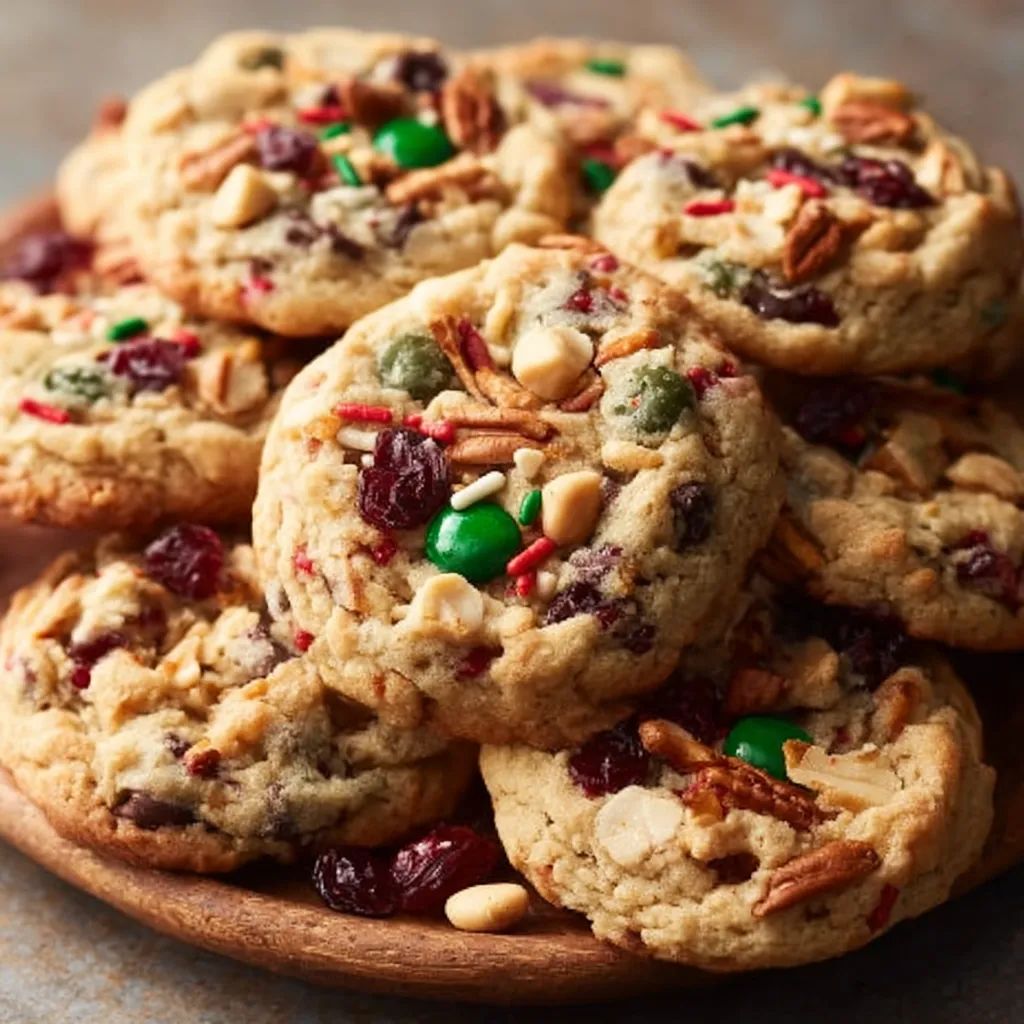
Okay, let’s be real. The best part about “kitchen sink” cookies is that anything goes! But I’ve perfected a balance of flavors and textures in this Christmas version that will have everyone begging for the recipe. We’re talking classic Christmas flavors kicked up a notch with unexpected twists. Think brown butter for nutty depth, pretzels for salty crunch, and plenty of festive sprinkles for that holiday magic.
Ingredients: Your Christmas Cookie Treasure Chest

Dry Ingredients:
- 2 1/4 cups all-purpose flour
- 1 teaspoon baking soda
- 1 teaspoon salt
- 1/2 teaspoon ground cinnamon
Wet Ingredients:
- 1 cup (2 sticks) unsalted butter, browned and cooled slightly
- 3/4 cup granulated sugar
- 3/4 cup packed brown sugar
- 2 large eggs
- 2 teaspoons vanilla extract
The “Kitchen Sink” Mix-Ins:
- 1 cup semi-sweet chocolate chips
- 1 cup white chocolate chips
- 1 cup crushed pretzels (about 2 cups whole)
- 1 cup holiday-colored sprinkles
- 1/2 cup chopped pecans or walnuts (optional)
- 1/2 cup mini marshmallows
Step-by-Step Instructions: Let’s Get Baking!
Step 1: Brown the Butter
- Place the butter in a light-colored saucepan over medium heat.
- Melt the butter, then continue cooking, swirling occasionally, until it turns a golden-brown color and smells nutty. This usually takes 5-7 minutes. Watch it carefully, as it can burn quickly!
- Pour the browned butter into a heatproof bowl and let it cool slightly (about 10-15 minutes).
Pro Tip: Don’t skip browning the butter! It adds a depth of flavor that’s simply irresistible.
Step 2: Cream the Sugars and Butter
- In a large bowl (or the bowl of a stand mixer), combine the cooled browned butter, granulated sugar, and brown sugar.
- Beat until light and fluffy, about 2-3 minutes.
Step 3: Add the Eggs and Vanilla
- Beat in the eggs one at a time, then stir in the vanilla extract.
Troubleshooting Tip: If the mixture looks curdled after adding the eggs, don’t worry! It will come together when you add the dry ingredients.
Step 4: Combine the Dry Ingredients
- In a separate bowl, whisk together the flour, baking soda, salt, and cinnamon.
Step 5: Gradually Add Dry Ingredients to Wet Ingredients
- Gradually add the dry ingredients to the wet ingredients, mixing until just combined. Be careful not to overmix!
Step 6: Stir in the “Kitchen Sink” Mix-Ins
- Gently fold in the chocolate chips, white chocolate chips, crushed pretzels, sprinkles, nuts (if using), and mini marshmallows.
Mix-In Magic: Feel free to customize these mix-ins based on your preferences! Dried cranberries, toffee bits, or even chopped-up candy canes would be delicious additions.
Step 7: Chill the Dough (Important!)
- Cover the dough and chill in the refrigerator for at least 30 minutes (or up to 2 hours). This helps prevent the cookies from spreading too much.
While the dough is chilling, consider making some Snowman Truffles as well!
Step 8: Bake the Cookies
- Preheat oven to 375°F (190°C).
- Line baking sheets with parchment paper.
- Drop rounded tablespoons of dough onto the prepared baking sheets, leaving about 2 inches between each cookie.
- Bake for 9-11 minutes, or until the edges are golden brown and the centers are still slightly soft.
Baking Secret: Don’t overbake! The cookies will continue to set up as they cool.
Step 9: Cool and Enjoy!
- Let the cookies cool on the baking sheets for a few minutes before transferring them to a wire rack to cool completely.
- Enjoy your amazing Christmas Kitchen Sink Cookies!
Tips for Cookie Perfection
- Don’t Overmix: Overmixing develops the gluten in the flour, resulting in tough cookies. Mix until just combined.
- Chill the Dough: Chilling prevents excessive spreading and allows the flavors to meld together.
- Use Parchment Paper: Parchment paper prevents sticking and makes cleanup a breeze.
- Brown Butter Basics: Keep a close eye on the butter while browning it, as it can burn quickly.
Variations and Substitutions: Make It Your Own!
- Gluten-Free: Use a gluten-free all-purpose flour blend.
- Dairy-Free: Use a dairy-free butter substitute and dairy-free chocolate chips.
- Nut-Free: Omit the nuts or substitute with sunflower seeds.
- Spice It Up: Add a pinch of nutmeg or cloves for extra Christmas flavor.
- Candy Lovers: Toss in some chopped up M&Ms, Reeses Pieces or other holiday candies!
Storing Your Christmas Kitchen Sink Cookies
These cookies are best enjoyed within 2-3 days of baking. Store them in an airtight container at room temperature. You can also freeze them for up to 2 months. Just make sure they are completely cool before freezing and store them in a freezer-safe container.
Looking for another great Christmas cookie to bake? Try these delicious Chocolate Thumbprint Cookies!
More Festive Baking Ideas
Once you’ve mastered these Christmas Kitchen Sink Cookies, why not expand your holiday baking repertoire? Consider whipping up a batch of Peanut Butter Kiss Cookie for a classic treat. For a fun edible gift, the Christmas Tree Cake Truffles are always a hit! And if you’re feeling adventurous, the Gingerbread Truffles are a spicy and decadent delight. Or maybe even some Christmas Puppy Chow!
Why I Love These Cookies: My Final Thoughts
These Christmas Kitchen Sink Cookies aren’t just a recipe; they’re a celebration of all things delicious and festive! They’re perfect for cookie exchanges, holiday parties, or simply enjoying with a cup of hot cocoa by the fire. The combination of sweet, salty, and crunchy textures is simply irresistible. So gather your ingredients, preheat your oven, and get ready to bake some holiday magic! Happy baking, my friend!
Why is it important to chill the cookie dough before baking?
Chilling the dough for at least 30 minutes (or up to 2 hours) helps prevent the cookies from spreading too much during baking and allows the flavors to meld together.
What does browning the butter do for the flavor of the cookies?
Browning the butter adds a nutty and irresistible depth of flavor to the cookies.
What are some variations or substitutions I can make to the recipe?
You can make gluten-free cookies by using a gluten-free all-purpose flour blend, dairy-free cookies by using a dairy-free butter substitute and chocolate chips, and nut-free cookies by omitting the nuts or substituting with sunflower seeds. You can also add a pinch of nutmeg or cloves for extra Christmas flavor or toss in chopped holiday candies.
How long can I store these Christmas Kitchen Sink Cookies?
These cookies are best enjoyed within 2-3 days of baking when stored in an airtight container at room temperature. They can also be frozen for up to 2 months in a freezer-safe container after they are completely cooled.
Best Christmas Kitchen Sink Cookies
Ingredients
Equipment
Method
- Place the butter in a light-colored saucepan over medium heat.
- Melt the butter, then continue cooking, swirling occasionally, until it turns a golden-brown color and smells nutty. This usually takes 5-7 minutes. Watch it carefully, as it can burn quickly!
- Pour the browned butter into a heatproof bowl and let it cool slightly (about 10-15 minutes).
- In a large bowl (or the bowl of a stand mixer), combine the cooled browned butter, granulated sugar, and brown sugar.
- Beat until light and fluffy, about 2-3 minutes.
- Beat in the eggs one at a time, then stir in the vanilla extract.
- In a separate bowl, whisk together the flour, baking soda, salt, and cinnamon.
- Gradually add the dry ingredients to the wet ingredients, mixing until just combined. Be careful not to overmix!
- Gently fold in the chocolate chips, white chocolate chips, crushed pretzels, sprinkles, nuts (if using), and mini marshmallows.
- Cover the dough and chill in the refrigerator for at least 30 minutes (or up to 2 hours).
- Preheat oven to 375°F (190°C).
- Line baking sheets with parchment paper.
- Drop rounded tablespoons of dough onto the prepared baking sheets, leaving about 2 inches between each cookie.
- Bake for 9-11 minutes, or until the edges are golden brown and the centers are still slightly soft.
- Let the cookies cool on the baking sheets for a few minutes before transferring them to a wire rack to cool completely.
- Enjoy your amazing Christmas Kitchen Sink Cookies!
