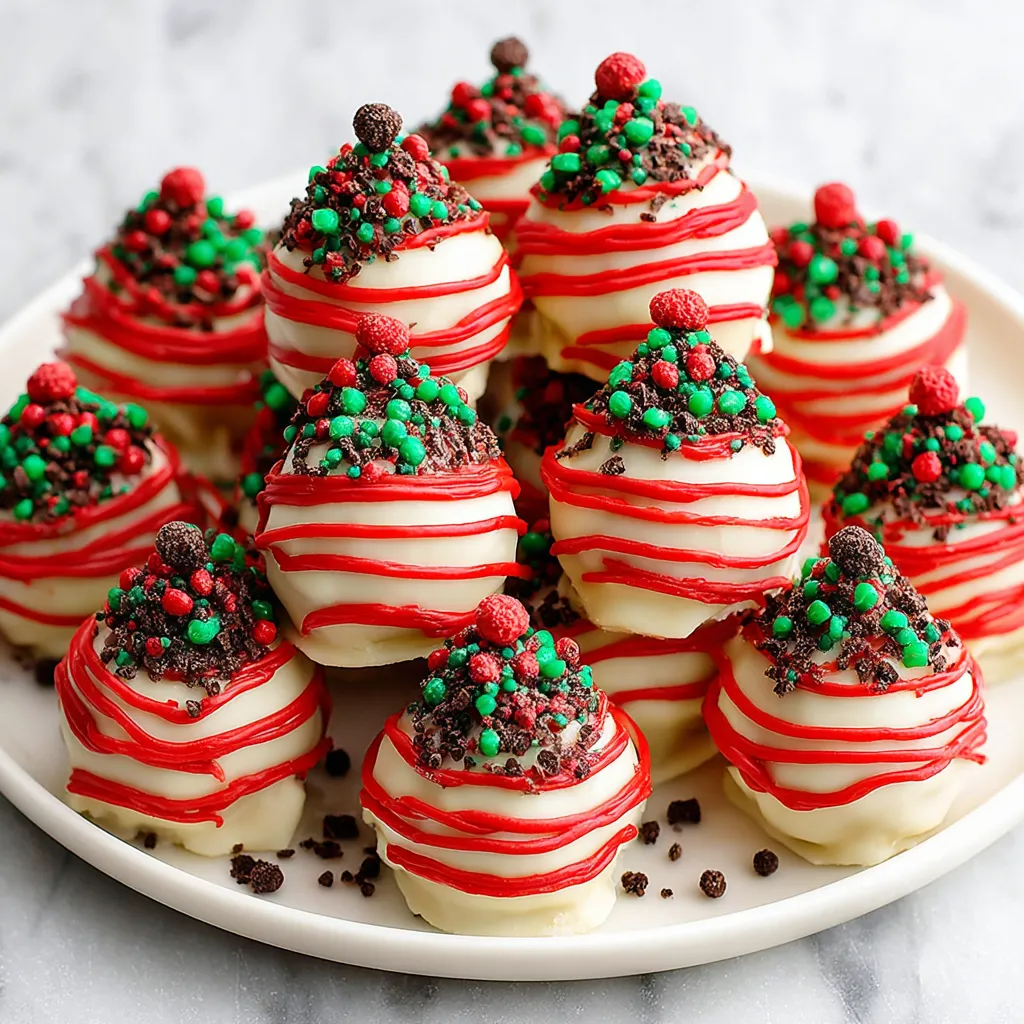
Imagine biting into a moist, decadent cake ball, coated in creamy green chocolate and adorned with festive sprinkles – that’s exactly what you’ll get with these Christmas Tree Cake Truffles! These little trees are the perfect combination of simplicity and holiday cheer, making them a show-stopping addition to your Christmas dessert spread. Get ready to impress your friends and family with these easy and utterly delicious treats – I promise you’ll be the star baker this year!
Ingredients
For the Cake Balls:
- 1 (10.75 oz) package of Little Debbie Christmas Tree Cakes (or similar snack cakes)
- 4 ounces cream cheese, softened
For the Coating:
- 12 ounces green candy melts (or white chocolate chips with green food coloring)
- 1 teaspoon vegetable shortening (optional, for smoother melting)
For Decoration:
- Christmas sprinkles (stars, nonpareils, etc.)
- Yellow candy melts or yellow decorating icing (for the star on top)
Tools You’ll Need

- Large mixing bowl
- Electric mixer (handheld or stand mixer)
- Baking sheet
- Parchment paper or silicone mat
- Double boiler or microwave-safe bowl
- Fork or dipping tools
- Small piping bag or Ziploc bag
Step-by-Step Instructions
Making the Cake Ball Mixture:
- Crumble the Cakes: In a large mixing bowl, crumble the Christmas Tree Cakes until they are finely broken down. You can do this by hand or use an electric mixer on low speed.
- Add Cream Cheese: Add the softened cream cheese to the crumbled cakes. Beat with an electric mixer until the mixture is well combined and forms a dough-like consistency.
- Chill the Dough: Cover the bowl with plastic wrap and refrigerate the mixture for at least 30 minutes. This will make it easier to roll into balls. I know, it’s hard to wait, but trust me, it’s worth it!
Forming the Truffles:
- Roll into Balls: Remove the dough from the refrigerator. Using a spoon or small cookie scoop, roll the mixture into approximately 1-inch balls. Place the balls on a baking sheet lined with parchment paper or a silicone mat.
- Shape into Trees: Gently shape each ball into a cone or triangle shape to resemble a Christmas tree. Don’t worry about perfection, a little imperfection adds to the charm!
- Freeze Briefly: Place the baking sheet with the shaped cake balls in the freezer for about 15-20 minutes. This will help them firm up before dipping.
Coating and Decorating:
- Melt the Candy Melts: In a double boiler or microwave-safe bowl, melt the green candy melts. If using a microwave, heat in 30-second intervals, stirring in between, until smooth. Add the vegetable shortening (if using) to help with the melting process and create a smoother consistency. Be careful not to overheat the candy melts, as they can seize up.
- Dip the Cake Balls: Remove the cake balls from the freezer. Using a fork or dipping tool, carefully dip each cake ball into the melted green candy. Make sure the entire cake ball is coated. Gently tap off any excess candy.
- Decorate Immediately: Place the dipped cake ball back on the parchment-lined baking sheet and immediately decorate with Christmas sprinkles before the candy coating sets.
- Add the Star: Melt a small amount of yellow candy melts or use yellow decorating icing. Transfer it to a small piping bag or Ziploc bag with a tiny corner snipped off. Pipe a small star on the top of each Christmas tree truffle.
- Chill to Set: Place the baking sheet with the decorated Christmas Tree Cake Truffles in the refrigerator for at least 30 minutes to allow the coating to fully set.
Tips for Perfect Christmas Tree Cake Truffles
- Don’t Overmix: When mixing the cake crumbs and cream cheese, be careful not to overmix. Overmixing can result in a tough texture.
- Chill, Chill, Chill: Chilling the dough and freezing the shaped cake balls are crucial steps. They prevent the cake balls from falling apart during the dipping process.
- Melt Candy Melts Carefully: Candy melts can be finicky. Low and slow is the way to go! Avoid overheating, and stir frequently. If they start to seize, try adding a tiny bit more shortening.
- Work Quickly: Once you start dipping, work quickly to decorate with sprinkles before the coating sets.
- Get Creative with Decorations: Feel free to use any Christmas sprinkles you like! Edible glitter, mini chocolate chips, or even crushed candy canes would be adorable.
Troubleshooting
My cake balls are too sticky!
If your cake ball mixture is too sticky, add a little more crushed cake or refrigerate for a longer period.
My candy melts are seizing!
If your candy melts seize up, try adding a very small amount of vegetable shortening. Stir gently and avoid overheating.
My sprinkles aren’t sticking!
Make sure to add the sprinkles immediately after dipping the cake balls, while the candy coating is still wet. If the coating has already set, you can lightly brush it with melted candy before adding the sprinkles.
Variations & Adaptations
Different Cake Flavors
While Christmas Tree Cakes are the star here, you can definitely experiment with other flavors! Try using vanilla snack cakes, chocolate snack cakes, or even leftover Candy Cane Cookies that have been pulsed into crumbs for a minty twist!
Chocolate Coating Options
Don’t love green candy melts? No problem! Use white chocolate dyed green, or even dark chocolate for a richer flavor. You could even do a mix of white and dark chocolate for a marbled effect.
Boozy Christmas Tree Cake Truffles
For an adult twist, add a tablespoon or two of your favorite liqueur (like Baileys Irish Cream or peppermint schnapps) to the cake ball mixture. Just be sure to label them accordingly!
Serving and Storage
Serving Suggestions
These Christmas Tree Cake Truffles are perfect for serving at holiday parties, potlucks, or as a sweet treat for friends and family. Arrange them on a festive platter or package them in small boxes for adorable homemade gifts. They pair perfectly with a warm mug of hot cocoa or a glass of sparkling cider.
Storage Instructions
Store leftover Christmas Tree Cake Truffles in an airtight container in the refrigerator for up to a week. They can also be frozen for longer storage (up to 2-3 months). Thaw them in the refrigerator before serving.
Why This Recipe Works
This recipe is a winner because it’s incredibly easy and requires minimal baking skills. Using store-bought Christmas Tree Cakes makes it a fantastic semi-homemade option, perfect for busy holiday schedules. The combination of moist cake, creamy cheese, and sweet candy coating is simply irresistible! Plus, the festive decorations make these truffles a delightful addition to any Christmas dessert table. They are a fun and easy way to make festive Cake Balls.
Perfect for Holiday Parties
When it comes to Easy Holiday Treats, these Christmas Tree Cake Truffles truly shine. They are easy to transport and are always a crowd-pleaser. They’re the ideal Party Food for both kids and adults. For even more holiday fun, you could also make Grinch Oreo Truffles, Sweetened Condensed Milk Snowballs, or Rolo Pretzels!
Embrace the Christmas Spirit
Making these Christmas Tree Cake Truffles is not just about creating a delicious dessert; it’s about embracing the joy and spirit of the holiday season. Gather your loved ones, put on some Christmas carols, and enjoy the process of creating these sweet little trees together. It’s a wonderful way to make lasting memories and spread some holiday cheer!
So there you have it – the easiest and most adorable Christmas Tree Cake Truffles you’ll ever make! I hope you enjoy creating these festive treats as much as I do. Happy baking, and happy holidays!
What kind of snack cakes are best to use if I can’t find Little Debbie Christmas Tree Cakes?
You can use similar snack cakes. Vanilla or chocolate snack cakes can be substituted, or even leftover candy cane cookies pulsed into crumbs for a minty twist.
What can I do if my cake ball mixture is too sticky to roll?
If the cake ball mixture is too sticky, you can add a little more crushed cake or refrigerate it for a longer period of time.
How should I store the Christmas Tree Cake Truffles?
Store leftover truffles in an airtight container in the refrigerator for up to a week, or freeze them for longer storage (up to 2-3 months). Thaw them in the refrigerator before serving.
What can I do if my candy melts start to seize up while melting?
If your candy melts seize up, try adding a very small amount of vegetable shortening. Stir gently and avoid overheating.
Best Christmas Tree Cake Truffles
Ingredients
Equipment
Method
- Crumble the Christmas Tree Cakes in a large mixing bowl until finely broken down.
- Add the softened cream cheese to the crumbled cakes. Beat with an electric mixer until the mixture is well combined and forms a dough-like consistency.
- Cover the bowl with plastic wrap and refrigerate the mixture for at least 30 minutes.
- Remove the dough from the refrigerator. Using a spoon or small cookie scoop, roll the mixture into approximately 1-inch balls.
- Place the balls on a baking sheet lined with parchment paper or a silicone mat.
- Gently shape each ball into a cone or triangle shape to resemble a Christmas tree.
- Place the baking sheet with the shaped cake balls in the freezer for about 15-20 minutes.
- In a double boiler or microwave-safe bowl, melt the green candy melts. If using a microwave, heat in 30-second intervals, stirring in between, until smooth. Add the vegetable shortening (if using) to help with the melting process and create a smoother consistency.
- Remove the cake balls from the freezer. Using a fork or dipping tool, carefully dip each cake ball into the melted green candy. Make sure the entire cake ball is coated. Gently tap off any excess candy.
- Place the dipped cake ball back on the parchment-lined baking sheet and immediately decorate with Christmas sprinkles before the candy coating sets.
- Melt a small amount of yellow candy melts or use yellow decorating icing. Transfer it to a small piping bag or Ziploc bag with a tiny corner snipped off. Pipe a small star on the top of each Christmas tree truffle.
- Place the baking sheet with the decorated Christmas Tree Cake Truffles in the refrigerator for at least 30 minutes to allow the coating to fully set.
