I’ll never forget the Christmas my younger brother, bless his heart, decided he was in charge of the holiday baking and proudly presented a tray of misshapen, slightly burnt, but undeniably chocolatey cookies – his attempt at Chocolate Thumbprint Cookies. Despite their less-than-perfect appearance, the taste was pure joy, and they vanished within minutes, leaving behind chocolate-covered smiles and a cherished memory. I know that sometimes baking can feel intimidating, but trust me, with this recipe, you’ll be whipping up gorgeous and delicious thumbprint cookies that everyone will rave about in no time!
The Allure of Chocolate Thumbprint Cookies
Let’s be honest, who can resist a chocolate cookie? Especially one with a soft, fudgy center just begging to be filled with a delectable surprise? Chocolate Thumbprint Cookies are a classic for a reason: they’re easy to make, endlessly customizable, and utterly irresistible. They strike the perfect balance between rich chocolate flavor and satisfying sweetness. Plus, they look absolutely adorable on any dessert platter! Whether you’re baking for a holiday gathering, a bake sale, or simply a sweet treat for yourself, these cookies are guaranteed to be a hit.
Gathering Your Ingredients: The Key to Success

Before you even preheat your oven, let’s make sure you have everything you need. High-quality ingredients really do make a difference, so splurge a little where you can. Here’s what you’ll need for these delightful Chocolate Thumbprint Cookies:
- All-Purpose Flour: The foundation of our cookie. Make sure it’s fresh!
- Unsweetened Cocoa Powder: This gives our cookies their deep, rich chocolate flavor. Use a good quality cocoa for the best results. Dutch-processed cocoa will give you a darker, more intense flavor, while natural cocoa will be a bit brighter.
- Baking Soda: Our leavening agent, giving the cookies a slight lift.
- Salt: Enhances the flavors and balances the sweetness.
- Unsalted Butter: Softened to room temperature. This is crucial for creating a tender cookie.
- Granulated Sugar: For sweetness and structure.
- Brown Sugar: Adds moisture and a caramel-like flavor. Light or dark brown sugar will work, but dark brown sugar will give you a richer flavor.
- Egg: Binds the ingredients together.
- Vanilla Extract: A must for adding a touch of warmth and complexity.
- Your Filling of Choice: We’ll talk filling options in more detail later, but common choices include chocolate ganache, peanut butter cups, raspberry jam, caramel, or even a simple chocolate kiss!
Step-by-Step Guide to Chocolate Thumbprint Cookie Perfection
Okay, let’s get baking! I’ve broken down the process into easy-to-follow steps to ensure your success.
Step 1: Creaming the Butter and Sugars
In a large bowl (or the bowl of your stand mixer), cream together the softened butter, granulated sugar, and brown sugar until light and fluffy. This is a crucial step, as it incorporates air into the dough, which will help create a tender cookie. Don’t rush this step; it usually takes about 3-5 minutes. You want the mixture to be pale and almost doubled in volume.
Troubleshooting Tip: If your butter isn’t soft enough, it won’t cream properly. You can soften it quickly by microwaving it for a few seconds, but be careful not to melt it! If you accidentally melt the butter, let it cool slightly before using it.
Step 2: Adding the Egg and Vanilla
Beat in the egg and vanilla extract until well combined. Scrape down the sides of the bowl to ensure everything is evenly mixed.
Step 3: Combining the Dry Ingredients
In a separate bowl, whisk together the flour, cocoa powder, baking soda, and salt. This ensures that the dry ingredients are evenly distributed throughout the dough. I always recommend whisking, as it helps to break up any clumps of cocoa powder.
Step 4: Gradually Adding the Dry Ingredients to the Wet Ingredients
Gradually add the dry ingredients to the wet ingredients, mixing on low speed until just combined. Be careful not to overmix the dough, as this can result in tough cookies. Stop mixing as soon as the flour is incorporated. A few streaks of flour are okay.
Troubleshooting Tip: If your dough seems too dry, add a tablespoon of milk or water at a time until it comes together. If it’s too wet, add a tablespoon of flour at a time.
Step 5: Chilling the Dough
Wrap the dough in plastic wrap and chill it in the refrigerator for at least 30 minutes. This allows the gluten to relax, which will help prevent the cookies from spreading too much in the oven. Chilling the dough also makes it easier to handle.
Step 6: Shaping the Cookies
Preheat your oven to 350°F (175°C). Line a baking sheet with parchment paper. Roll the dough into 1-inch balls. Place the balls on the prepared baking sheet, leaving about 2 inches between each cookie.
Step 7: Making the Thumbprints
Use your thumb (or the back of a small spoon) to make an indentation in the center of each cookie. Be careful not to press all the way through the cookie.
Troubleshooting Tip: If the dough is sticking to your thumb, dip your thumb in a little bit of flour or sugar before making the indentations.
Step 8: Baking the Cookies
Bake for 8-10 minutes, or until the edges are set and the centers are slightly soft. Don’t overbake the cookies, as they will continue to firm up as they cool.
Step 9: Adding the Filling
Remove the cookies from the oven and immediately fill the indentations with your desired filling. If you’re using chocolate kisses, gently press one into each indentation while the cookies are still warm. If you’re using a ganache or jam, allow the cookies to cool slightly before filling them.
Step 10: Cooling and Enjoying
Let the cookies cool completely on the baking sheet before transferring them to a wire rack. Once cooled, they’re ready to enjoy! Store them in an airtight container at room temperature for up to 3 days.
Filling Ideas: Endless Possibilities
This is where you can really get creative! The possibilities are endless when it comes to filling your Chocolate Thumbprint Cookies. Here are a few of my favorite ideas:
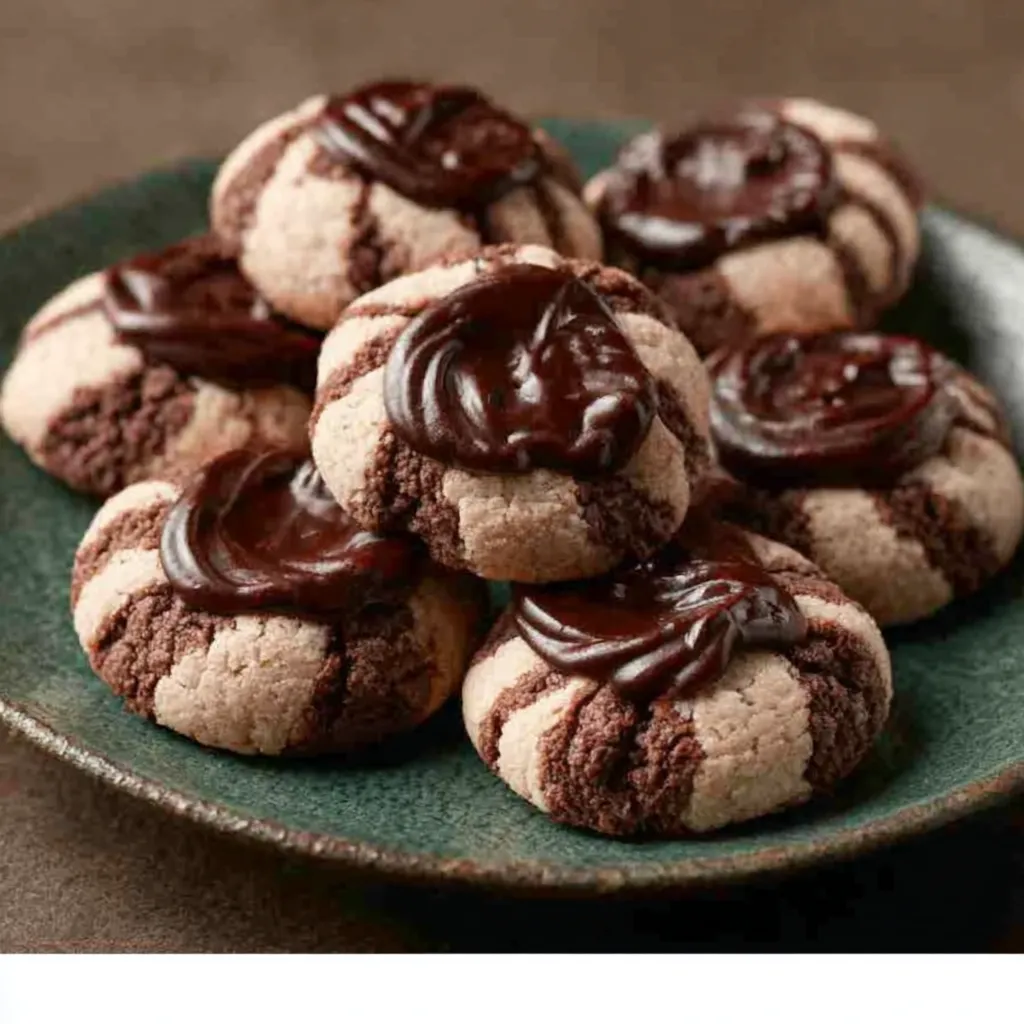
- Chocolate Ganache: A classic choice. Simply melt equal parts chocolate and heavy cream together, then let it cool slightly before filling the cookies.
- Peanut Butter Cup: Press a mini peanut butter cup into the center of each cookie while it’s still warm.
- Raspberry Jam: A tangy and fruity contrast to the rich chocolate.
- Salted Caramel: Adds a sophisticated touch. You can use store-bought caramel or make your own.
- Chocolate Kisses: A simple and satisfying option.
- Nutella: For the hazelnut lovers!
- Cream Cheese Frosting: Adds a touch of tangy sweetness.
Tips and Tricks for Perfect Thumbprint Cookies
Here are a few extra tips to help you achieve thumbprint cookie perfection:
- Use room temperature ingredients: This is especially important for the butter and egg. Room temperature ingredients emulsify better, resulting in a smoother batter and more tender cookies.
- Don’t overmix the dough: Overmixing develops the gluten in the flour, which can lead to tough cookies. Mix until just combined.
- Chill the dough: Chilling the dough prevents the cookies from spreading too much in the oven and makes them easier to handle.
- Use parchment paper: Parchment paper prevents the cookies from sticking to the baking sheet and makes cleanup a breeze.
- Don’t overbake the cookies: Overbaked cookies will be dry and crumbly. Bake until the edges are set and the centers are slightly soft.
- Let the cookies cool completely: This allows the filling to set properly.
Variations and Adaptations
Want to put your own spin on these Chocolate Thumbprint Cookies? Here are a few ideas:
- Add chopped nuts to the dough: Walnuts, pecans, or almonds would all be delicious.
- Drizzle the cookies with melted chocolate: For an extra touch of chocolatey goodness.
- Sprinkle the cookies with sea salt: To balance the sweetness and enhance the flavor.
- Use different extracts: Peppermint extract would be perfect for the holidays.
- Make them gluten-free: Simply substitute the all-purpose flour with a gluten-free blend.
Serving Suggestions
Chocolate Thumbprint Cookies are perfect on their own, but they’re also delicious with a glass of milk, a cup of coffee, or a scoop of ice cream. They make a great addition to any dessert platter and are always a hit at parties and gatherings.
Storing Your Chocolate Thumbprint Cookies
Store your Chocolate Thumbprint Cookies in an airtight container at room temperature for up to 3 days. They can also be frozen for up to 2 months. To freeze, place the cookies in a single layer on a baking sheet and freeze until solid. Then, transfer them to a freezer bag or container.
Complementary Cookie Recipes
Looking for other delicious cookie recipes to try? Be sure to check out my recipes for Cinnamon Roll Cookies; they are soft, gooey, and packed with cinnamon flavor. If you love cheesecake, you’ll adore the Sugar Cookie Cheesecake, a delightful twist on two classic desserts. For a sophisticated and decadent treat, try my Black Forest Cookies, inspired by the famous cake. And if you’re a fan of pecan pie, you absolutely must try the Pecan Pie Cookie and Pecan Pie Cookies; the combination of nutty pecans and sweet filling is simply irresistible!
A Final Note
Don’t be afraid to experiment and have fun! Baking is all about creativity and personal expression. So, go ahead, add your own special touch to these Chocolate Thumbprint Cookies and make them your own. And remember, even if they don’t turn out perfectly, they’ll still be delicious!
What are some filling options for Chocolate Thumbprint Cookies?
Popular filling options include chocolate ganache, peanut butter cups, raspberry jam, salted caramel, chocolate kisses, Nutella, and cream cheese frosting. The article suggests being creative and using your favorite fillings.
What is the key to preventing Chocolate Thumbprint Cookies from spreading too much while baking?
Chilling the dough for at least 30 minutes before baking helps prevent the cookies from spreading too much in the oven. It also makes the dough easier to handle.
What type of cocoa powder is recommended for a darker, more intense chocolate flavor?
Dutch-processed cocoa powder is recommended for a darker, more intense chocolate flavor. Natural cocoa powder will provide a slightly brighter flavor.
How long can I store Chocolate Thumbprint Cookies?
You can store Chocolate Thumbprint Cookies in an airtight container at room temperature for up to 3 days. They can also be frozen for up to 2 months.
Chocolate Thumbprint Cookies
Ingredients
Equipment
Method
- Cream together the softened butter, granulated sugar, and brown sugar in a large bowl until light and fluffy (3-5 minutes).
- Beat in the egg and vanilla extract until well combined. Scrape down the sides of the bowl.
- In a separate bowl, whisk together the flour, cocoa powder, baking soda, and salt.
- Gradually add the dry ingredients to the wet ingredients, mixing on low speed until just combined. Be careful not to overmix.
- Wrap the dough in plastic wrap and chill it in the refrigerator for at least 30 minutes.
- Preheat your oven to 350°F (175°C). Line a baking sheet with parchment paper.
- Roll the dough into 1-inch balls. Place the balls on the prepared baking sheet, leaving about 2 inches between each cookie.
- Use your thumb (or the back of a small spoon) to make an indentation in the center of each cookie. Be careful not to press all the way through the cookie.
- Bake for 8-10 minutes, or until the edges are set and the centers are slightly soft.
- Remove the cookies from the oven and immediately fill the indentations with your desired filling.
- Let the cookies cool completely on the baking sheet before transferring them to a wire rack.
- Store in an airtight container at room temperature for up to 3 days.
